

Ordering a virtual server on F3 Cloud
1. Log in to the control panel
To log in to the billing panel, follow these steps:
- Go to the login page.
- Enter your credentials.
- If you do not have an account yet, complete the simple registration.
.png)
Login window
2. Navigating the main page
After logging in successfully, you will be redirected to the main page of the billing panel, where the following information will be displayed:
In the Client section – configure your account settings.
In the Products/Services section – order and manage your servers.
In the Finance section – track balance top-ups and expenses.
In the Support section – manage all requests to the support team.
In the Tools tab – add users and payers.
In the Statistics section – view the access log of your account.
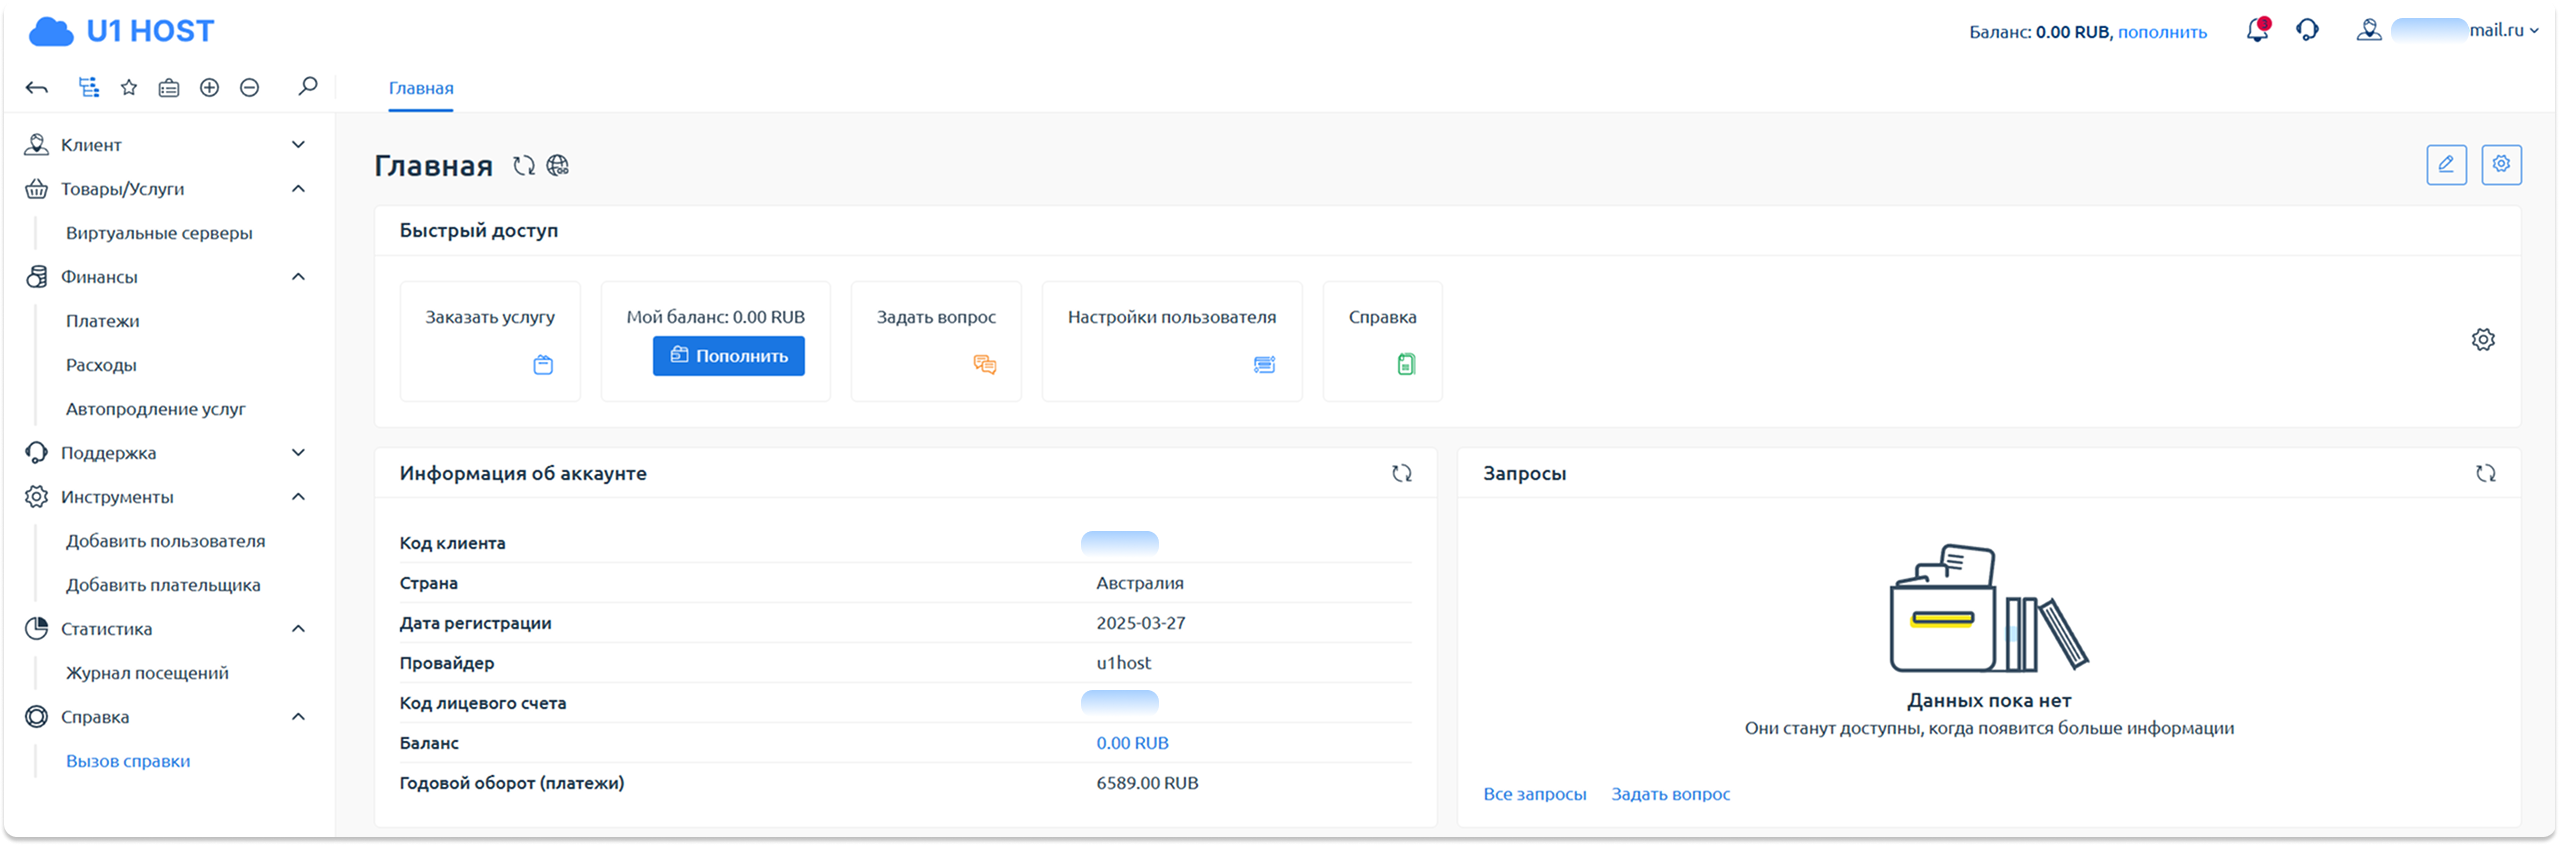
F3 Cloud BillManager main page
3. Choose a plan
In the “Order service” tab, we recommend clicking “View all” to open the full list of available plans.
This will help simplify the choice and let you compare all offers on one page.
.png)
The Order service tab
Next, filters will become available to you; let's start with choosing a data centre. Three locations are available in this filter: the Netherlands, Germany and Finland.
Choosing a location will let you ensure optimal connection speed and stability for your tasks.
.png)
Choosing a data centre
The next filter – the payment period. You can choose a suitable option: a day, a month, 3 months, half a year or a year.
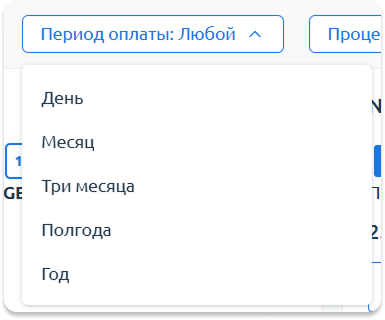
Choosing the payment period
INFO
Please note: when you choose a period of 3 months or more, you automatically get discounts that increase in proportion to the rental duration. This is a great way to save money on long-term use of a server.
Next comes the “Processor” filter, which you can use to sort plans by model.
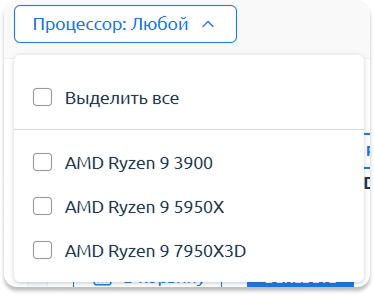
Choosing the processor type
This filter lets you choose a server with the level of performance you need – from balanced solutions to the most modern and powerful configurations.
4. Place your order
After choosing a plan, we move on to the next step – configuring what will be installed on the server.
You can choose:
- the operating system (OS);
- preinstalled software (if needed);
- additional services (if needed).
WARNING
The list of available OS includes: Windows, Ubuntu, Debian, CentOS, AlmaLinux, FreeBSD, Oracle Linux 8, Astra Linux and others.
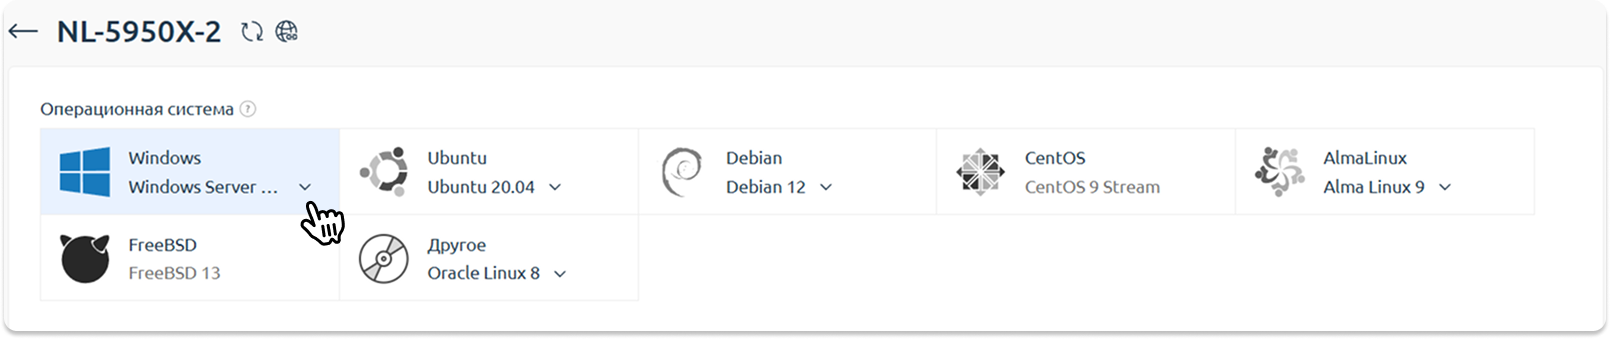
Choosing the operating system
Thanks to this choice, it is easy to find a suitable configuration for any task – from standard hosting to specialised corporate solutions.
Choosing preinstalled software
At this stage, you can install additional software right before the server is created.
For example, for Ubuntu and Debian there are solutions such as Mazban, WireGuard Easy (WG Easy), OpenVPN, WireGuardVPN, ISPmanager, Docker, Nginx.
This is convenient – you get a ready-made working environment straight away, without having to install and configure the software you need manually.
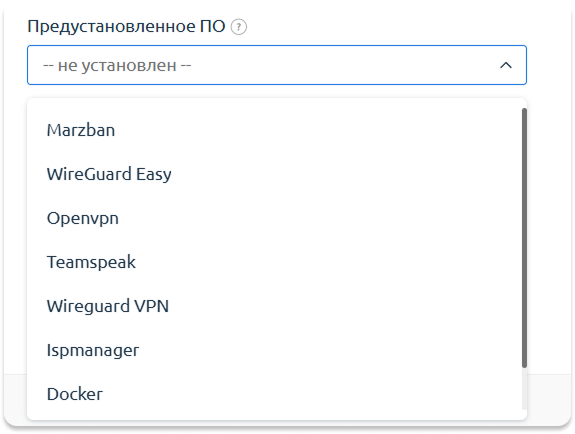
Choosing preinstalled software
Additional parameters
Next, we need to choose the number of IPv4 addresses (in units) and specify how many services you want to order.
These parameters let you fine-tune the server for any task – be it a single instance for personal use or several at once for large-scale tasks.
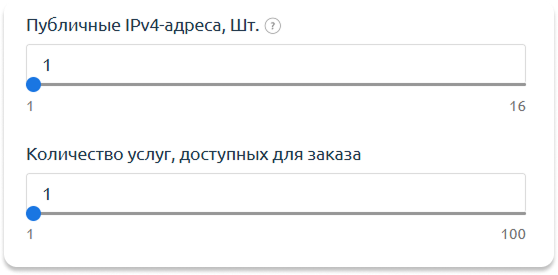
Choosing additional parameters
Final stage of placing the order
At the final stage, all that remains is to choose the payment period – from one day to a year, depending on your preferences.
You can also enable or disable auto-renewal of the service. If the option is active, the server will be renewed automatically when there are funds in the account, which is convenient for continuous operation without the risk of disconnection.
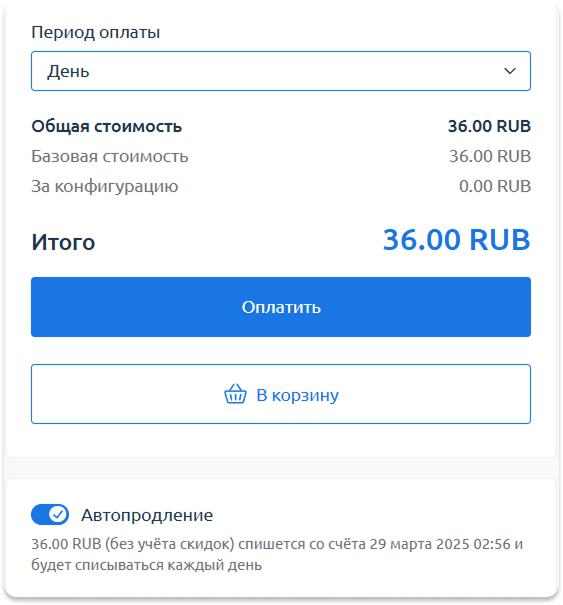
Final stage of placing the order
5. Payment process
At this step, you need to choose a convenient payment method from the available options:
Personal account (payment from your account balance)
Faster Payments System (SBP)
Bank card (Russian cards, "Mir" cards)
Payment in cryptocurrency via Heleket
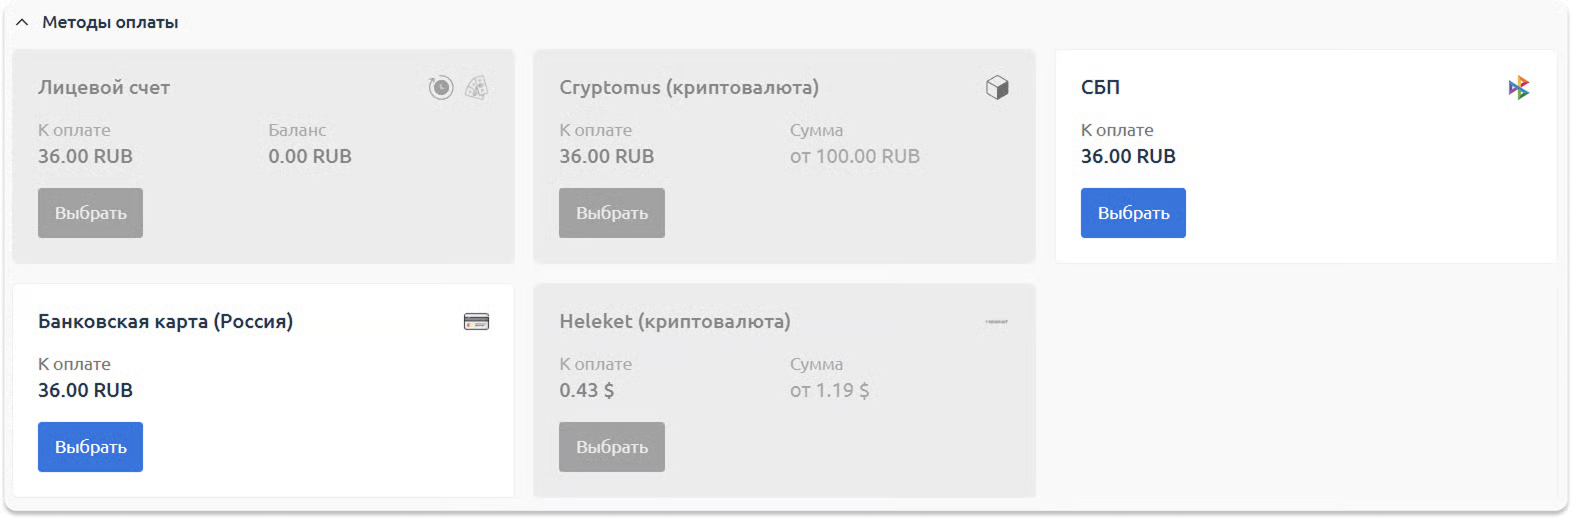
Payment methods
6. Server activation
After payment, automatic processing of the order begins. As a rule, the activation process takes no more than 120 seconds.
You can track the current status in the control panel. As soon as the server is ready for use, the status will change to “Active”.

Server status "processing"

Server status "active"
7. Where to find the server access details
After the server is activated, the login details will be available in two ways:
- Sent to your email specified during registration.
- Available in the control panel, in the “Instructions” tab.
The screenshot below shows exactly where you can find this information.
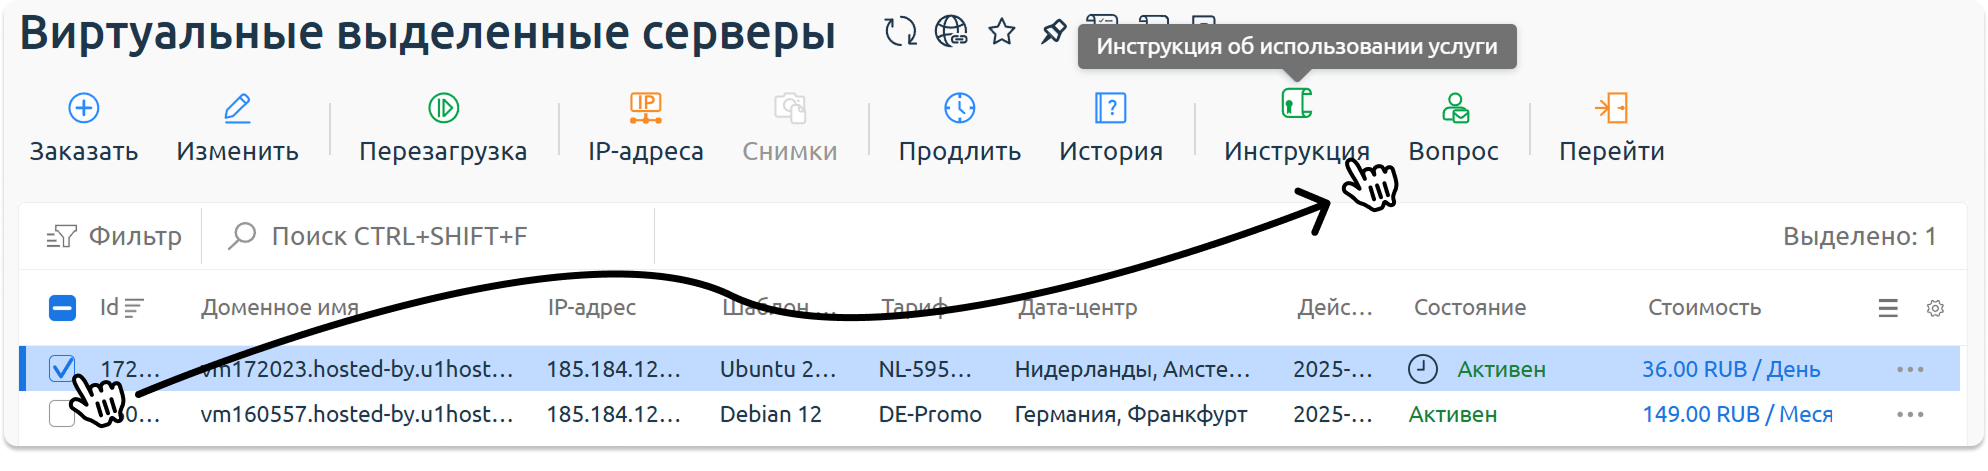
Instructions with the server details
8. Your server has been successfully activated and is ready to use.
Now you can connect to the server, install the software you need and start working on your projects.
Our resources
Telegram channel: https://t.me/
Our hosting: https://f3cloud.com