

Amnezia – a personal VPN on a server without the command line
What is Amnezia?
Amnezia – a free open-source app for running a personal VPN server on your own VPS.
This program lets you automatically install and configure a VPN without using the terminal or commands.
It is also worth noting that Amnezia runs on Android, iOS, Windows, macOS and other platforms, supports popular protocols and provides convenient management through a graphical interface.
Advantages and why Amnezia
- Quick start: setting up your own VPN takes no more than 2 minutes – most of that time is spent waiting for the automatic installation.
- Convenient management: all the settings for configuring the VPN, as well as for giving access to friends and colleagues, are available in one app – most actions take 2–3 clicks.
- Flexible options: the app supports several VPN protocols and traffic masking modes, including AmneziaWG, WireGuard, OpenVPN, IKEv2/IPsec, Shadowsocks, OpenVPN with Cloak, and also XRay (VLESS/Reality).
Video guide to setting up Amnezia
WARNING
Please note: this video is hosted on YouTube and may be unavailable in some regions, including Russia.
If the video is unavailable, full written setup instructions are provided below.
Step 1. Buying a server to set up the VPN
To set up a personal VPN with Amnezia, you need a server. We recommend using our F3 Cloud servers – they are fully compatible and ensure stable VPN operation.
For high-speed internet and maximum data transfer speed, it is better to choose the 5950X-1 and 7950X3D-1 plans – they are designed for a channel of up to 1 Gbit/s and give a noticeable bandwidth margin. This is especially important if you plan to: connect several users at the same time, actively download/share large files, often work with remote working environments, or want the speed not to “hit a ceiling” on the server at peak loads. You should also keep in mind that a VPN adds encryption and encapsulation overhead, so the real usable speed is usually lower than the port speed – the headroom of a gigabit plan helps keep things comfortable.
If you need a VPN for everyday tasks (messengers, websites, routine work, video calls, moderate streaming), a basic plan with speeds of up to 100 Mbit/s is usually enough – its price starts from 149 ₽/month. For reference: video conferences usually fit within tens of Mbit/s, and 4K video, depending on the service and codec, needs around 15–40 Mbit/s per stream, so even with a margin this fits comfortably into 100 Mbit/s with 1–4 active users.
Step 2. Choosing the server configuration
After logging in or registering in the F3 Cloud panel, click the Order service button to go to server selection.
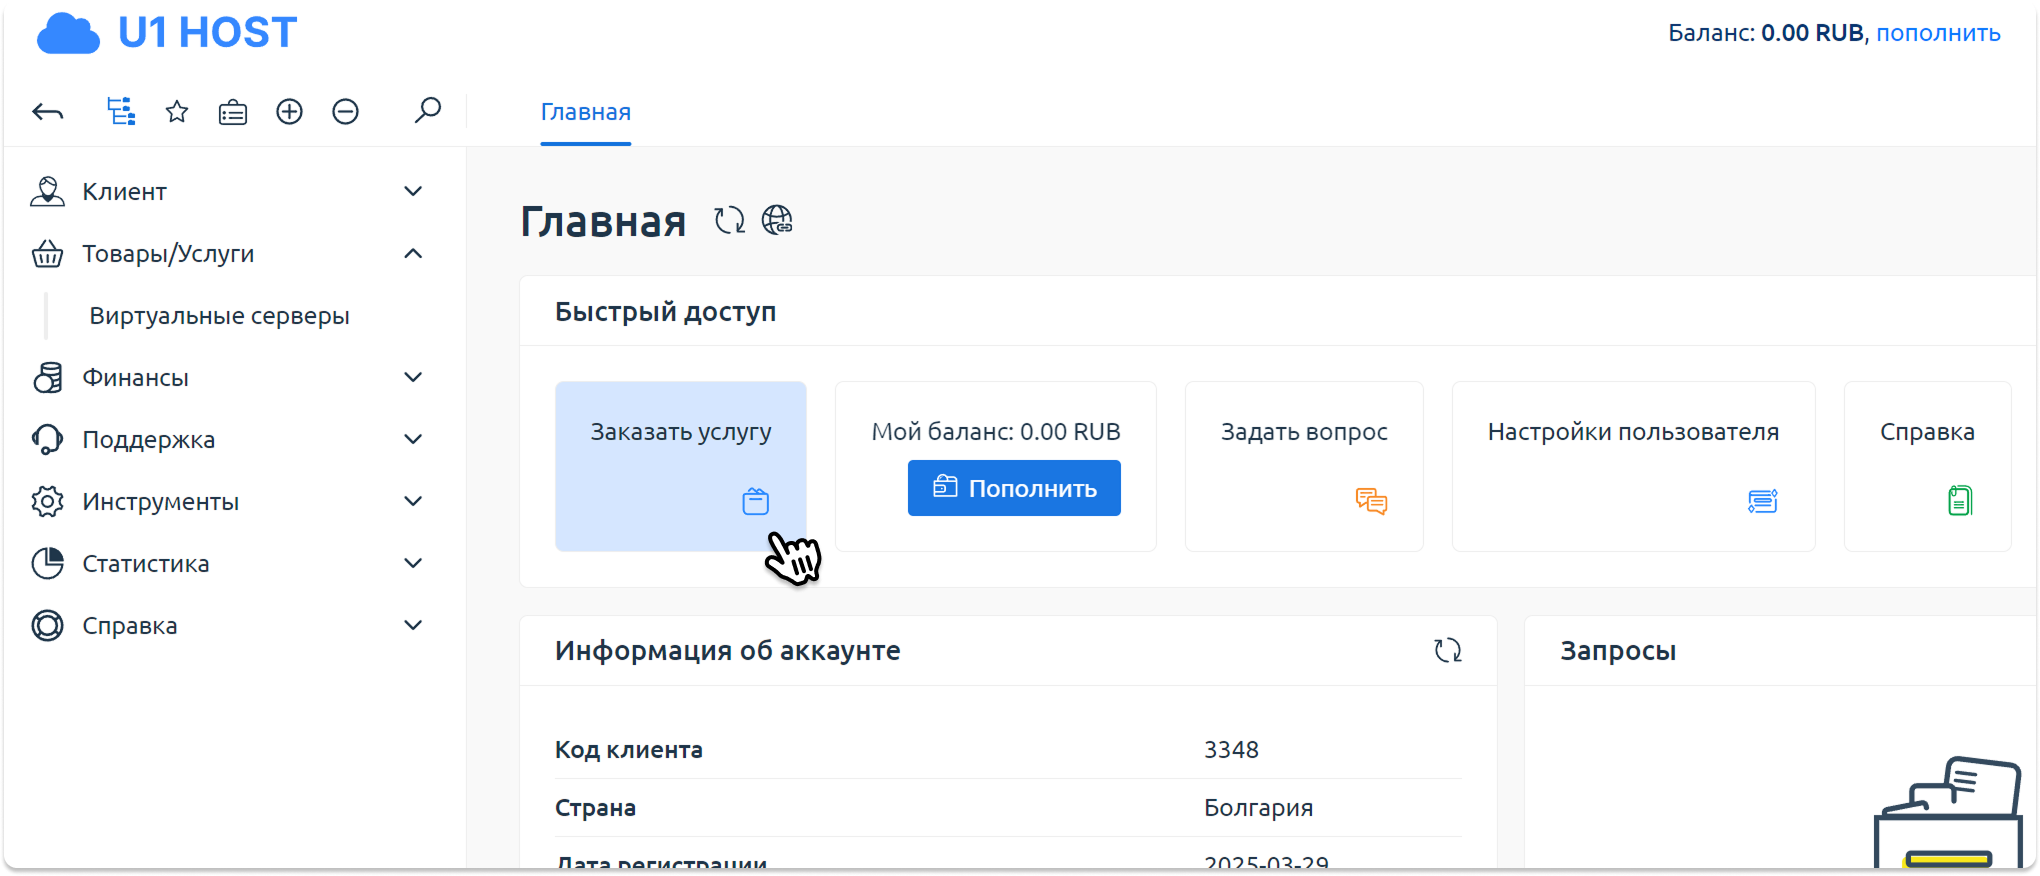
Going to the service order menu
The Order service menu shows the main plans suitable for speeds of up to 100 Mbit per second. To see the full list, click View all.
How to choose a server:
- On the NL-Promo, DE-Promo or FI-Promo card, click the Order button.
- In the server configuration, select the Debian 11 or Debian 12 operating system – there is no difference between them.
- Click the Pay button to complete the order.
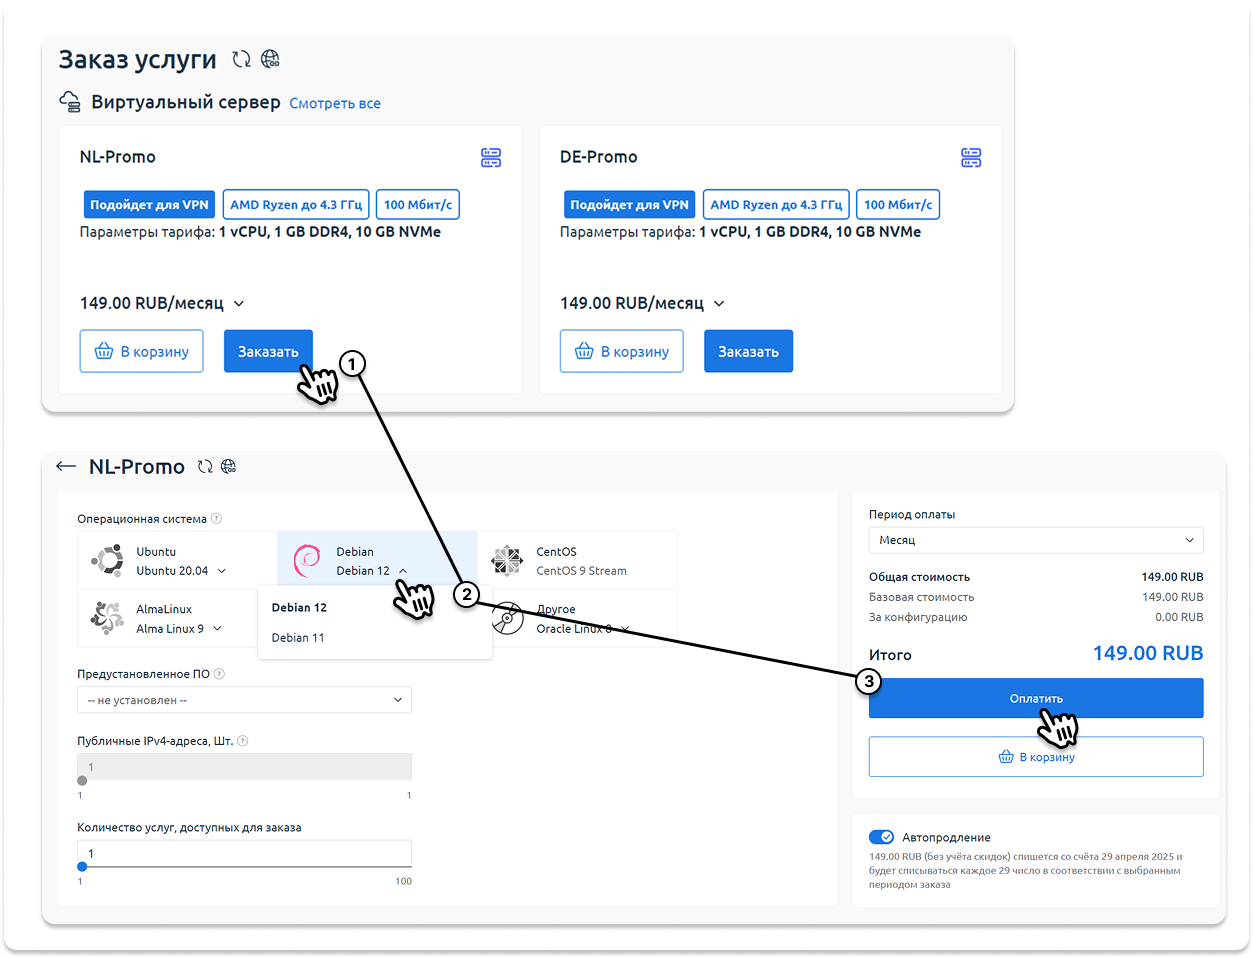
Step 3. Server activation
After payment, automatic order processing begins. Server activation usually takes no more than 120 seconds.

Server status "processing"
You can track the current status in the control panel. As soon as the server is ready to use, the status will change to Active.
INFO
Sometimes activation may take a little longer due to increased load and a queue for order processing in the selected location. If the server has not been activated within 10 minutes – please write to us in a ticket, and we will promptly check the order status.

Server status "active"
Step 4. Getting the server details
- Wait until the server is fully activated.
- In the client area, tick the checkbox next to the server you need and click the Instructions button in the top menu.
- Copy the connection details given in the instructions:
- Server IP address
- Username
- Password
The screenshot below shows exactly where you can find this information.
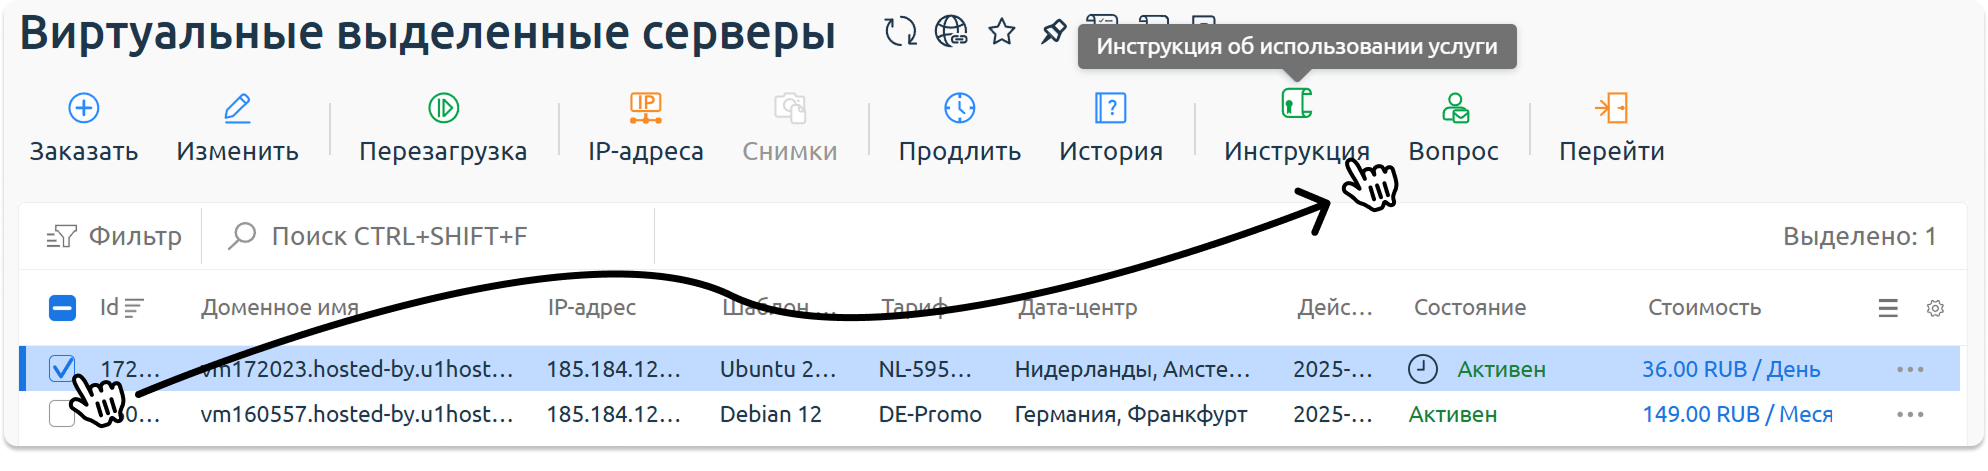
Instructions with the server details
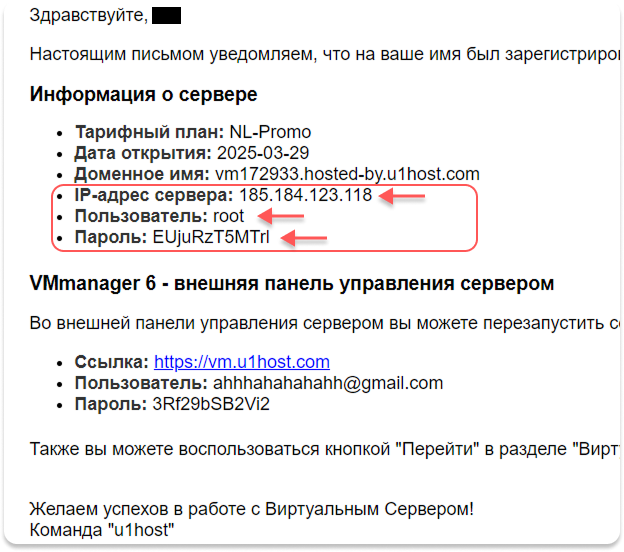
The server details you need
Step 5. Downloading and setting up Amnezia
Download site: AmneziaWG
Download mirror (if the site does not work):
1. https://storage.googleapis.com/kldscp/amnezia.org
2. The official Amnezia GitHub repository, where updates are published: https://github.com/amnezia-vpn/amnezia-client
Basic setup:
- Install Amnezia on your PC.
- Launch the app and click Let’s Get Started.
- Select Self-hosted VPN .
- Enter the details you copied earlier:
- IP address
- Username
- Password
- When choosing the protection level, select High.
- Wait for the setup to finish – the VPN will be ready to use.
DANGER
If you are faced with a choice of protocol, let us explain a little. Previously there was the AmneziaWG protocol (an improved WireGuard), but in some or most regions they have learned to counter it with TSPU equipment, which is why using it may be obsolete. Later Amnezia added another protocol called xRay. We advise choosing that one.
.png)
AmneziaWG download page
.png)
Main screen of the app
.png)
Selecting Self-hosted VPN
.png)
Data entry form
.png)
Choosing the High protection level
.png)
Setup completed successfully
Step 6. Connecting and sharing access
- Connect to the VPN through the Amnezia app on your PC or another device.
- To give access to other devices or to friends and relatives, click the 2nd (second) button in the bottom menu of the app.
- Enter a name for the configuration and select Amnezia native format as the format.
- A QR code for connecting will then appear. Scan it on another device with the Amnezia app installed.
.png)
VPN connection window
.png)
Adding a new profile
.png)
QR code for connecting
Apps for mobile devices
- iPhone, MacOS: AmneziaWG is available on the App Store.
- Android: AmneziaWG is available on Google Play.
Install the app, add a tunnel, scan the QR code and turn on the VPN.
.png)
Completing the setup
Your own VPN server is now successfully set up and ready to use. It provides high speed, stability and improved security compared with public VPN services.
Don't forget to set a strong and long password for accessing the server to protect it from unauthorised connections.
Our resources
Telegram channel: https://t.me/
Official website: https://f3cloud.com