

Installing and configuring Marzban on a server
Advantages of Marzban
Marzban – a modern open-source VPN panel focused on supporting several powerful protocols. It suits both beginners and experienced administrators thanks to the following advantages:
- Automated installation and configuration – a minimum of manual steps.
- Support for many protocols – works “out of the box”.
- Convenient web interface – management without the need to work in the terminal.
- Multi-accounts, statistics, logging – control over traffic and expiry dates.
- Support for Debian, Ubuntu and other popular distributions – deployment flexibility.
Supported VPN protocols
| Protocol name | Features of this protocol |
|---|---|
| VLESS | High resistance to blocking, no headers, used in V2Ray |
| VMESS | The older V2Ray protocol, easy to configure, compatible with most clients |
| Trojan | Based on TLS, disguised as HTTPS traffic, hard to detect |
| Shadowsocks | A lightweight proxy protocol with encryption, simple to set up |
System requirements and preparation
For a server with Marzban to work correctly, a VPS with the following specifications is recommended:
| Parameter | Minimum requirements |
|---|---|
| vCPU (virtual core) | 1 core |
| RAM (memory) | 1-2 GB |
| Disk | 10-20 GB |
| Operating system (OS) | Debian 11 or Debian 12 |
| Internet speed | from 100 Mbit/s to 10 Gbit/s |
Choosing and renting a VPS at F3 Cloud
INFO
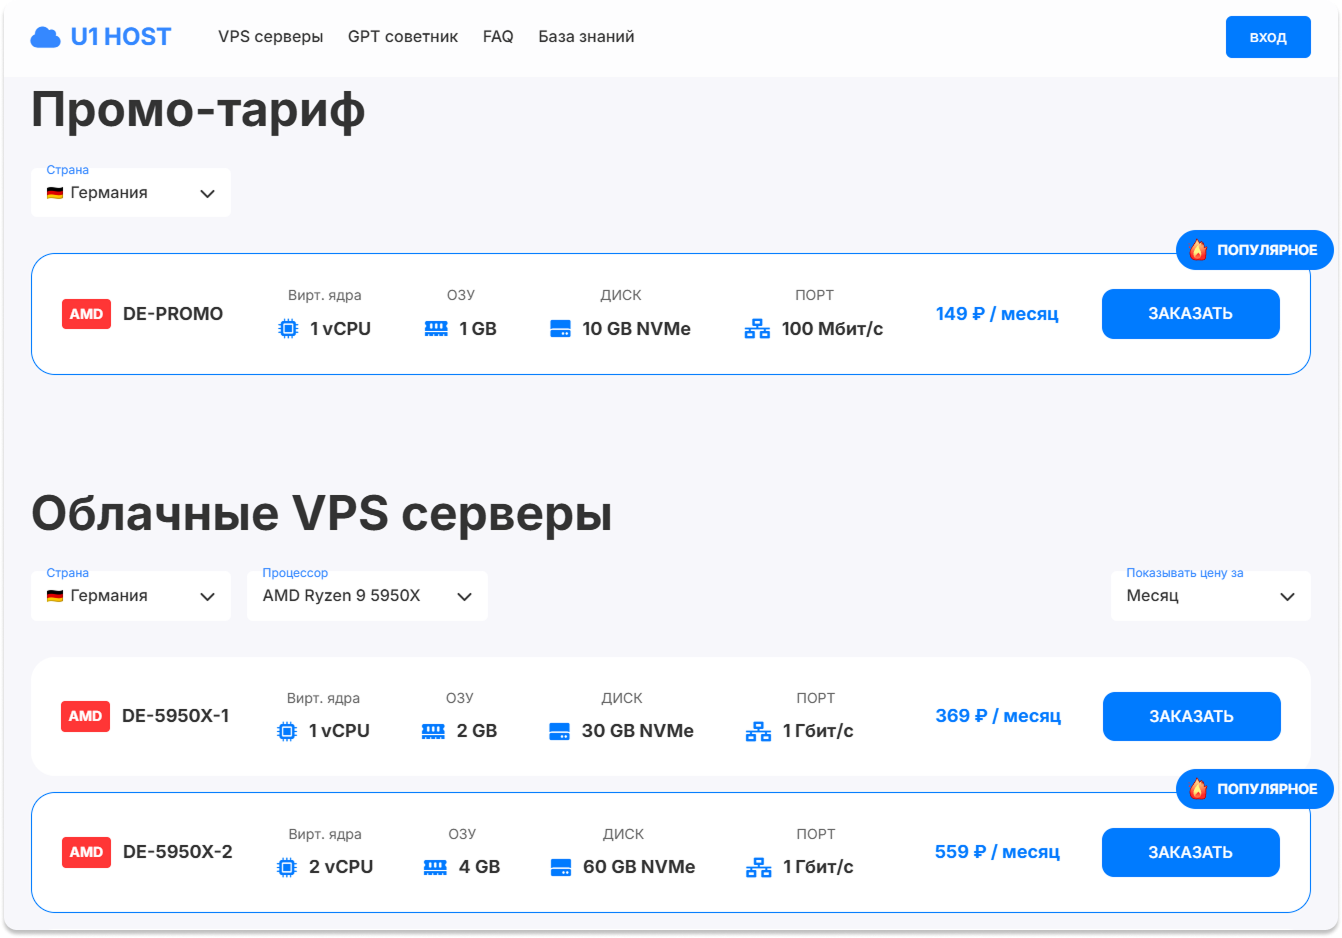
Our F3 Cloud hosting provides servers for rent in European data centres.
The following locations are currently available:
• Germany (DE-Promo)
• The Netherlands (NL-Promo)
• Finland (FI-Promo)
WARNING
Recommended plan:
To install the panel, use a VPS with the specifications given in the section
“System requirements and preparation for installation”.
If you expect a high load or need a bandwidth of 1 Gbit/s or more, we recommend choosing more powerful configurations – for example, 5950X-1 or 7950X3D-1.
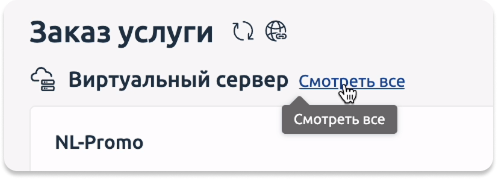
Register at f3cloud.com and click the “Order service” button. The detailed process is shown in the screenshot below.
.png)
INFO
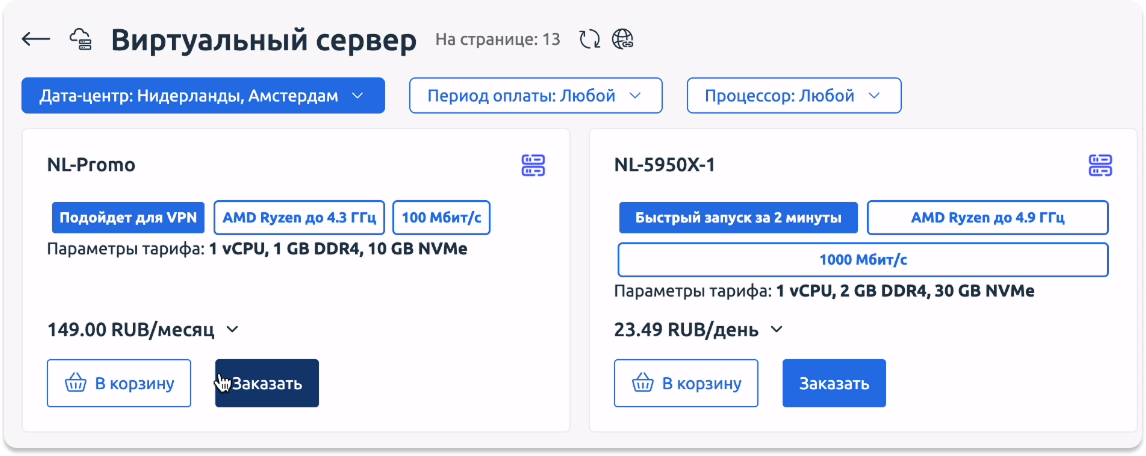
Earlier we identified a suitable plan based on the internet speed you need.
Now we choose one of the basic options – NL-Promo (the Netherlands), DE-Promo (Germany) or FI-Promo (Finland).
These plans are optimal for speeds of up to 100 Mbit/s and meet the minimum requirements described earlier.
Configuring the server in the client area
After choosing a plan and region, configure the server in the client area:
- Select the “Debian” operating system, version 11 or 12.
- In the pre-installed software section, select “Marzban”.
- Set the payment period and enable auto-renewal if needed.
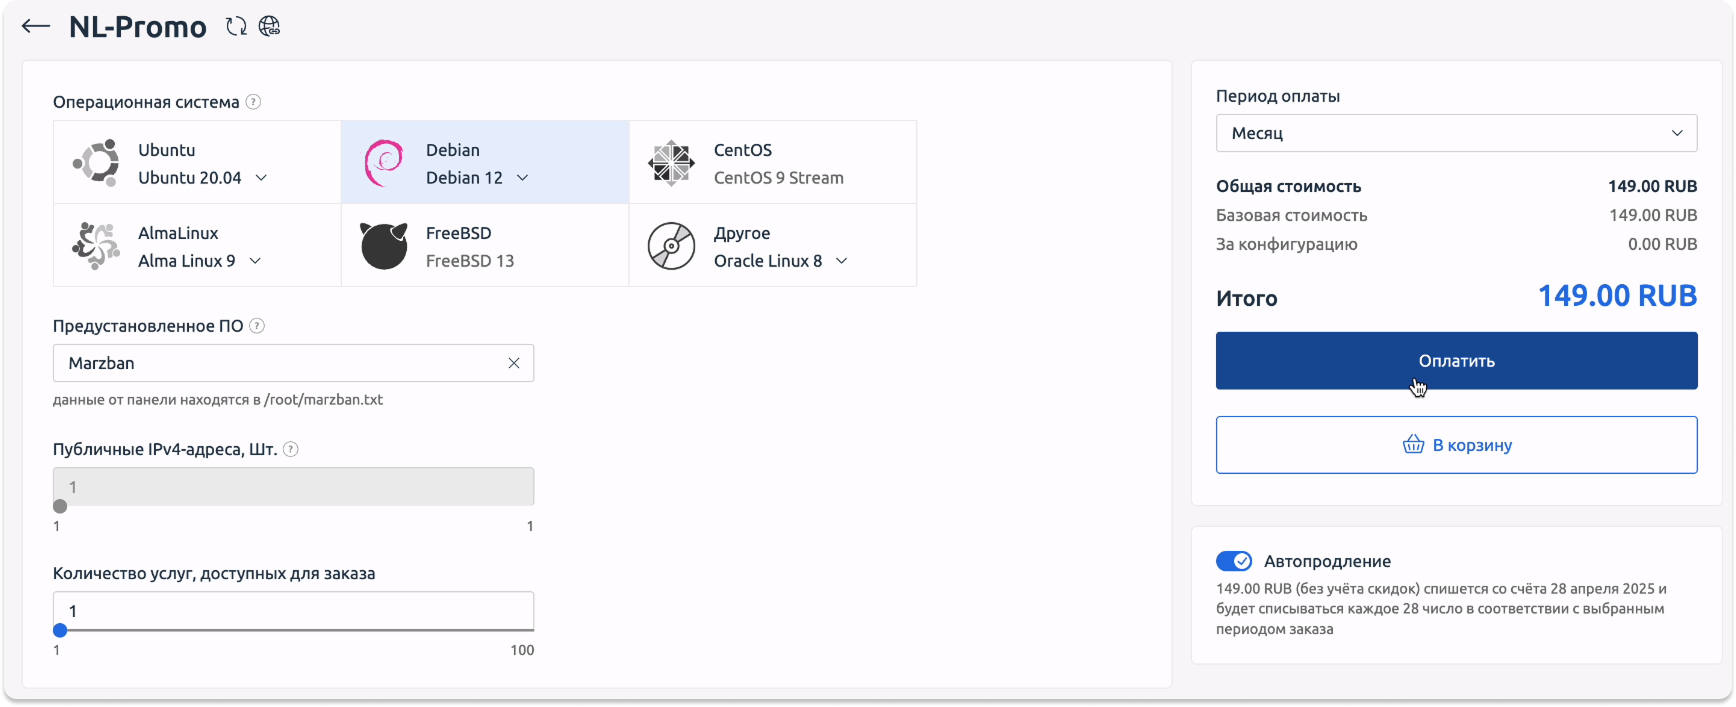
Once the order is placed, you need to pay for it. The following methods are supported:
- Bank cards (including "Mir")
- Heleket (cryptocurrency)
- Faster Payments System (SBP)
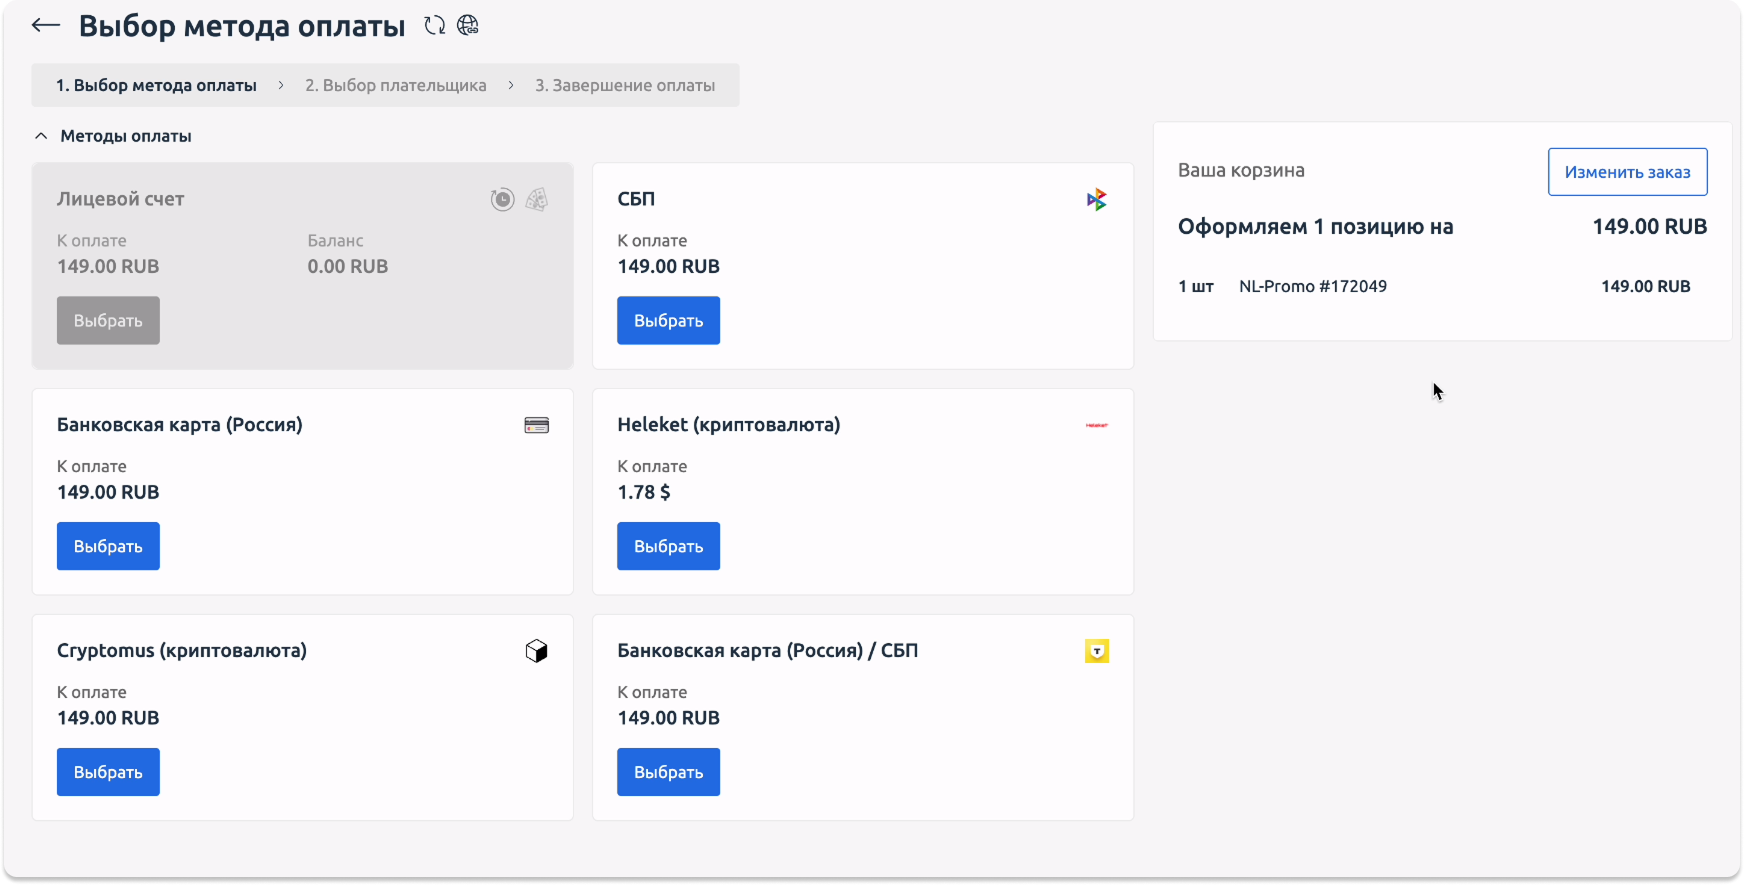
After payment, wait 3–4 minutes – during this time the server will be activated and “Marzban” will be automatically installed and configured.

Automatic installation of Marzban
One of the advantages of using Marzban via F3 Cloud – automatic installation. There is no need to manually download or configure components. After the server is activated, follow these steps:
- In the control panel, open the Servers section.
- Tick the checkbox next to the server you need.
- In the top menu, select Instructions.
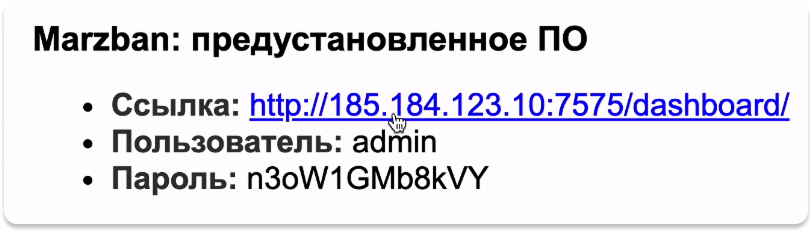
A window will then open with the access details for Marzban:
- the server IP address;
- the administrator login and password;
- a link for logging in to the Marzban control panel.

Access and authorisation in the Marzban panel
Follow the link given in the instructions and enter the login and password.
.png)
The panel interface is intuitive: you can create users, assign configurations to them, view statistics, configure TLS, restart services.
.png)
Creating a VPN configuration
- Go to the Users section.
- Click Create new user.
- Select the protocol you need (for example, VLESS).
- The other protocols can be disabled.
- Enter a username.
- Click Save – the system will generate the configuration.
The resulting config can be:
- copied as a link (URL);
- saved as a QR code;
- exported in JSON format.
.png)
.png)
Great, now we have a config, and it needs to be added to an app.
Client apps
There are plenty of VPN apps for working with this VPN, so let's take a look at them.
1. V2rayTun
V2rayTun
INFO
Platforms: Android, iOS, MacOS, Windows, AndroidTV
Protocols: V2Ray (VMess, VLESS, Shadowsocks)
2. Happ

Happ
INFO
Platforms: Android, iOS, MacOS, Windows, Linux
Protocols: V2Ray
3. Hiddify

Hiddify
INFO
Platforms: Android, iOS, Mac OS, Windows, Linux
Protocols: V2Ray (VMess, VLESS, Shadowsocks)
4. NekoRay

NekoRay
5. V2RayN

V2RayN
6. V2Box
.png)
V2Box
INFO
Platforms: Android, iOS, MacOS
Supported protocols: VMess, VLESS and Shadowsocks.
Installation: Android, iOS, MacOS, Windows, Linux
7. Streisand

Streisand
INFO
Supported protocols: VMess, VLESS and Shadowsocks.
Installation: Android, iOS, MacOS, Windows, Linux
Importing the configuration into the app
- Copy the generated config from the Marzban panel
- Open the Hiddify app
- Click Import configuration
- Paste the link or scan the QR code
- Connect with a single click
The VPN connection will be active right away, with no additional steps.
.png)
.png)
.png)
Our resources
Telegram channel: https://t.me/
F3 Cloud: https://f3cloud.com