
You changed a record at your registrar, but the site still opens from the old server. Mail to your domain does not arrive, or a service asks you to verify the domain with a TXT record and insists it cannot see it. In all of these cases you need to ask DNS directly what it is answering right now. There are two commands for this, nslookup and dig. In this article we look at how they differ and learn to view records of different types, query a specific DNS server and walk the whole chain from the root servers to the answer. All examples were run on a test server with Debian 12.
Why DNS answers can differ
When you ask DNS for a domain's address, the answer almost never comes directly from the server that is responsible for that domain. Your computer contacts its resolver, for example your provider's server or the public 1.1.1.1, and the resolver either returns an answer from its memory or walks the chain. First it asks a root server, which points it to the servers of the zone, for example .com, and they in turn point it to the domain's own NS servers, where the records are actually stored. This chain is covered in detail in the article about pointing a domain to a VPS.
It follows from this design that different resolvers can give different answers at the same moment. One has already received the new record, while another is still returning the old one from its memory until the record's storage time, the TTL, runs out. That is why, when checking, it is useful to compare the answers of several resolvers and, if you need to be completely sure, to ask the domain's NS server directly. Both commands can do this, and dig can also walk the whole chain by itself and show which server answered what.
The difference between the commands is mostly a matter of convenience. nslookup is available almost everywhere, including Windows, and prints the answer in a simple form. dig comes with Linux and macOS, shows the answer in more detail, with the TTL and service fields, and is handier for scripts. On Debian and Ubuntu both commands are installed with a single package.
apt install -y dnsutils1. Find out a domain's IP address
# Detailed dig answer, only the answer section
dig example.com +noall +answer

# Only the addresses, nothing extra
dig example.com +short

# The same with nslookup, works in Windows too
nslookup example.com
The number in the second column of the dig answer is the remaining TTL in seconds, that is, how much longer the resolver will remember this answer. IPv6 addresses are checked the same way with the AAAA type, for example dig example.com AAAA +short.
2. View records of other types
The record type goes after the domain name in dig or into the -type= parameter in nslookup.
# Mail servers of the domain, the number before the name is the priority
dig gmail.com MX +short

# TXT records, this is where SPF and service verification codes are kept
dig example.com TXT +short

# NS servers that serve the domain
dig example.com NS +short

# Reverse PTR record, which domain an IP address has
dig -x 1.1.1.1 +short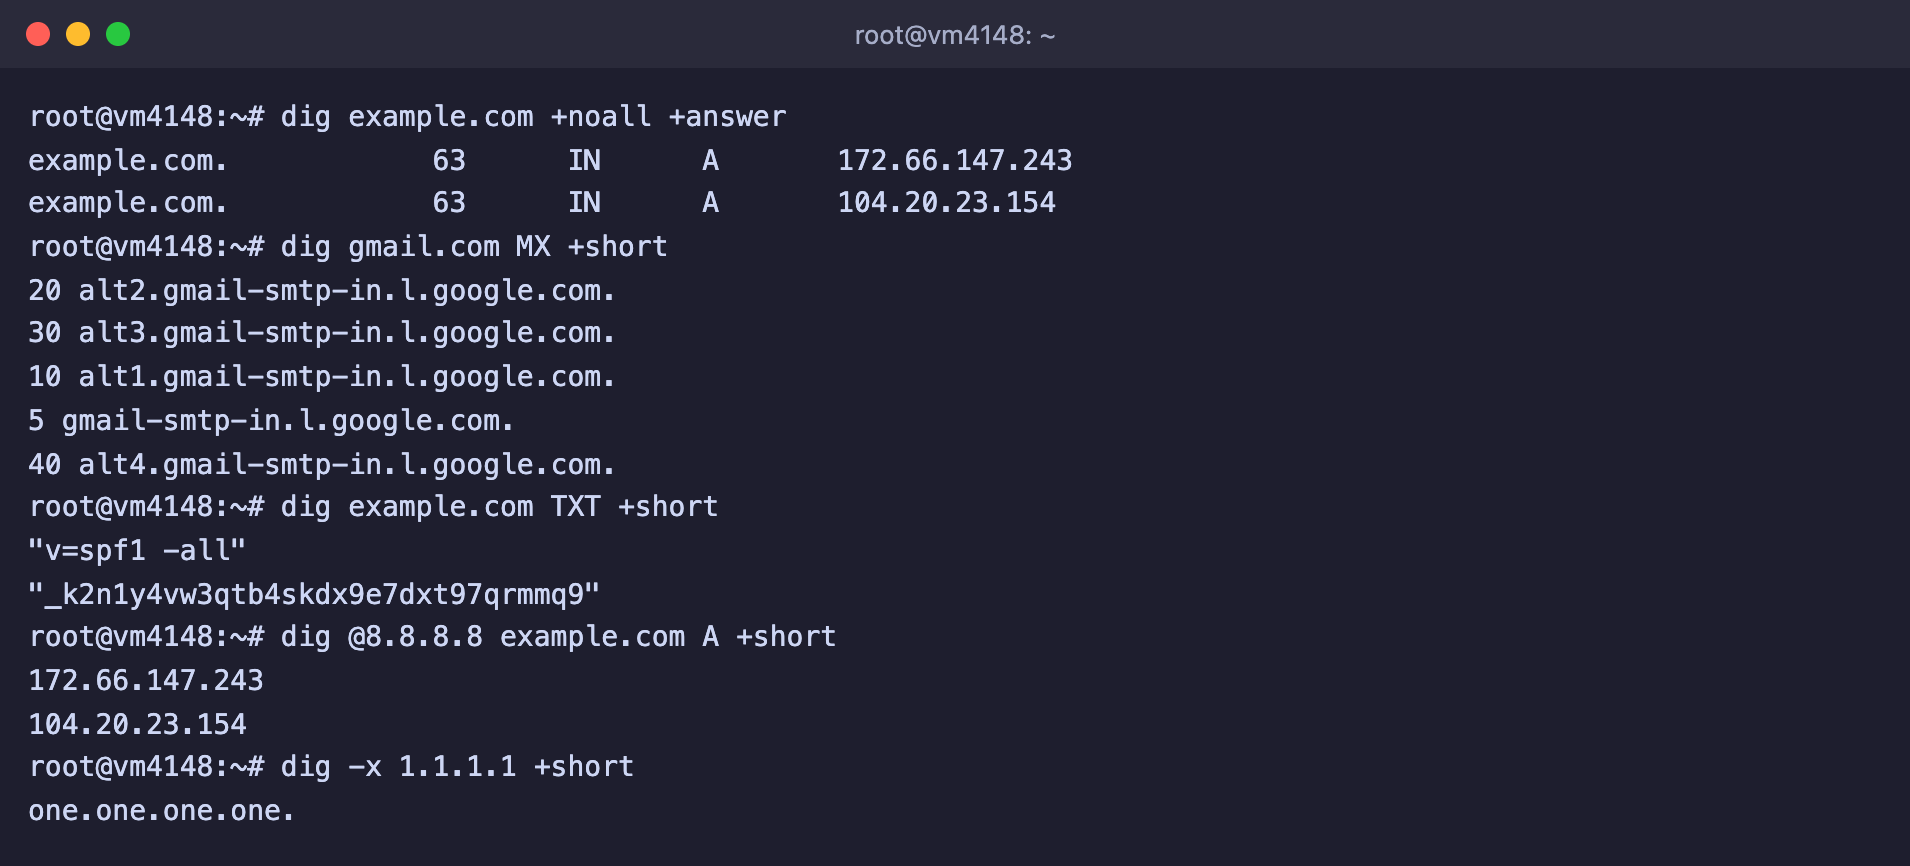
Records of different types in one window
In nslookup the same queries look like this.
nslookup -type=mx gmail.com
nslookup -type=txt example.com
nslookup -type=ns example.com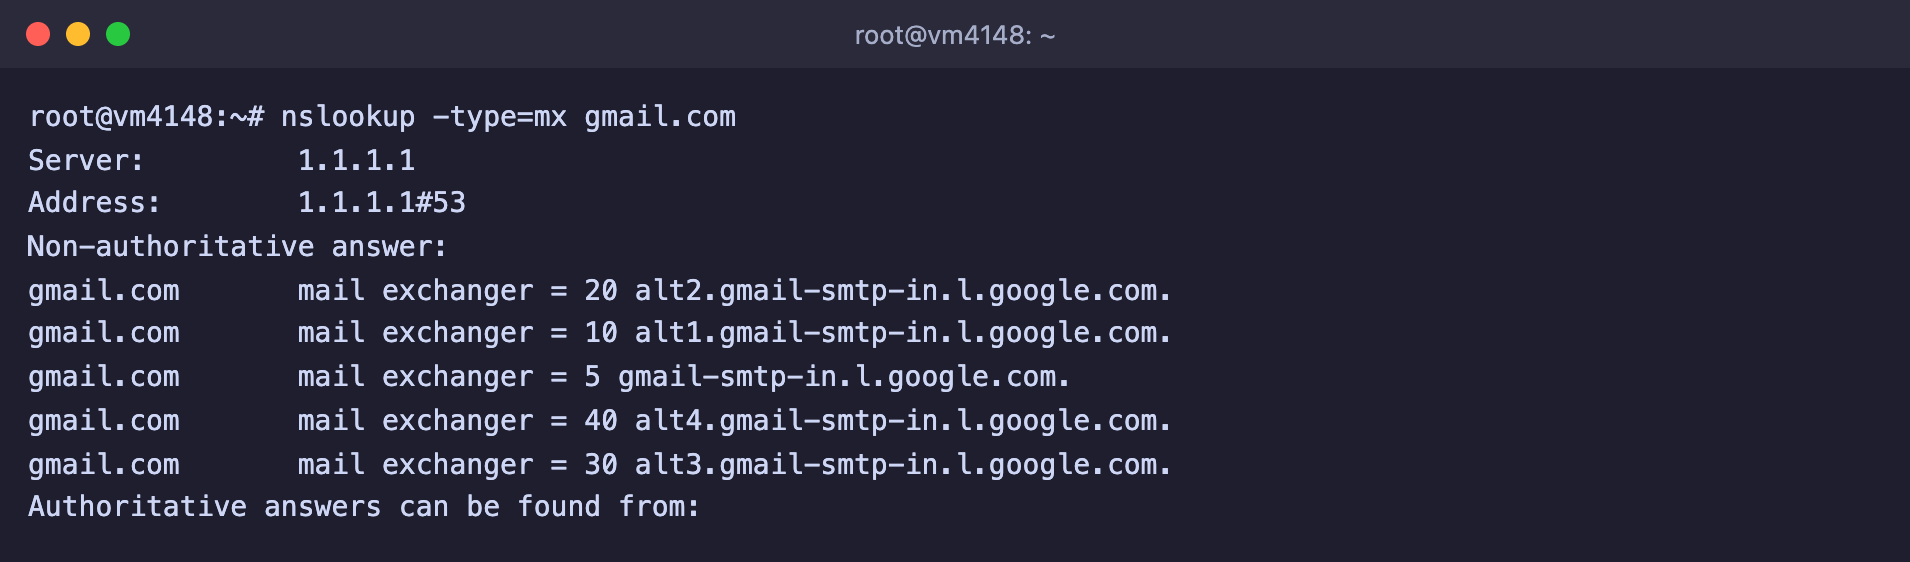
nslookup shows the same MX records in a different form
3. Query a specific DNS server
To find out what a particular resolver or the domain's own NS server answers, put it after @ in dig or as the last parameter in nslookup.
# Google and Cloudflare public resolvers
dig @8.8.8.8 example.com +short
dig @1.1.1.1 example.com +short

# The domain's own NS server, an answer without cache
dig @elliott.ns.cloudflare.com example.com +short

# The same with nslookup
nslookup example.com 8.8.8.8
If the domain's NS server already returns the new record but the public resolvers do not yet, you did everything right, and all that is left is to wait until the TTL of the old answer runs out.
4. Walk the whole chain with dig +trace
The +trace parameter makes dig skip the resolver and walk the path by itself, starting from the root servers. This way you can see who is responsible for the domain at each step.
dig +trace example.comThe full output is long, so for the screenshot we kept only the lines with the steps and the records found.
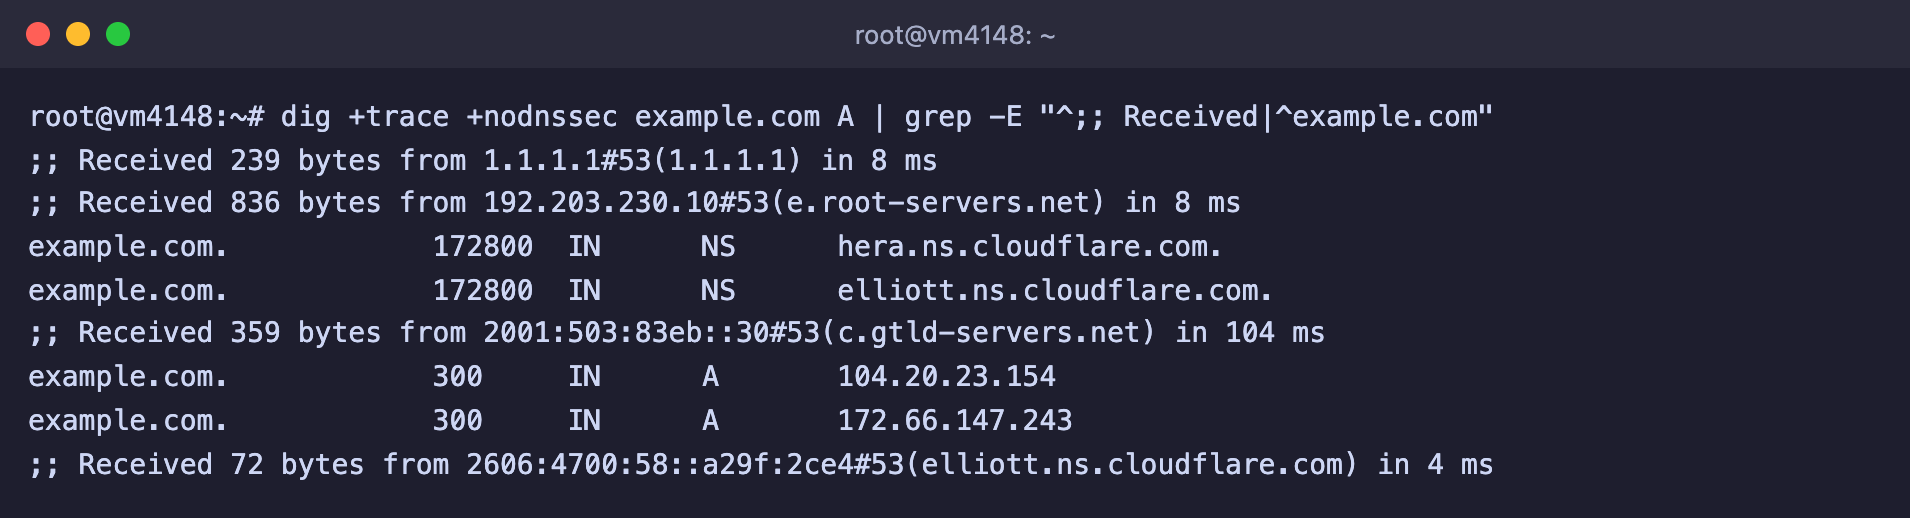
A root server, a .com zone server and the domain's NS server in turn
The Received … from lines show which server answered at each step. Here the root server e.root-servers.net referred the query to the .com zone servers, the c.gtld-servers.net server reported that the domain is served by Cloudflare, and the NS server elliott.ns.cloudflare.com returned the addresses. If the chain breaks, you can see at which step. For example, this happens if the registrar lists NS servers that know nothing about the domain.
Frequently asked questions
dig: command not found
The command is part of the dnsutils package. Install it with apt install -y dnsutils. In our Debian 12 image this package is already installed.
The answer shows status: NXDOMAIN
There is no such name in DNS. Check the spelling of the domain and make sure the record was created for the right name, for example separately for www. If the domain has just been registered, check its NS servers with dig example.com NS +short.
The answer is empty, but there is no error
The domain exists, but it has no record of the requested type. For example, the domain has an A record but no MX record. Check that the record was created with the right type.
A new record is visible on one resolver but not on another
The second resolver is still keeping the old answer. Look at the TTL in the output of dig +noall +answer, it is the time in seconds until the update. You can clear the DNS cache on your own computer. In Windows this is done with the ipconfig /flushdns command.
Our resources
Telegram channel: https://t.me/f3cloud_news
F3 Cloud: https://f3cloud.com