
OpenClaw, formerly called ClawdBot, is an AI agent that lives on your server and talks to you through Telegram or another messenger. Unlike an ordinary chat with an AI model, it works around the clock, remembers past conversations and can carry out actions on the server by itself, for example run scripts or put together summaries for you. In this article we will install OpenClaw on a VPS and connect an AI model, Telegram and the control panel. We repeated every step on a test server with Debian 12, and the OpenClaw version at the time of testing was 2026.10.5.
How OpenClaw works
To understand what exactly we are installing, it helps to split OpenClaw into three parts. As a rule, the AI model itself does not run on the server. OpenClaw reaches it through an API, that is, it sends requests to OpenAI, Anthropic, DeepSeek, OpenRouter or another service and gets the answers back. That is why the server needs neither a graphics card nor a lot of memory, and the quality of the answers depends on the model you choose, which you pay its provider for through the API key.
The second part is called the gateway. It is a Node.js program that runs all the time, stores the agent's memory, receives messages from messengers, decides when to turn to the model and carries out actions on the server. By default the gateway listens on port 18789 only on the internal address 127.0.0.1, so it cannot be reached from the internet. This is done on purpose, because the gateway can be used to control the server.
The third part consists of the channels and the control panel. Channels connect the agent to messengers, for example to your bot in Telegram. The control panel (Control UI) opens in the browser, and you can chat with the agent through it. Since the gateway is closed off from the internet, the panel is opened through an SSH tunnel, and the gateway itself asks for a token even from local connections.
The agent gets real access to the server
The installer itself warns about this too. Install OpenClaw on a separate server with no websites, databases or other people's data, and do not give the agent keys you would hate to lose.
What you need
- A server with Debian 12 or Ubuntu 24.04 and at least 2 GB of memory, for example the DE-RZ9-1 plan. On our test server with 1 GB the gateway did start, but it immediately took up almost all the free memory. If you do not have a server yet, order one using the guide.
- An SSH connection, for example via Termius. Commands are run as
root. - An API key for the AI model. The model provider issues it in your account, for example DeepSeek, OpenAI, Anthropic or OpenRouter.
- A Telegram account, if you want to talk to the agent through a bot.
Step 1. Run the installer
Connect to the server and run the official installation command.
# Official OpenClaw installer
curl -fsSL https://openclaw.ai/install.sh | bash
The installer does everything by itself. It installs the build tools and Node.js 24, downloads OpenClaw and immediately starts the initial setup. On our server the whole installation took a few minutes.
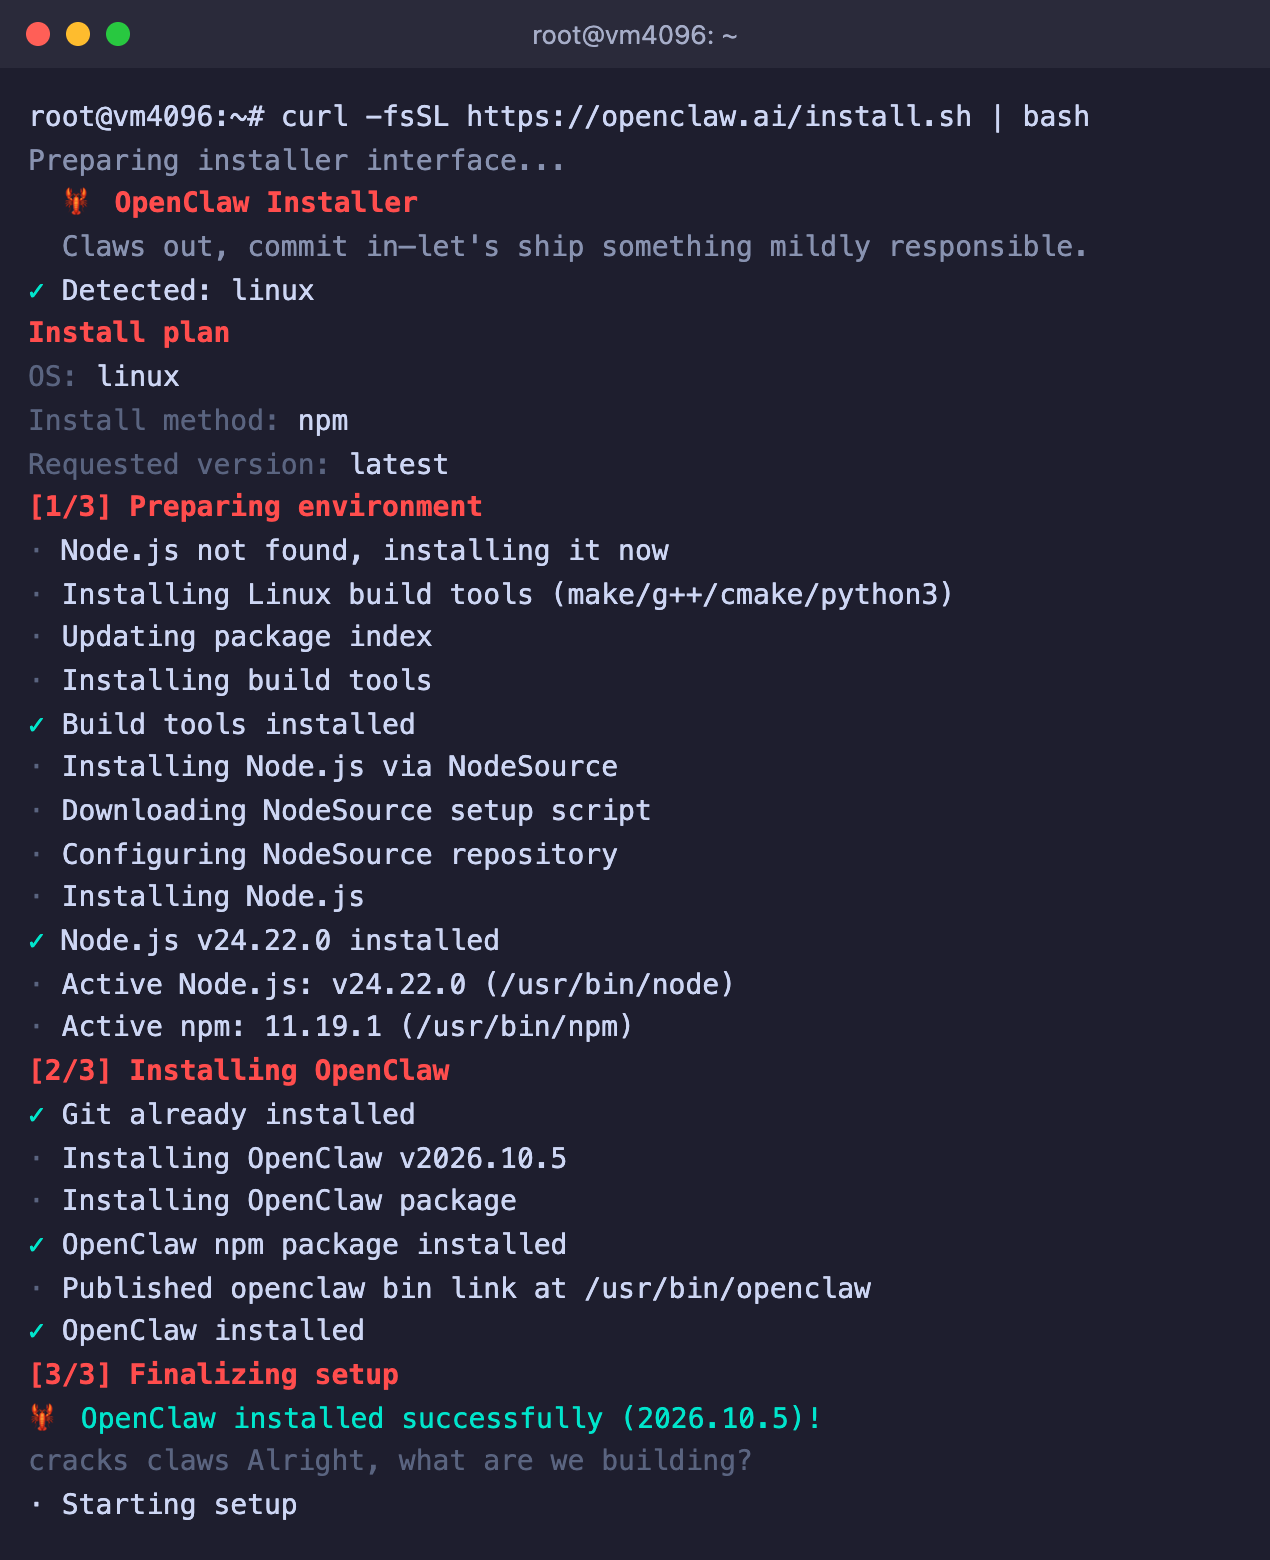
The OpenClaw installer
Step 2. Complete the initial setup
The setup wizard is controlled with the keyboard. The ↑ and ↓ arrows select an option, and Enter confirms the choice.
- How would you like to start? – choose Quick start (recommended). Above this, the wizard shows the security warning we mentioned at the beginning.
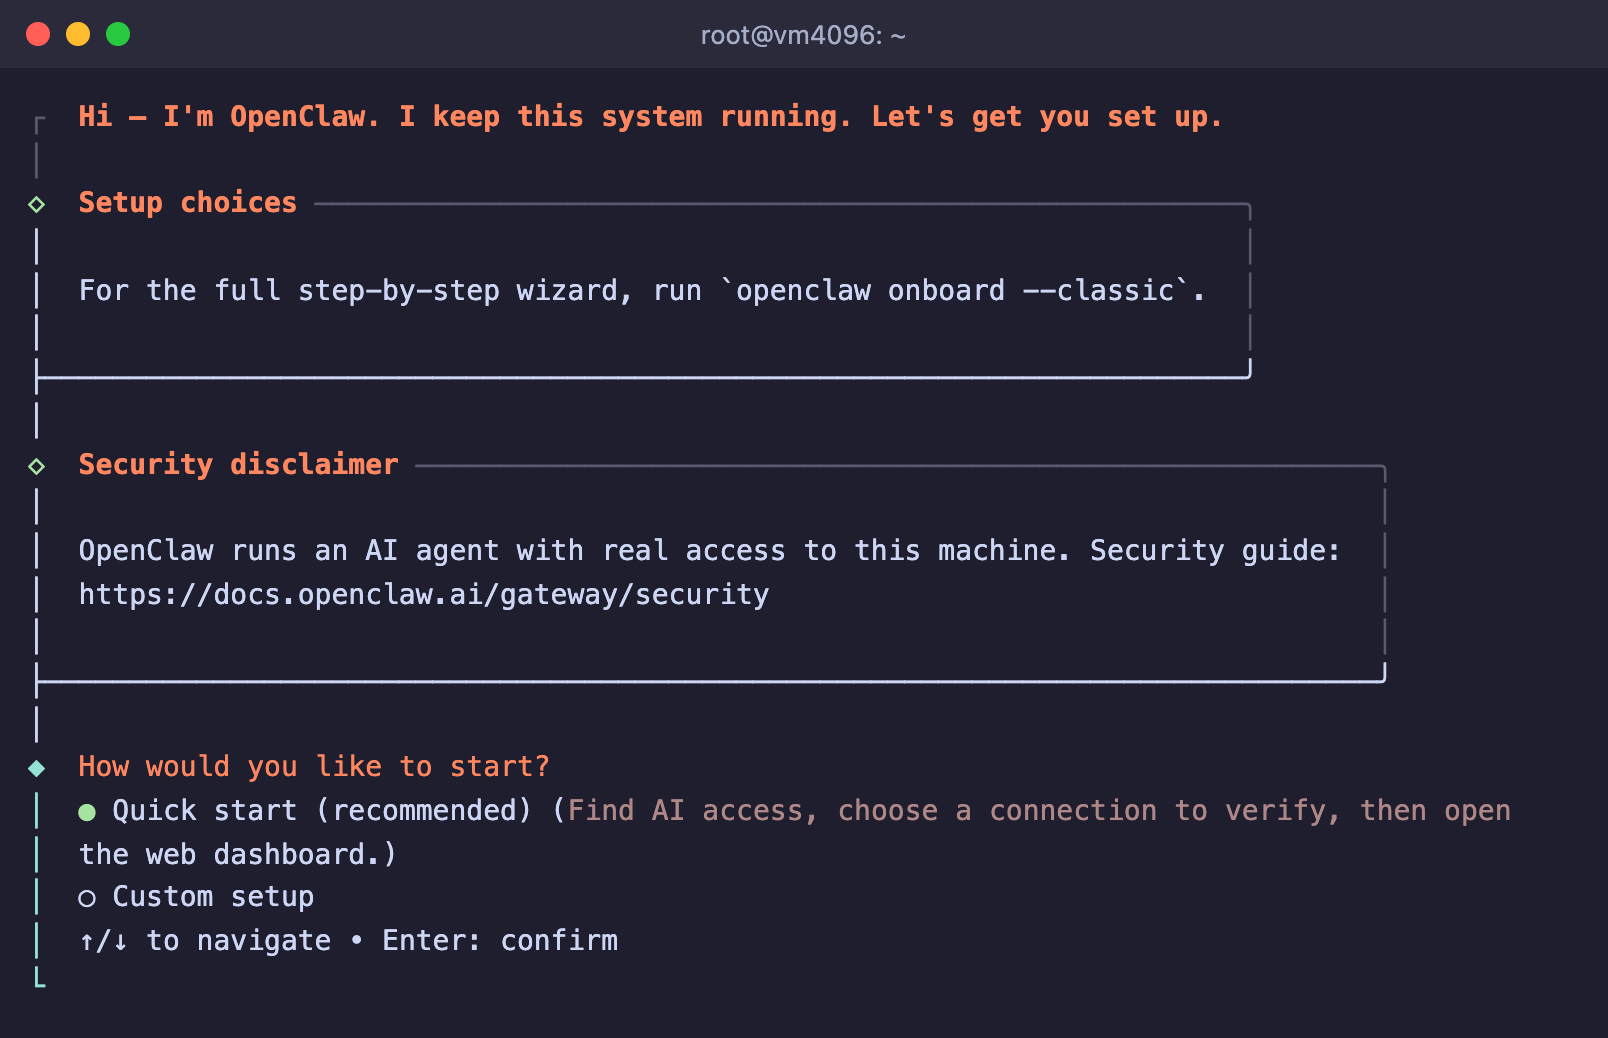
Start of the setup
- What would you like to create? – choose One agent, that is, a single agent.
- The wizard will look for already configured access to AI models on the server. On a new server it will not find anything and will print No existing AI access was detected.
- Model/auth provider – choose the provider whose key you have. The first items in the list are OpenAI, OpenRouter, xAI, Google and Anthropic. The rest, including DeepSeek and Ollama, are hidden under More…, where you can start typing the name on the keyboard.
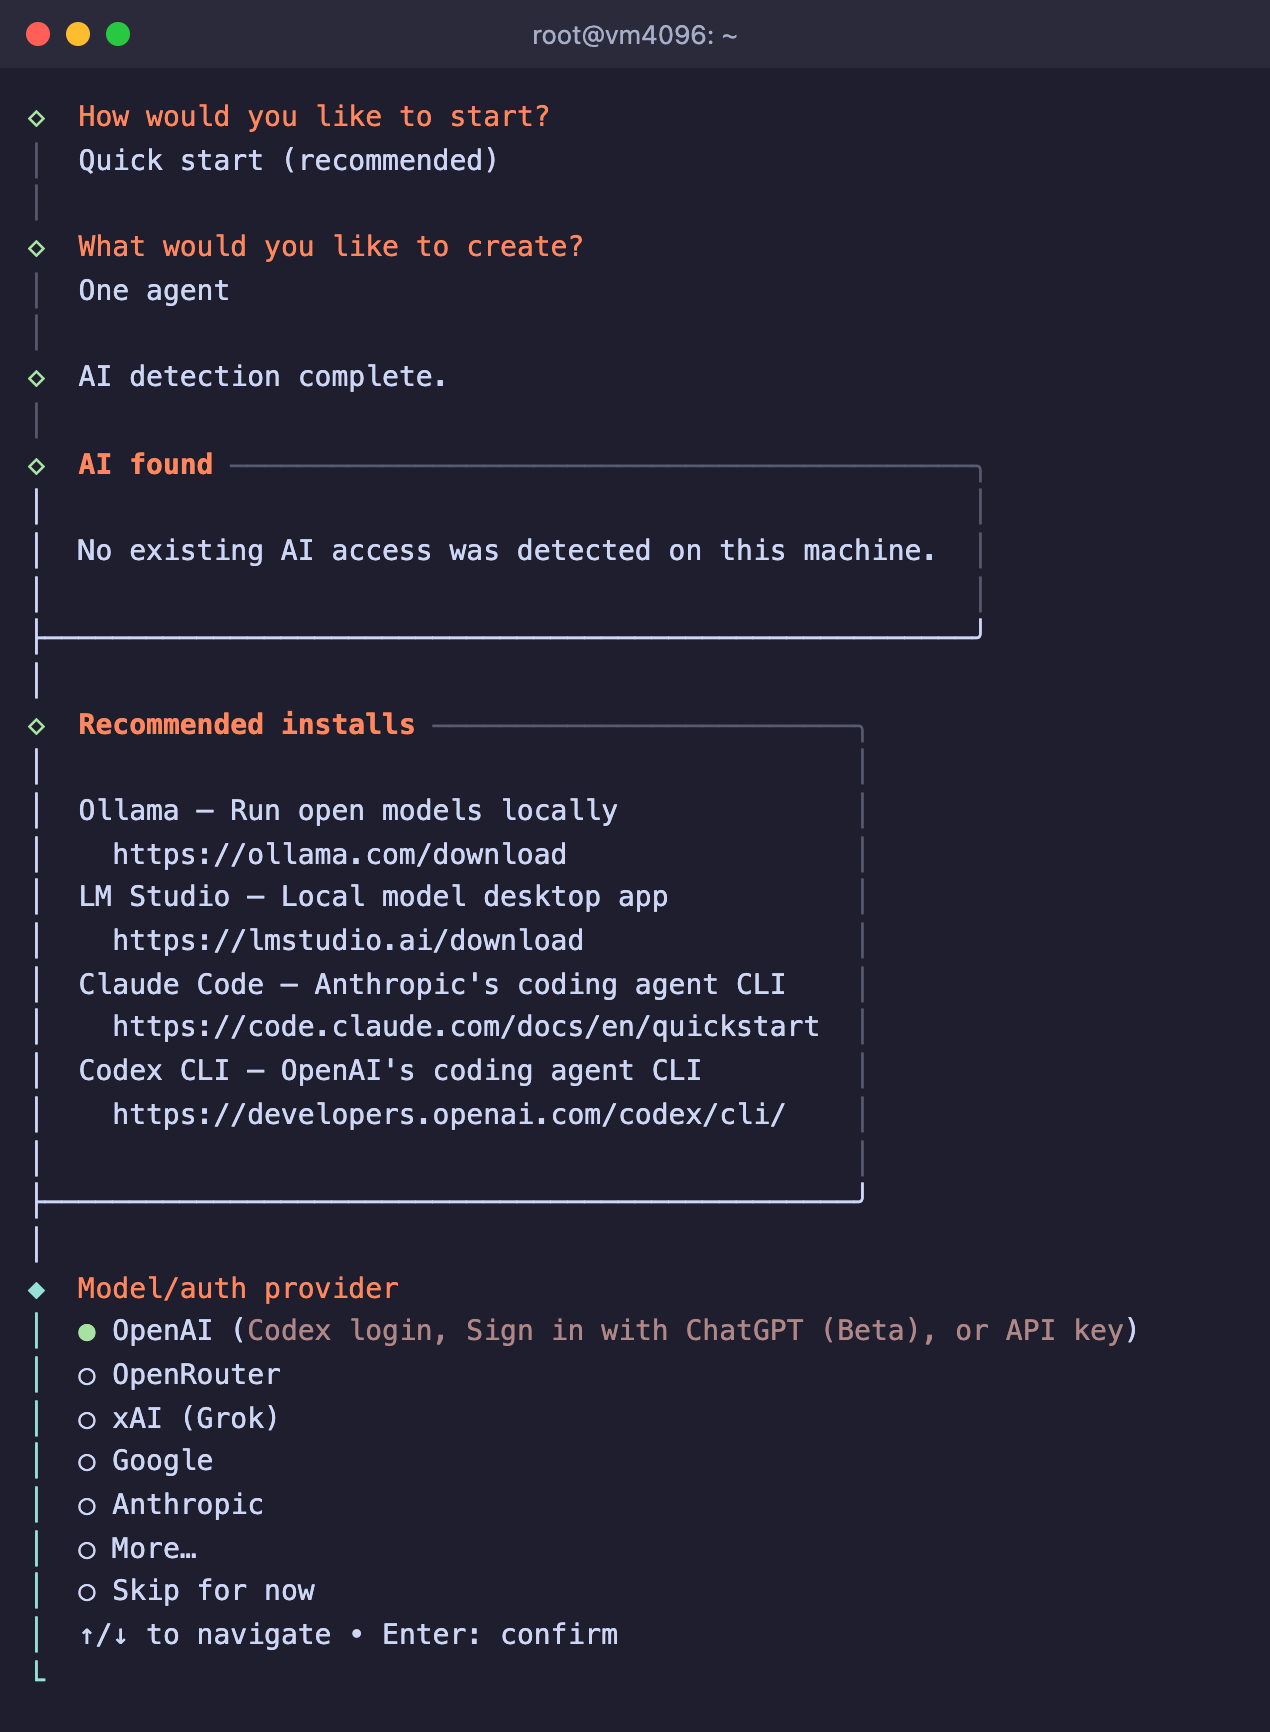
Choosing the AI model provider
- For some providers the wizard will offer to install a plugin. For DeepSeek, for example, it asks Install DeepSeek plugin?, and here you leave the Download from npm option and press Enter.
- Paste the API key into the Enter ... API key field and press Enter.
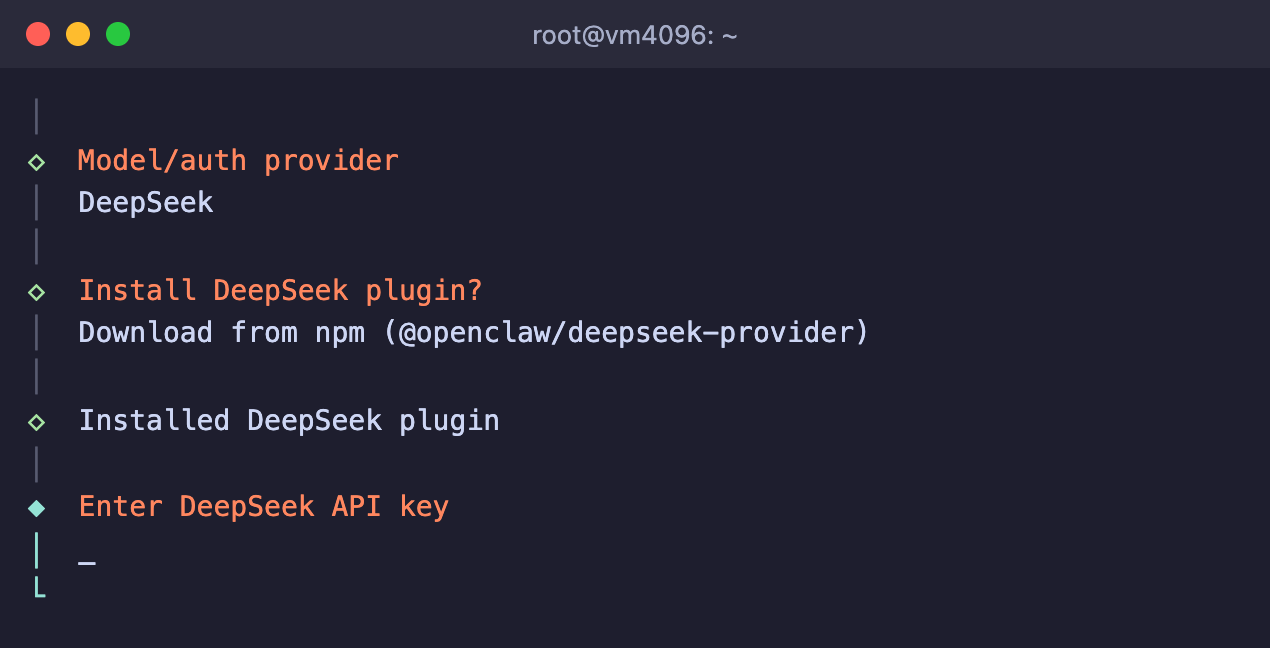
Entering the API key
When the setup is finished, the wizard prints Everything's in place and suggests the next commands.
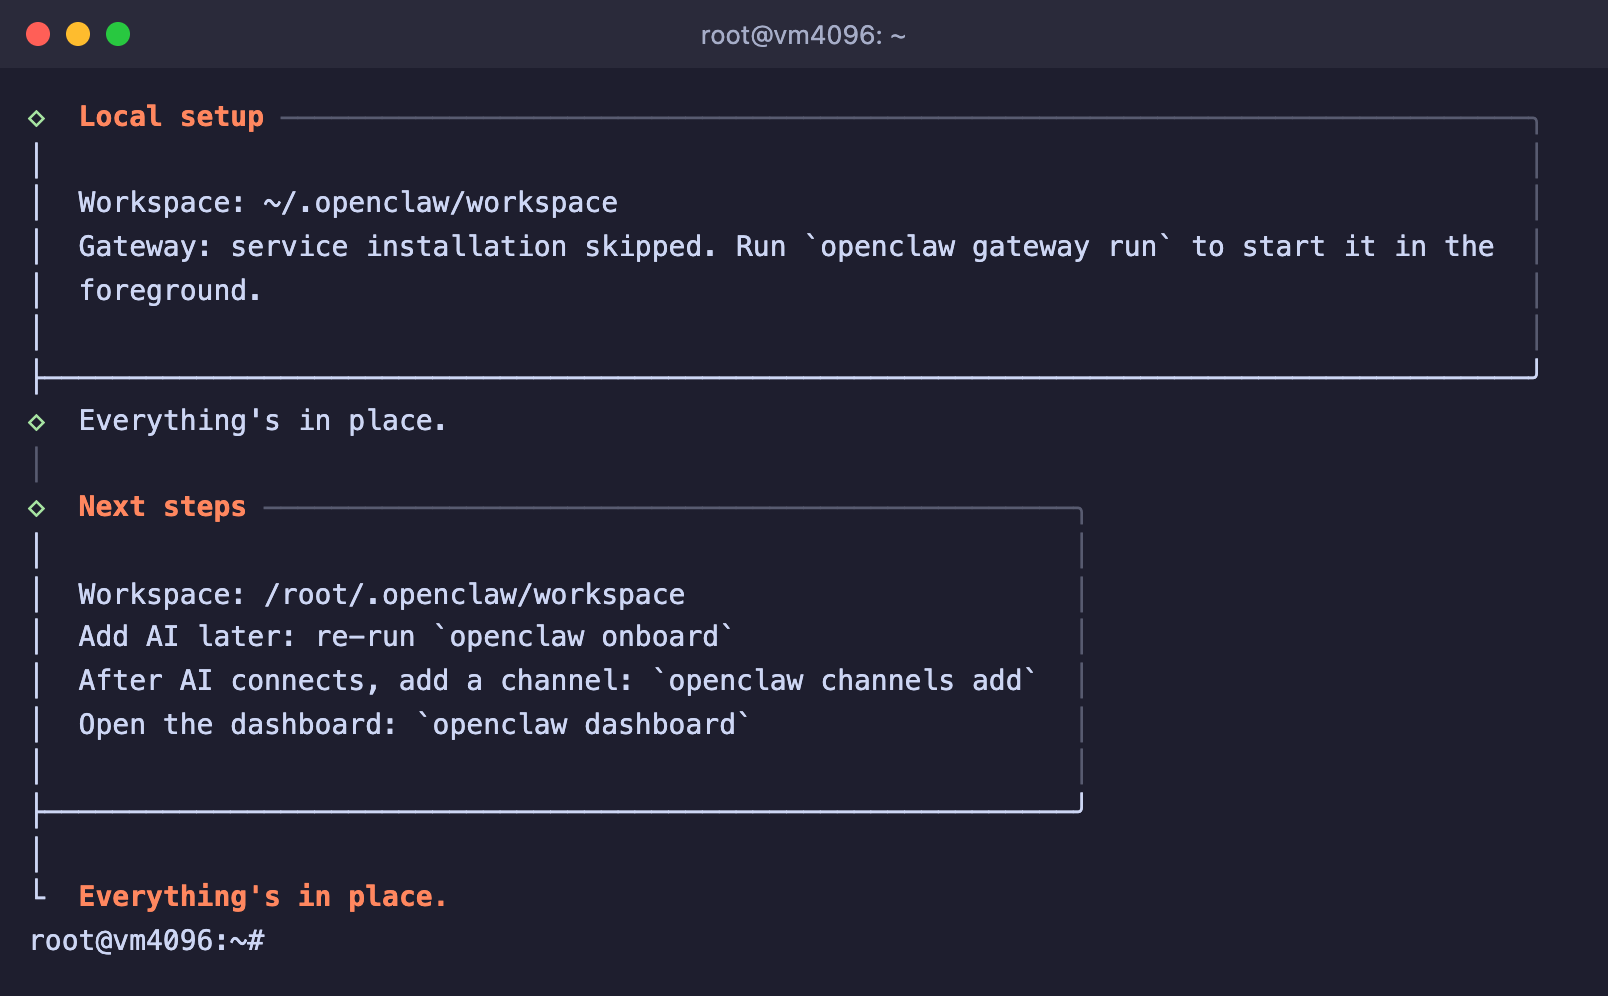
Setup complete
No key yet
Choose Skip for now, and the wizard will finish the setup without an AI model. You can connect one later by running openclaw onboard again. If you need the step-by-step wizard with all the settings, run openclaw onboard --classic.
Step 3. Run the gateway as a service
For the agent to run all the time and start again after a reboot, install the gateway as a service and allow it to run without an open SSH session.
# Install the gateway as a systemd service
openclaw gateway install

# Allow root's services to run without an SSH login
loginctl enable-linger root

# Check the gateway status
openclaw gateway status
The second command is important. The gateway is installed as a user service, and by default systemd stops such services when the user logs out. OpenClaw itself recommends enabling this mode on servers without a desktop.
The output of openclaw gateway status should contain the lines Runtime: running and Listening: 127.0.0.1:18789.
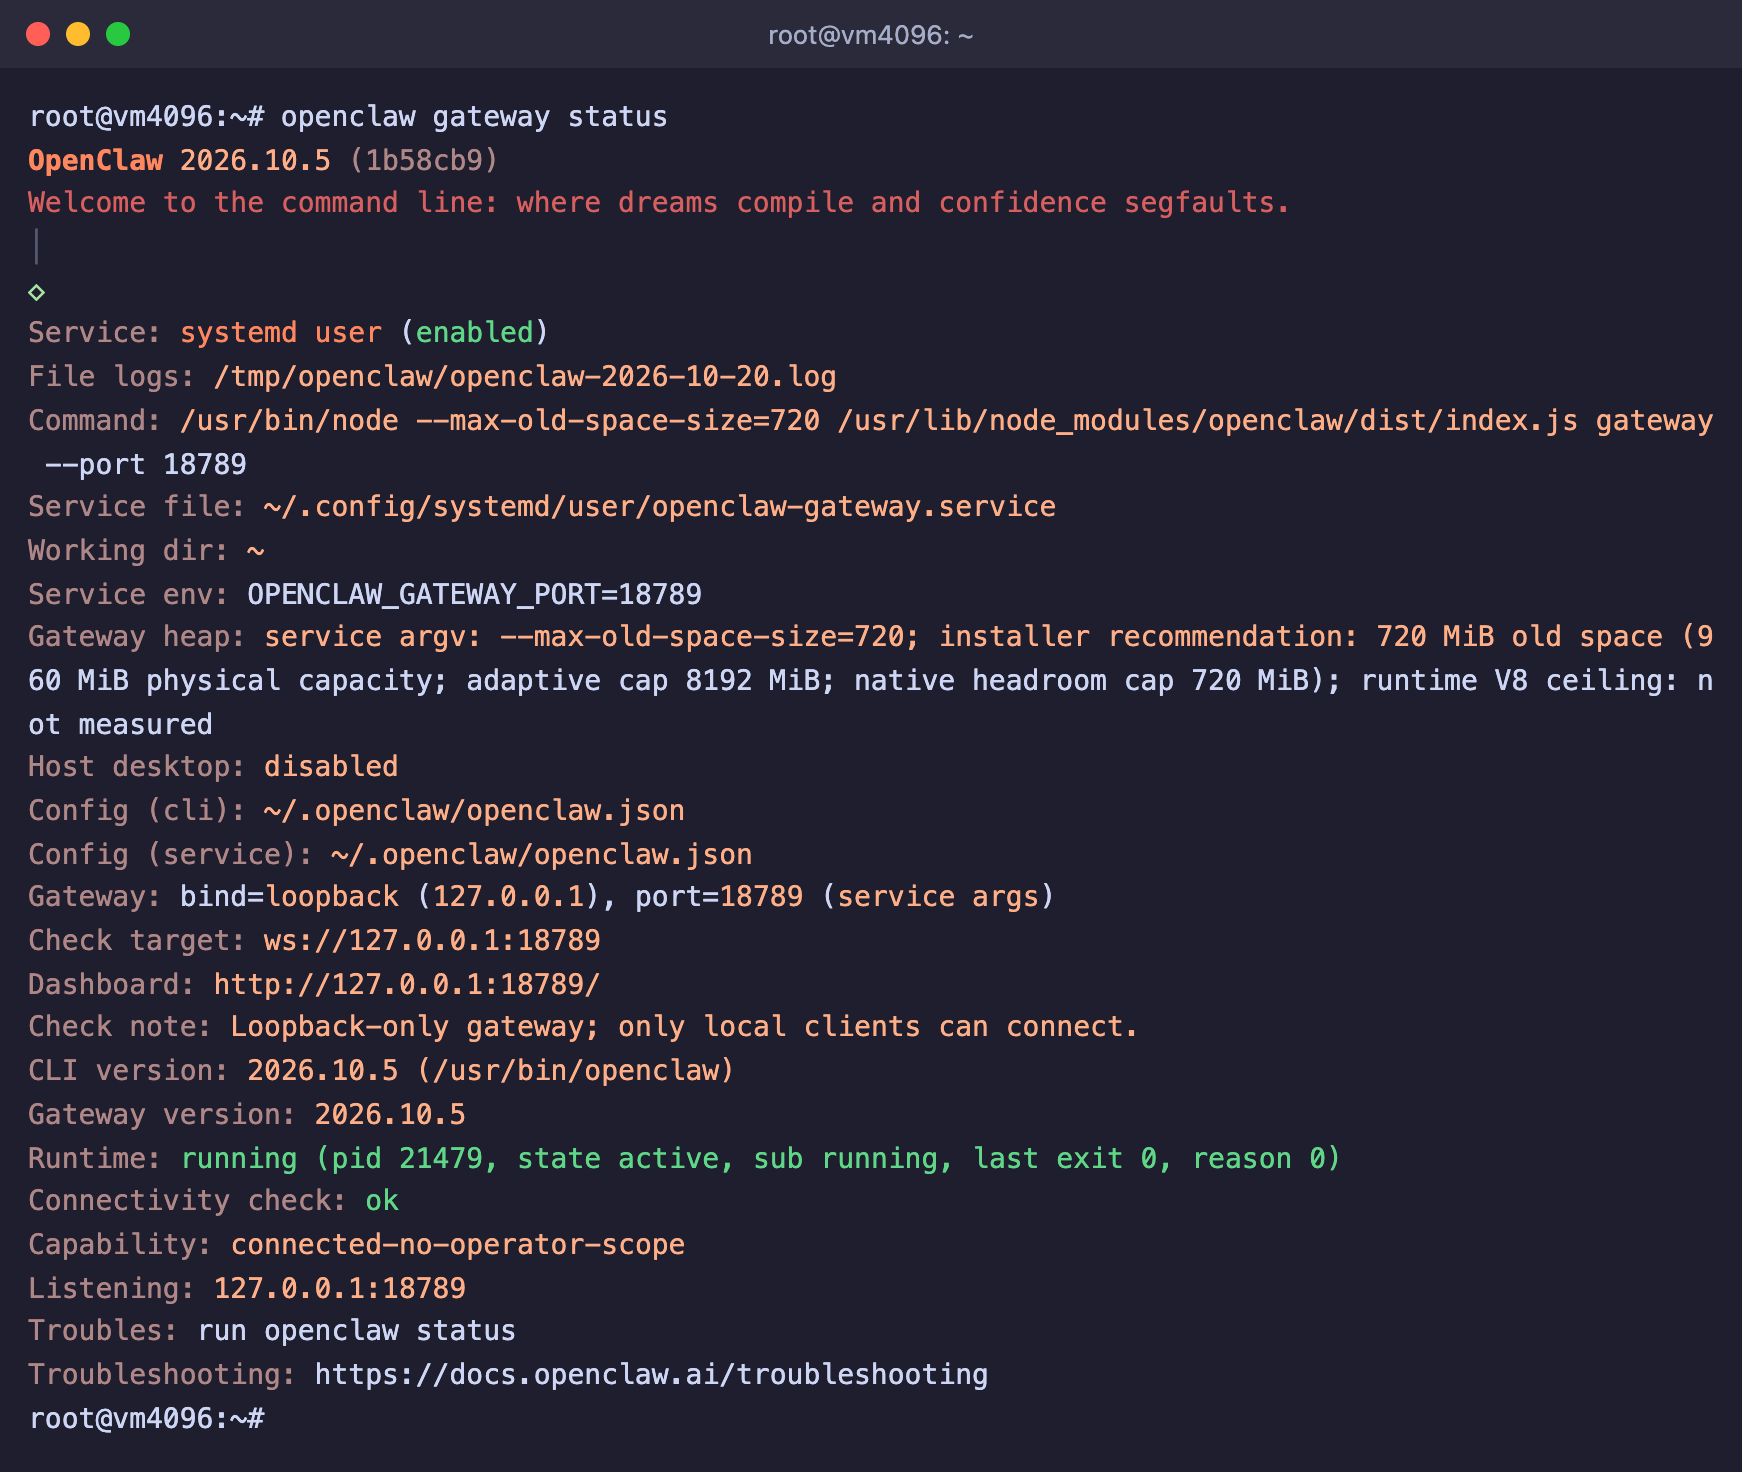
The gateway is running
Step 4. Connect Telegram
- In Telegram, open the @BotFather bot, send it the
/newbotcommand and come up with a name and a username for your bot. BotFather will send you a token like123456:ABC.... - On the server, run
openclaw channels add. When asked Set up a chat channel now?, answer Yes. - In the list of channels, choose Telegram (Bot API), then the default (primary) account.
- When asked how to provide the token, choose Enter Telegram bot token and paste the token from BotFather.
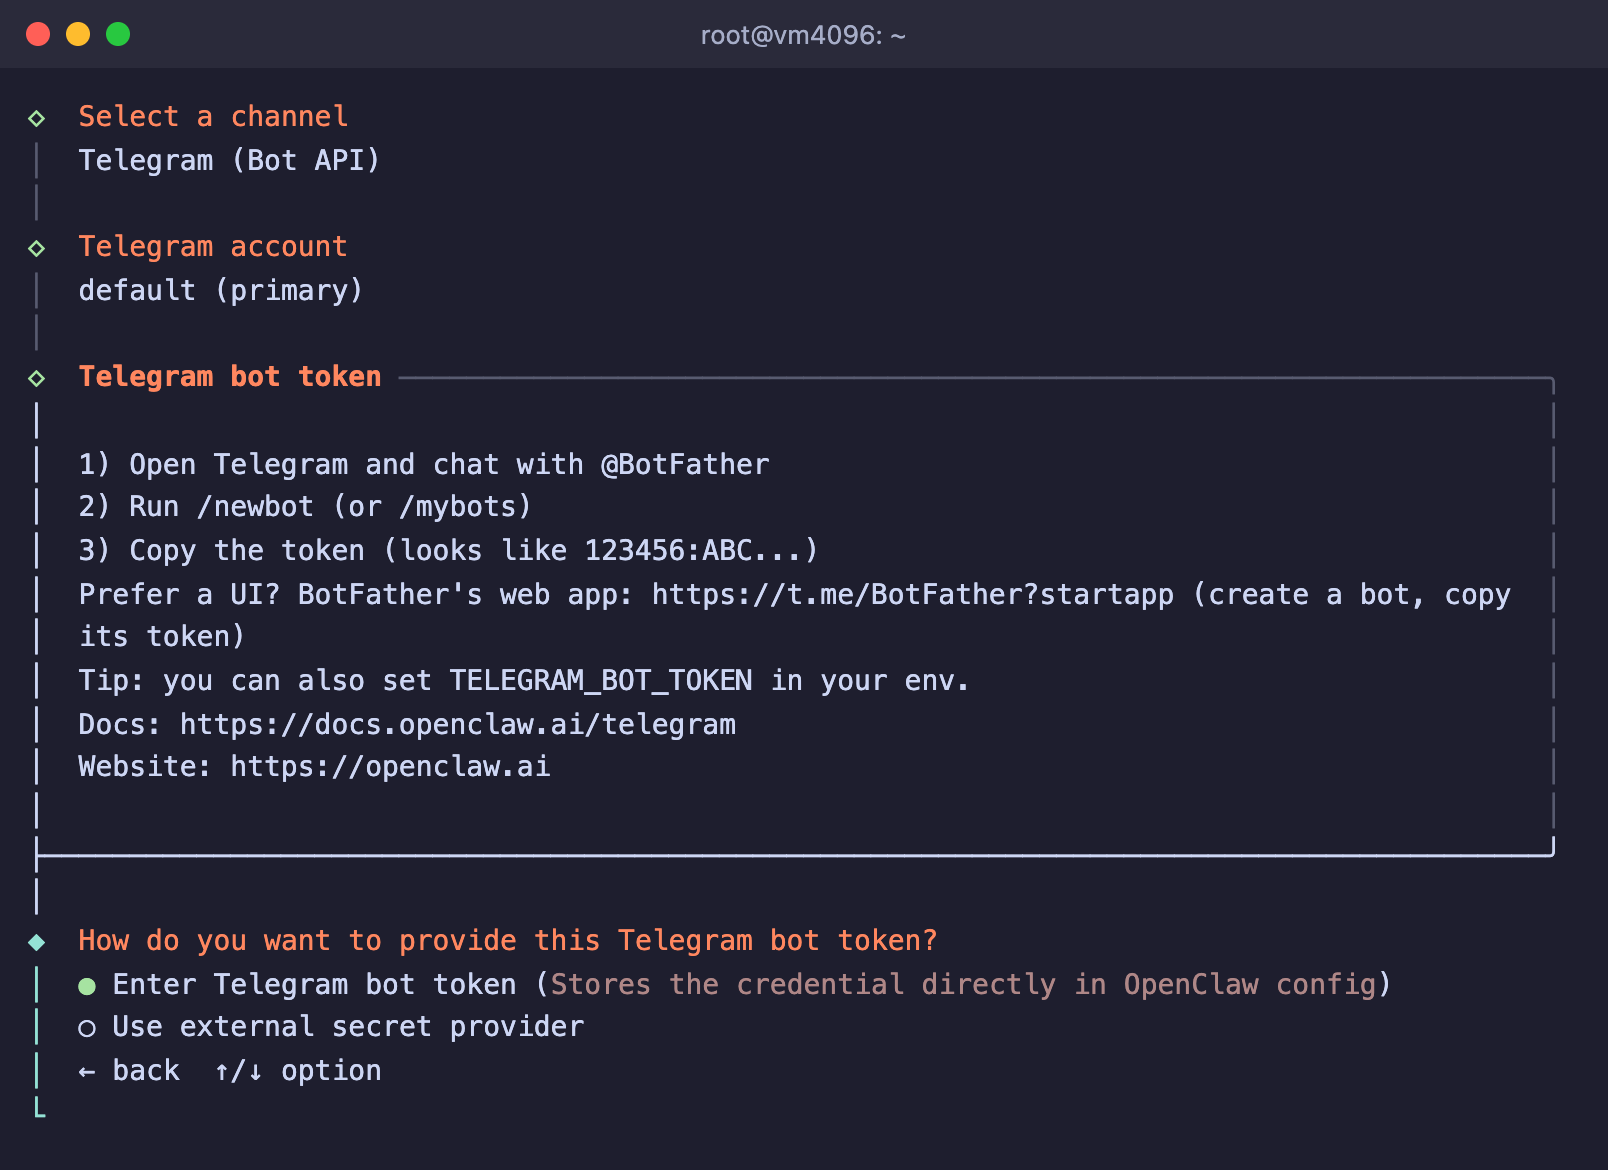
Connecting the Telegram bot
- Send your bot any message. The agent does not reply to strangers, so the bot will answer with a pairing code of 8 capital letters.
- Approve the code on the server.
# List of pairing requests
openclaw pairing list telegram

# Approve your code
openclaw pairing approve telegram CODE
The code is valid for one hour. After approval the agent will start replying to you in Telegram, while messages from other people will keep waiting for your permission.
Step 5. Open the control panel
The panel only works on the server's internal address, so open an SSH tunnel to it from your computer. Run the command in a terminal on your own computer, not on the server, and do not close that window.
# Forward the server's port 18789 to your computer
ssh -N -L 18789:127.0.0.1:18789 root@SERVER_IP
Now open http://localhost:18789 in your browser. The panel will ask for the Gateway secret (Секрет Gateway). Look it up on the server, paste it into the field and click Connect (Подключиться).
# Show the gateway token
openclaw gateway auth-token --show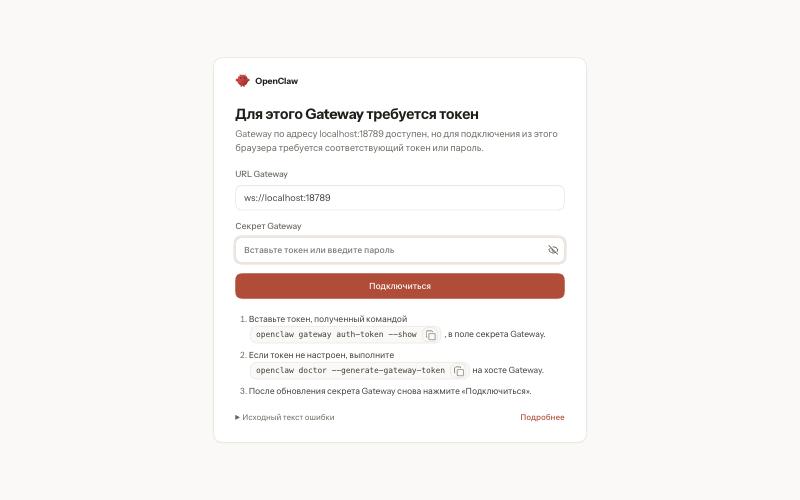
Logging in to the control panel
Once connected, the panel opens on the chat page, where you can chat with the agent right in the browser.
Do not open port 18789 to the internet
Even with a token, the panel gives control over the agent, and therefore over the server. Connect to it only through an SSH tunnel.
Maintenance
A few commands that will come in handy.
# Status of all parts of OpenClaw
openclaw status

# Check the settings and look for problems
openclaw doctor

# Change the settings, for example connect a different model
openclaw configure

# Restart the gateway after changes
openclaw gateway restart
On our server, openclaw doctor immediately warned that the gateway token is stored in plain text in the settings file ~/.openclaw/openclaw.json. The agent can read files on the server, so doctor recommends moving secrets to a separate store with the openclaw secrets configure command.
Frequently asked questions
The agent stops replying after I log out of SSH
Most likely, the loginctl enable-linger root command was not run. Without it, the gateway service stops together with the last SSH session. Run it and start the gateway with openclaw gateway start.
The Telegram bot does not reply
- Check that the gateway is running with
openclaw gateway status. - Check for an unapproved request with
openclaw pairing list telegram. The code lives for an hour. After that, message the bot again and approve the new code. - Check that an AI model is connected. Without it the agent has nothing to reply with, so connect one via
openclaw onboard.
Can I run the AI model right on the server without paying for an API
Yes, the list of providers includes Ollama for local models. But the models need a lot of memory and CPU time. How to install a local model and what server it needs is explained in the article about DeepSeek.
The panel says the Gateway requires a token
That is how it should be. Run openclaw gateway auth-token --show on the server and paste the token into the Gateway secret (Секрет Gateway) field. If no token is configured, create one with openclaw doctor --generate-gateway-token.
Our resources
Telegram channel: https://t.me/f3cloud_news
F3 Cloud: https://f3cloud.com