
Speedtest CLI is the official program from Ookla, the makers of the speedtest.net website, for checking internet speed right from the server console. It measures latency, download and upload speed and shows whether any packets are being lost.
Below we show how to install Speedtest, how to choose the right server for the test and what to do if the result looks odd or IPv6 does not behave as it should.
1. Install Speedtest
The official install script that works through a repository does not support every system. On Debian 12, for example, it replies This distribution version is not currently supported. That is why it is more reliable to install the ready-made build from the Speedtest website, which works on any Linux.
# Download the official Speedtest build for 64-bit servers
curl -LO https://install.speedtest.net/app/cli/ookla-speedtest-1.2.0-linux-x86_64.tgz

# Unpack the program into /usr/local/bin,
# so that it runs from any folder
tar -xzf ookla-speedtest-1.2.0-linux-x86_64.tgz -C /usr/local/bin speedtest

# Delete the archive, which is no longer needed
rm ookla-speedtest-1.2.0-linux-x86_64.tgz

# Check that the program is installed
speedtest --version
Where to get the latest version
Links to the current builds, including ones for ARM servers, are on the official Speedtest CLI page.
2. Run the test
speedtestOn the first run, Speedtest will ask you to accept the licence agreement. Type YES and press Enter, and it will not ask again.
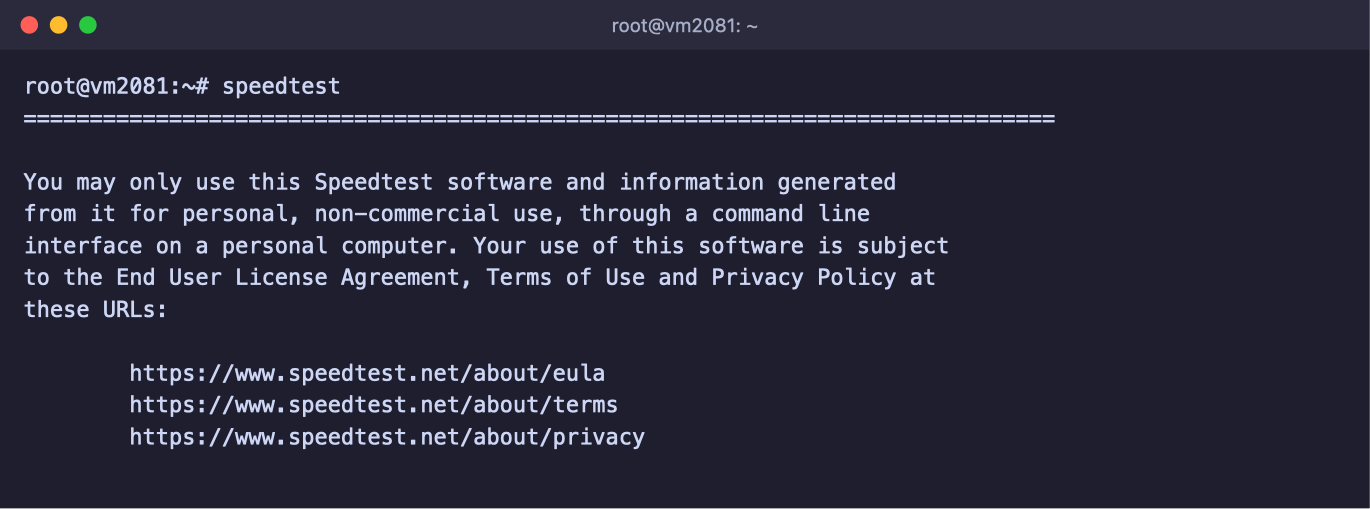
The first Speedtest run
Running in scripts
To stop Speedtest from asking questions, for example when it runs on a schedule, accept the terms up front by starting it as speedtest --accept-license --accept-gdpr.
The test uses a noticeable amount of traffic. In our checks, one run took between 1 and 2 GB. This matters if your plan has a monthly traffic limit, for example DE-Promo.
3. Choose the nearest server
By default, Speedtest picks the test server itself, working out your location from the IP address. Sometimes it gets this wrong and picks a server on the other side of the world. The latency then comes out huge and the speed lower than it really is.
That is why it is better to choose a server by hand, in the same city as your VPS. You can find servers by city name with the command below. It also shows whether each server has IPv6, which will come in handy in the next section.
# Look for Speedtest servers in Frankfurt. Instead of Frankfurt you can
# specify Amsterdam, Helsinki or any other city
curl -s "https://www.speedtest.net/api/js/servers?engine=js&search=Frankfurt&limit=8" | python3 -c '
import json, socket, sys
for s in json.load(sys.stdin):
    try:
        socket.getaddrinfo(s["host"].split(":")[0], None, socket.AF_INET6); ip = "IPv4 + IPv6"
    except OSError:
        ip = "только IPv4"
    print(s["id"], "|", s["sponsor"], "|", ip)'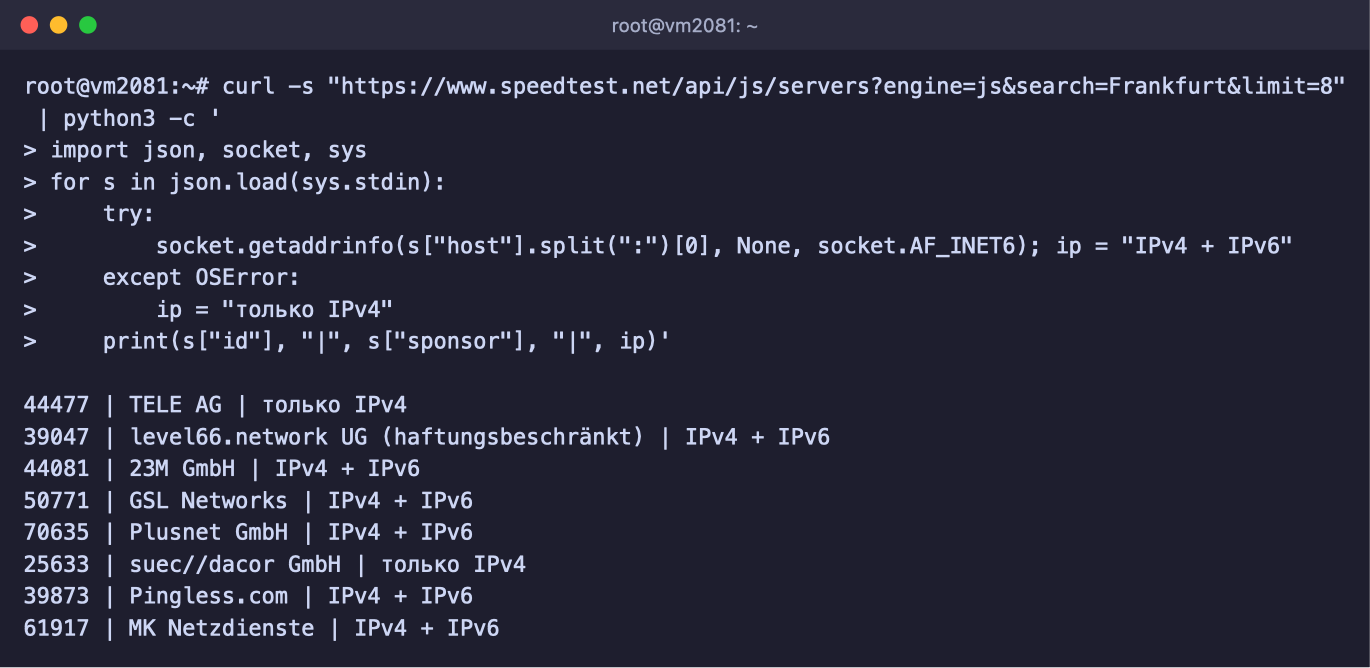
Speedtest servers in Frankfurt
The number at the start of each line is the server number. Run the test against the server you want with the -s flag.
# Run the test against server number 31120
speedtest -s 31120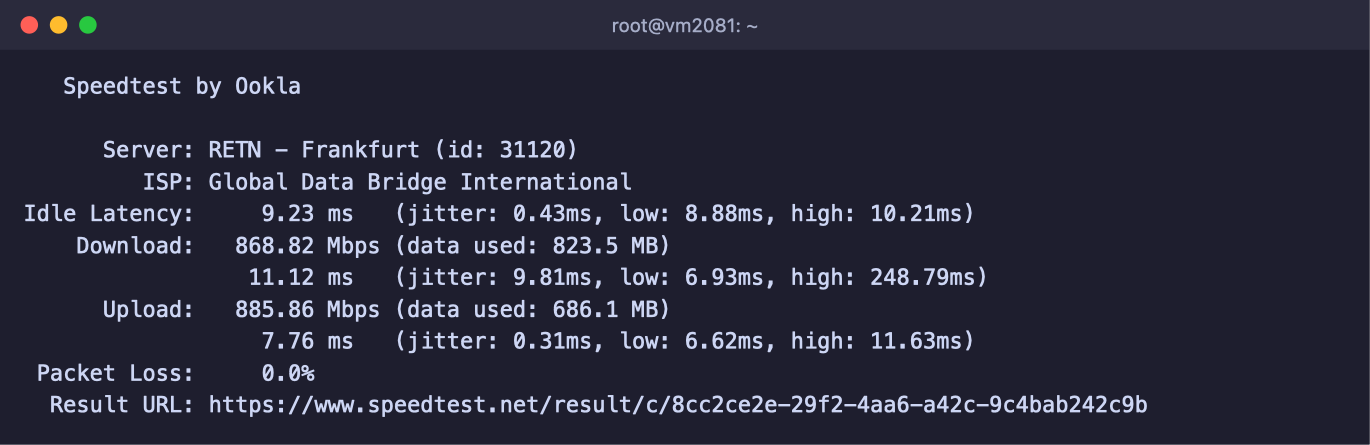
The result of a test against a server in Frankfurt
How to read the result
- Server – the server the test ran against, and its city.
- Idle Latency – the latency, or ping, when the connection is idle. The lower, the better.
- Download – the download speed, that is, how fast the server receives data.
- Upload – the upload speed, that is, how fast the server sends data. This is the one that matters for websites, VPN and file sharing.
- The ms lines under the speeds – the latency under load. If it is much higher than Idle Latency, the connection is busy.
- Packet Loss – lost packets. Normally this shows
0.0%. - Result URL – a link to the result on the speedtest.net website, which is handy to send to our support team.
What speed to expect
On plans with a 1 Gbit/s port, a normal result is around 850–900 Mbit/s, because part of the bandwidth goes on service data.
On DE-Promo the port is 125 Mbit/s, and the result will be slightly below that figure.
Testing over IPv4 and IPv6
Every VPS at F3 Cloud has both IPv4 and IPv6. If the test server also has IPv6, Speedtest measures the speed over IPv6. Routes over IPv4 and IPv6 can differ, so the results can differ too, especially the latency.
To measure the speed over IPv4 specifically, pick a server marked только IPv4 (IPv4 only) from the list in step 3. Speedtest will connect to it over IPv4, and there is nothing to configure.
To find out whether IPv6 works on your server, run the command below.
# Send 4 requests to the Cloudflare DNS server over IPv6
ping -6 -c 4 2606:4700:4700::1111
If replies come back and the last lines say 0% packet loss, IPv6 is working.
If the command says Network is unreachable or all the packets are lost, IPv6 is not set up on the server or is not working. This is not a problem for the speed test, because Speedtest will switch to IPv4 on its own. But if your project needs IPv6, write to our support team and we will help you set it up.
The -i and -I flags do not switch the test to IPv4
Speedtest has flags for choosing the network address and the interface, but they are no good for changing the protocol. If you specify an IPv4 address, a test against a server with IPv6 will fail with the Cannot open socket error. Choose a server marked только IPv4 (IPv4 only) instead.
Useful flags
| Command | What it does |
|---|---|
speedtest -L | Show the nearest servers according to Speedtest |
speedtest -s number | Test against a specific server |
speedtest -a | Show the speed in convenient units, kbit/s, Mbit/s or Gbit/s |
speedtest --progress=no | Hide the progress bar, handy for logs |
speedtest -f json | Output the result as JSON for scripts |
speedtest --help | List all the flags |
Frequently asked questions
It says “This distribution version is not currently supported”
This is how the official repository install script responds on newer systems, such as Debian 12. Install the ready-made build as described in step 1, because it works on any Linux.
Speedtest picked a server in another country, and the ping is over 100 ms
Speedtest worked out the server's location from its IP address and got it wrong. Find a server in your city with the command from step 3 and run the test against it with the -s flag. For the same reason, speedtest -L may show distant servers.
“Connection refused” or “Cannot open socket” error
The chosen Speedtest server did not accept the connection, which happens now and then. If the test still carried on with another server, there is nothing you need to do.
If the test stopped, choose another server from the list and run the test against it.
“Could not retrieve or read configuration” error
Speedtest could not reach the speedtest.net website to get its settings. Check that the internet connection on the server works, for example with curl -I https://www.speedtest.net. If you ran the test with the -i flag and an IPv6 address, remove that flag, because the speedtest.net website has no IPv6.
The speed is much lower than stated in the plan
First check that the test server is nearby and the ping is low. Then repeat the test against two or three different servers, because sometimes the test server itself turns out to be the slow one. If the speed is low on all of them, send our support team the Result URL links from several tests, and we will look into it.
How to remove Speedtest
The program is a single file, so you can delete it with rm /usr/local/bin/speedtest.
Its settings and the accepted licence are kept in the ~/.config/ookla folder, which you can delete too.
Our resources
Telegram channel: https://t.me/f3cloud_news
F3 Cloud: https://f3cloud.com