
Docker lets you run programs in isolated containers that already include everything they need to work. Many popular services, from n8n and Nextcloud to game servers and bots, are installed today with a single command through Docker. In this article we install Docker and Docker Compose on a server, start the first container, bring up a website made of two containers and go through the settings people usually remember too late. We tested all commands on a test server with Debian 12. The Docker version at the time of testing was 29.9.2, and Docker Compose was 5.6.1.
What Docker is and why you need it on a server
To understand what problem Docker solves, imagine a regular program installation on a server. Say you need to run a web application written in PHP that requires a specific PHP version, a set of extensions and the Apache web server. All of this is installed through the package manager directly into the system, and as long as only one application runs on the server, there are no difficulties. But as soon as you add a second application that needs a different PHP version, the packages start conflicting with each other. A system update may quietly change the version of a library that one of the applications depended on, and moving to another server turns into a long repetition of every installation step from memory.
Docker removes this problem by packing the application together with its whole environment into an image. An image is an unchangeable set of files that already contains the right interpreter version, the libraries and the default settings. It is built by the program's developers and published in the public Docker Hub catalog or in their own registry. When you run an image, Docker creates a container from it, that is, a running process that sees only its own file system, its own network interfaces and its own list of processes. At the same time, a container is not a virtual machine, since it has no kernel of its own. All containers use the Linux kernel of the server itself, and isolation is provided by kernel mechanisms that keep processes, the network and files apart. That is why a container starts in a fraction of a second and uses almost no memory beyond what the program itself needs.
An important consequence follows from this design. Everything the program writes inside a container disappears together with it when the container is removed, for example when it is updated to a new image version. To make data survive the re-creation of a container, it is stored in volumes. A volume lives on the server's disk and is mounted inside the container at a given path, so a database or uploaded files stay in place, while the container itself can safely be thrown away and created again. The network works in a similar way. By default a container cannot be reached from outside, and to open, for example, a website running in a container, you need to publish a port, that is, tell Docker that incoming connections to a certain server port should be passed into the container.
Real services rarely consist of a single container. A WordPress site needs a database, a monitoring system needs storage and a web interface, and each component is easier to keep in its own container. Starting them by hand with long commands is inconvenient, and that is why Docker Compose exists. It describes all of the application's containers, their volumes, ports and settings in a single docker-compose.yml file, after which the whole set is started, updated and stopped with one command. Containers from one Compose file automatically join a shared network and find each other by service name, so WordPress reaches the database simply by the name db without knowing its address.
What you will need
- A server with Ubuntu 24.04 or Debian 12. Docker itself took about 190 MB of memory on the test server, so it runs on any of our plans, and how much memory you need in the end depends on which containers you run. If you do not have a server yet, order one using this guide.
- An SSH connection, for example via Termius. The commands below are run as
root, so they do not needsudo.
1. Install Docker
It is better not to install Docker from the standard Ubuntu and Debian repositories, as they often have an outdated version without the Compose plugin. We use the official Docker repository, and there are two ways to add it. Both give the same result, so pick either one.
Method 1. The official script in one command
This is the fastest method. The script detects the system by itself, adds the Docker repository, installs all the packages and starts the service.
# Download and run the official installation script
curl -fsSL https://get.docker.com | sh
The installation takes about a minute. At the end the script prints the Docker client and server versions and the line INFO: Docker daemon enabled and started, which means the service is running and will start together with the server.

The script added the Docker repository and installed the packages
The script is needed only once
The Docker developers themselves advise against running it again to update. After installation Docker is updated with a regular apt upgrade, more on that below in the section about updates.
Method 2. Add the repository manually
This is the method the official Docker documentation recommends for production servers. You perform the same steps as the script, but you see each of them. The commands below are for Debian.
# Docker repository key
apt update
apt install -y ca-certificates curl
install -m 0755 -d /etc/apt/keyrings
curl -fsSL https://download.docker.com/linux/debian/gpg -o /etc/apt/keyrings/docker.asc
chmod a+r /etc/apt/keyrings/docker.asc

# The repository itself
tee /etc/apt/sources.list.d/docker.sources <<EOF
Types: deb
URIs: https://download.docker.com/linux/debian
Suites: $(. /etc/os-release && echo "$VERSION_CODENAME")
Components: stable
Architectures: $(dpkg --print-architecture)
Signed-By: /etc/apt/keyrings/docker.asc
EOF

# Install Docker and the Compose plugin
apt update
apt install -y docker-ce docker-ce-cli containerd.io docker-buildx-plugin docker-compose-plugin
On Ubuntu the commands are the same, just replace linux/debian with linux/ubuntu in two places, in the key address and in the URIs line.
2. Check the installation
Make sure Docker and Compose are installed, and run a test container.
# Docker and Compose versions
docker --version && docker compose version

# Test container
docker run hello-world
Docker will not find the hello-world image on the server, so it downloads it from Docker Hub and runs it. The container prints the greeting Hello from Docker! and exits right away. If you see this text, everything works.
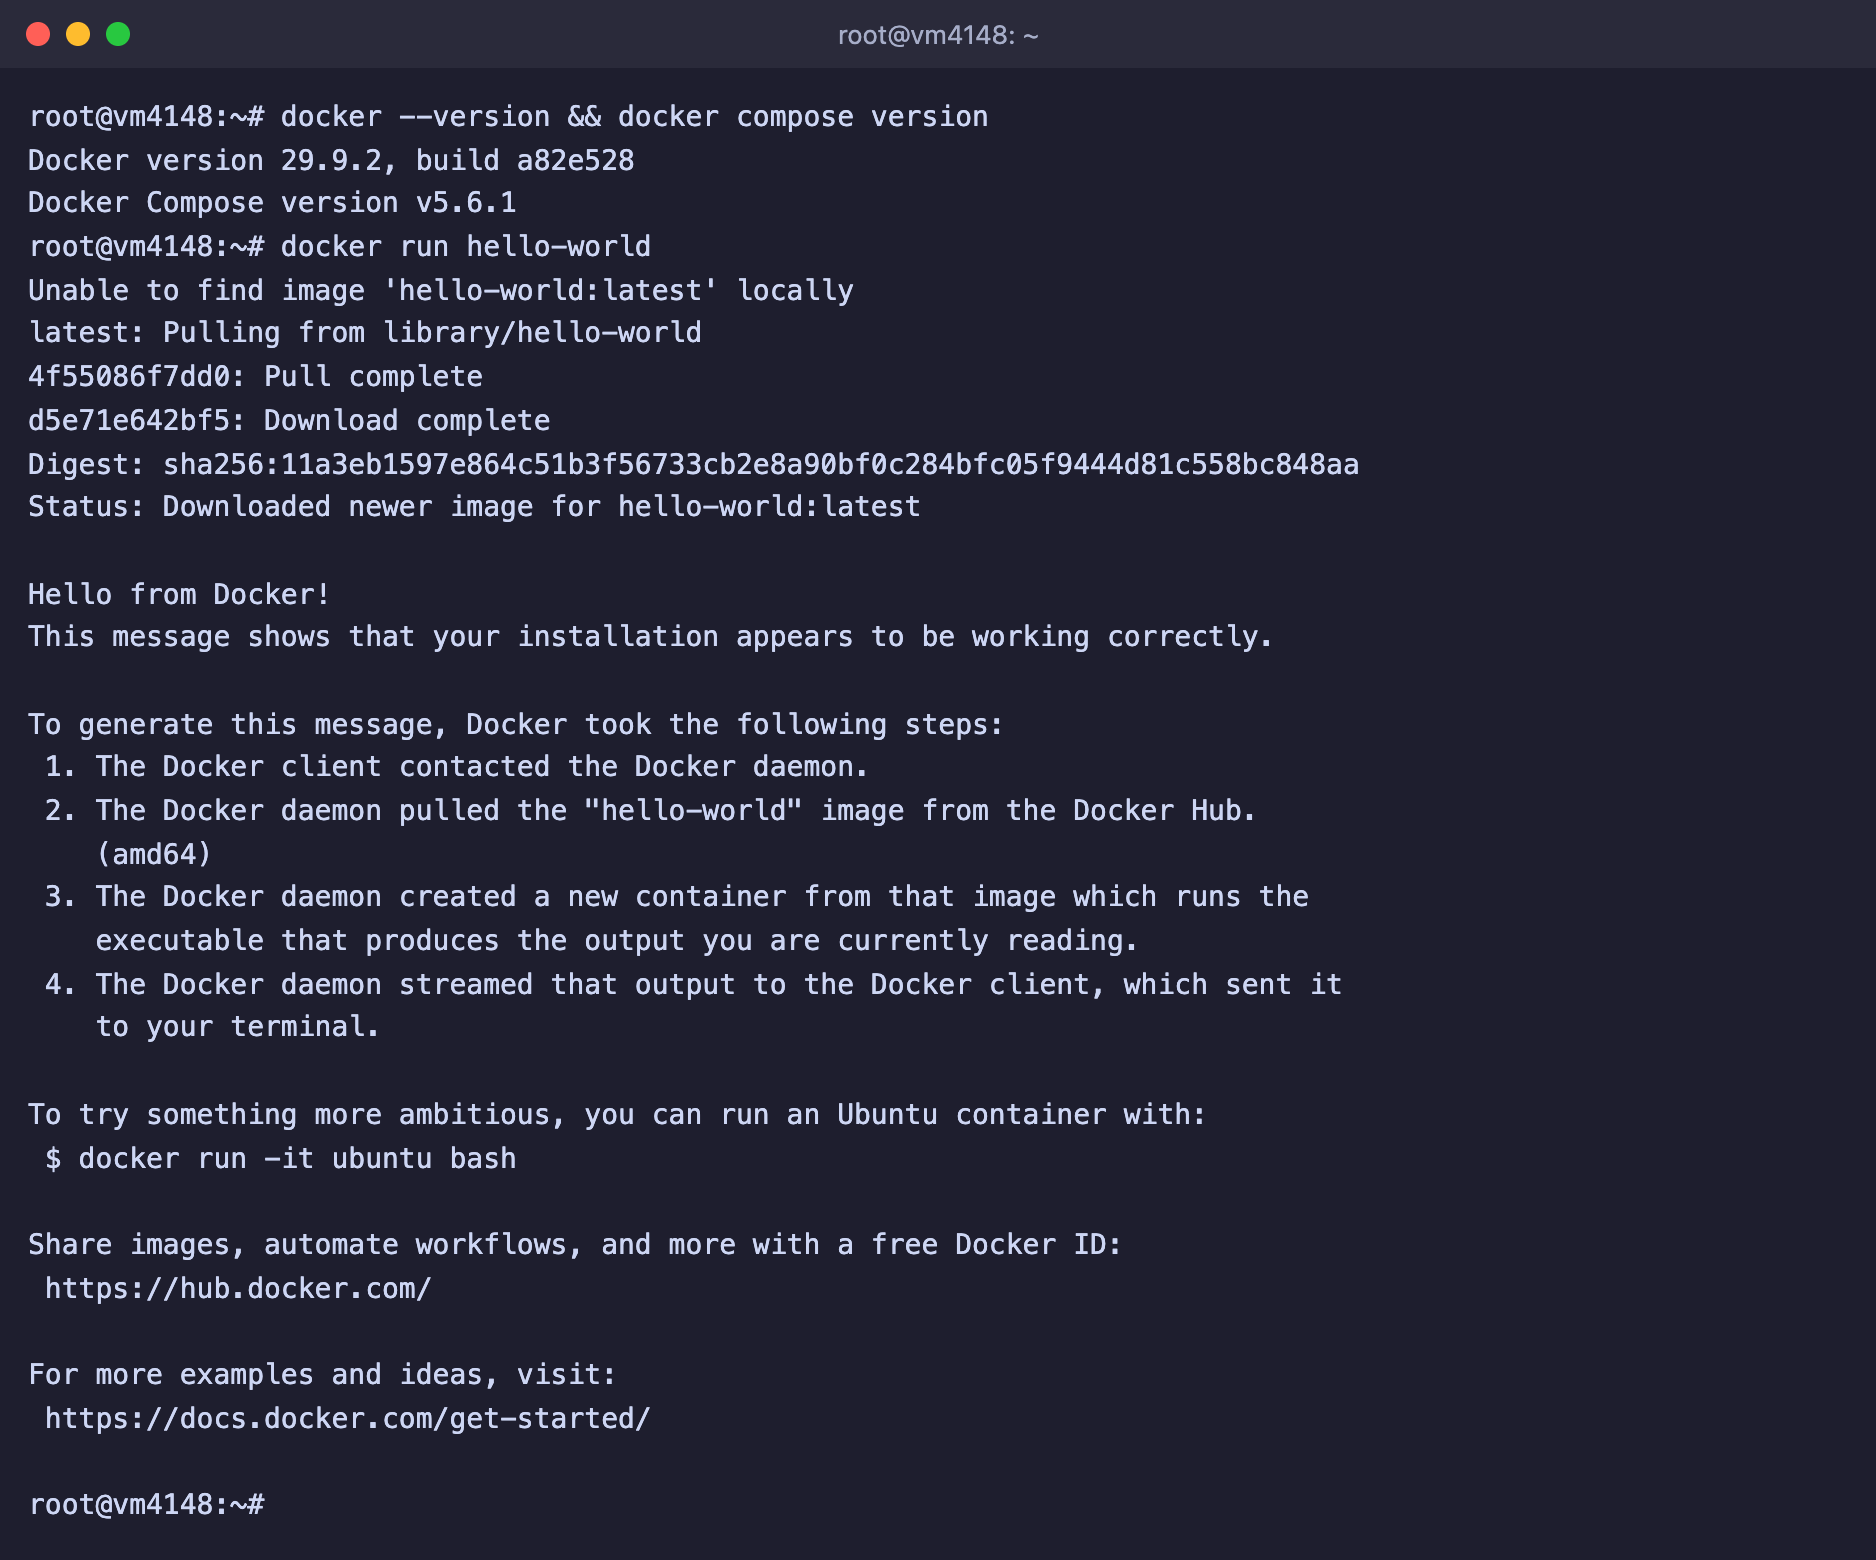
Docker and Compose are installed, and the test container ran successfully
3. Start your first container
As an example, let's start the nginx web server and open its page in a browser.
docker run -d --name web --restart unless-stopped -p 8080:80 nginxHere is what each part of the command means.
-druns the container in the background so the terminal stays free.--name webgives the container a clear name. Without it Docker makes up a random one.--restart unless-stoppedmakes Docker bring the container back up after the server reboots. We checked that without this option the container stays off after Docker restarts.-p 8080:80publishes a port. Connections to port 8080 of the server go to port 80 inside the container.nginxis the image name in Docker Hub.
Open http://SERVER_IP:8080 in a browser. The Welcome to nginx! page should appear.
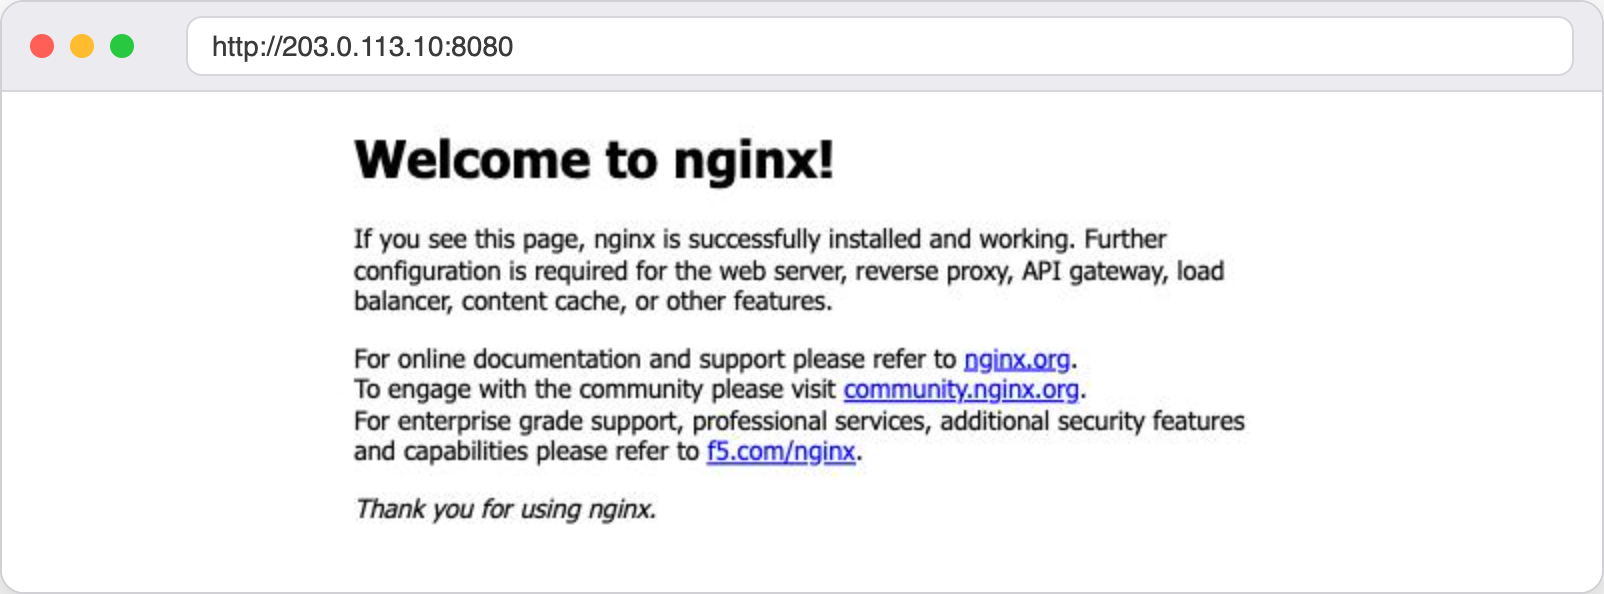
nginx runs in a container and answers on port 8080
Now you can look at the container and try the basic commands.
# List of running containers
docker ps

# Container logs, press Ctrl+C to exit
docker logs -f web

# Stop and start again
docker stop web
docker start web

# Stop and remove the container
docker rm -f web
Remove the web container before the next step, otherwise port 8080 will be taken.
4. Run an application with Docker Compose
Let's build a WordPress site with a MariaDB database. These are two containers that need to find each other, keep their data and start together, so this example shows clearly why Compose is needed.
Create a project folder and a
.envfile with a random database password.bashmkdir -p /opt/wordpress && cd /opt/wordpress echo "DB_PASSWORD=$(openssl rand -hex 16)" > .envCreate the
docker-compose.ymlfile.bashcat > docker-compose.yml <<'EOF' services: db: image: mariadb:11 restart: unless-stopped environment: MARIADB_DATABASE: wordpress MARIADB_USER: wordpress MARIADB_PASSWORD: ${DB_PASSWORD} MARIADB_RANDOM_ROOT_PASSWORD: "1" volumes: - db_data:/var/lib/mysql wordpress: image: wordpress:latest restart: unless-stopped depends_on: - db ports: - "8080:80" environment: WORDPRESS_DB_HOST: db WORDPRESS_DB_USER: wordpress WORDPRESS_DB_PASSWORD: ${DB_PASSWORD} WORDPRESS_DB_NAME: wordpress volumes: - wp_data:/var/www/html volumes: db_data: wp_data: EOFStart both containers and check their state.
bashdocker compose up -d docker compose ps
Compose creates a shared network, two volumes and two containers. The STATUS column should show Up for both.

The network, the volumes and both containers are created with one command
Open http://SERVER_IP:8080, and you will see the first step of the WordPress installation with language selection. If this page opens, WordPress has already connected to the database. Compose took the database password from the .env file, and WordPress found the database address by the service name db.

WordPress is running and already sees its database
This is a learning example
A real site needs a domain and HTTPS. Do not leave the WordPress installer open on port 8080, otherwise whoever opens the page first can finish the installation and become the administrator. To remove the example, run docker compose down -v in the project folder.
The other Compose commands are run in the folder where docker-compose.yml is located.
# Logs of all project containers
docker compose logs -f

# Stop and remove the containers, the data volumes are kept
docker compose down

# The same, but together with the volumes, the data will be deleted
docker compose down -v
Ports and the firewall
This is the most common trap when working with Docker on a server. If the UFW firewall is enabled on the server, it seems natural that a port closed in it cannot be reached from outside. However, Docker publishes ports with its own iptables rules, and packets to a container get through before the UFW rules even get their turn. We tested this on a test server. UFW allowed only SSH and a few other ports, but not port 8080, and yet the nginx page from the container opened from another computer without any restrictions. The official Docker documentation also warns about this behaviour.
That is why service interfaces that should not be visible to the whole internet are better published only on the server's internal address 127.0.0.1.
# The port is reachable only from the server itself
docker run -d --name web-local -p 127.0.0.1:8081:80 nginx
In a Compose file this is written the same way, "127.0.0.1:8081:80". Such a container answers on the server itself, while a connection to port 8081 from outside is not established, which we also checked. You can open it on your own computer through an SSH tunnel or through a web server with HTTPS, as in the article about n8n.
Do not publish databases to the internet
Add a ports line for MySQL, MariaDB, PostgreSQL or Redis only if you clearly understand why you need it. Containers of one Compose project do not need ports to talk to each other, they already find each other by name.
Where the data is stored
Volumes created by Compose are named after the project folder, for example wordpress_db_data, and are stored on the server's disk in the /var/lib/docker/volumes/ directory. The docker compose down command removes the containers but keeps the volumes, so after a new docker compose up -d the site comes back with all its data. Volumes disappear only after docker compose down -v or docker volume rm.
# List of volumes
docker volume ls

# Where the volume is located on disk
docker volume inspect wordpress_wp_data --format '{{.Mountpoint}}'
Include volumes in your backups the same way as regular files. For databases it is more reliable to make a dump with the database's own tools than to copy the files of a running database.
Updating containers and Docker itself
A container does not update itself. To move to a new version of a program, you need to download a fresh image and re-create the container, and the data in the volumes is kept.
# Inside the Compose project folder
docker compose pull
docker compose up -d
Compose re-creates only the containers that have a new image. Docker itself is updated together with the system, because its packages come from the repository.
apt update && apt upgrade -yDuring the update Docker restarts, and the containers stop for a short while. Those with restart: unless-stopped or always set will come back up by themselves.
Disk space and logs
Old images stay on the disk after updates and gradually fill it up. Here is how to see how much space Docker and its data take and remove what is not needed.
# How much space images, containers and volumes take
docker system df

# Remove stopped containers, unused networks and untagged images
docker system prune

# Remove all images that no container uses
docker image prune -a
The second reason for running out of space is logs. By default Docker writes everything a container prints to the console into a file with no size limit, and for a chatty container this file can grow to gigabytes. The limit is set in the /etc/docker/daemon.json file.
cat > /etc/docker/daemon.json <<'EOF'
{
  "log-driver": "json-file",
  "log-opts": {
    "max-size": "10m",
    "max-file": "3"
  }
}
EOF
systemctl restart docker
Now each container keeps no more than three log files of 10 MB each. Keep in mind that the setting applies only to new containers. On the test server the containers that already existed kept their old settings, so existing projects need to be re-created with docker compose up -d --force-recreate.
The Portainer web panel
If you prefer to manage containers with a mouse, install Portainer. It is a web panel that shows all containers, images, volumes and logs, and you can start, stop and update containers in it with buttons.
docker volume create portainer_data
docker run -d -p 9443:9443 --name portainer --restart=always \
  -v /var/run/docker.sock:/var/run/docker.sock \
  -v portainer_data:/data \
  portainer/portainer-ce:lts
Open https://SERVER_IP:9443. The browser will warn about an insecure certificate because Portainer uses a self-signed one, and that is expected. Confirm that you want to continue, and the administrator creation form opens. The form waits no longer than 5 minutes. If you miss that window, Portainer locks it with the message Your Portainer instance timed out for security purposes, and you need to restart the container with docker restart portainer and take the new token.
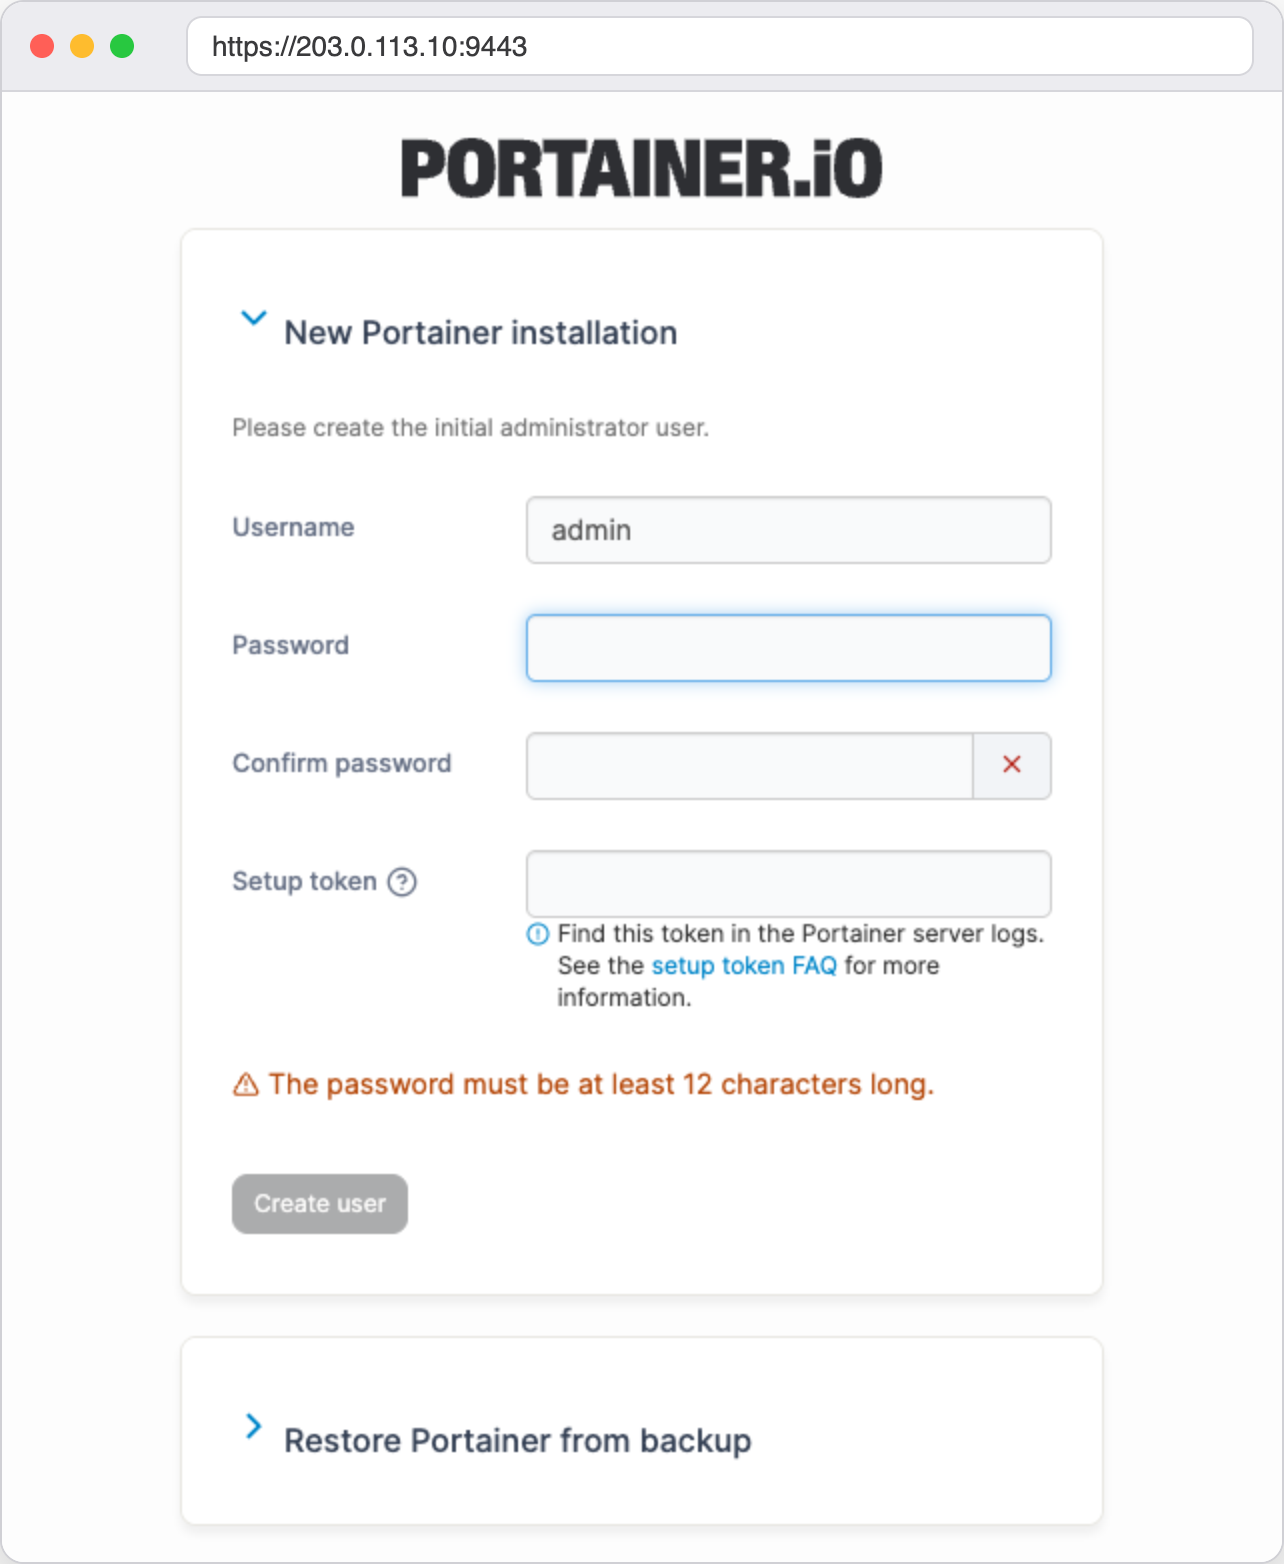
First login to Portainer, you need a password and the token from the logs
Choose an administrator name and a password at least 12 characters long.
In the Setup token field, paste the token from the Portainer logs. The command below shows it, copy the value after
setup_token=.bashdocker logs portainer 2>&1 | grep setup_token | tail -1Click Create user.
The panel sees all of Docker
Portainer can manage any container on the server, so access to it is equal to root access. Use a long password, and if only you need the panel, publish it on 127.0.0.1:9443 and open it through an SSH tunnel.
Useful commands
docker ps -a                  # all containers, including stopped ones
docker images                 # downloaded images
docker logs --tail 50 web     # last 50 lines of the log
docker exec -it web sh        # open a console inside the container, type exit to leave
docker stats                  # CPU and memory load of the containers
docker restart web            # restart the container
docker pull nginx             # download the latest version of the image
docker rm -f web              # remove the container
docker rmi nginx              # remove the image
Frequently asked questions
docker-compose: command not found
The old first version of Compose was run with a hyphenated command, docker-compose. Now Compose is installed as a Docker plugin, and the command is written with a space, docker compose. If you come across docker-compose up -d in someone else's guide, just replace the hyphen with a space.
permission denied while trying to connect to the docker API
The command was run by a regular user who has no rights to Docker. Run it as root, or add the user to the docker group and reconnect over SSH.
usermod -aG docker usernameKeep in mind that a member of the docker group effectively gets root rights on the server.
Bind for 0.0.0.0:8080 failed: port is already allocated
The port is already taken by another container or program. Check what is using it, and either stop that container or publish the new one on a different port, for example -p 8082:80.
docker ps --format '{{.Names}} {{.Ports}}'
ss -ltnp | grep 8080
Cannot connect to the Docker daemon. Is the docker daemon running?
The Docker service is stopped. Start it and enable it to start at boot.
systemctl enable --now docker
systemctl status docker
The container did not come up after a server reboot
The container has no restart policy. Add --restart unless-stopped to the docker run command or the restart: unless-stopped line to the Compose service, and re-create the container. For a container that already exists, the policy can be changed on the fly.
docker update --restart unless-stopped webHow to remove Docker completely
Remove the packages, and then the directories with images, containers and volumes. All container data will be deleted along with them.
apt purge -y docker-ce docker-ce-cli containerd.io docker-buildx-plugin docker-compose-plugin docker-ce-rootless-extras docker-model-plugin
rm -rf /var/lib/docker /var/lib/containerd
rm -f /etc/apt/sources.list.d/docker.list /etc/apt/sources.list.d/docker.sources /etc/apt/keyrings/docker.asc
Our resources
Telegram channel: https://t.me/f3cloud_news
F3 Cloud: https://f3cloud.com