

How to create your own proxy server on a VPS with 3Proxy: quick and manual installation
3Proxy Manager – a handy tool that lets you create HTTP(S) and SOCKS5 proxy servers in a few clicks. If you are interested in queries such as "3proxy installation", "3proxy configuration" or "adding a user to 3proxy", you have come to the right place!
Method 1. Simple installation via 3Proxy Manager
Step 1. Installing the script
To begin with, we download and install the script. Run the following commands in the terminal:
cd /root && curl -o 3proxy.sh https://cdn.f3cloud.com/scripts/3proxy.sh && chmod +x 3proxy.shRun the script with the command:
/root/3proxy.shAfter starting the script, we type 1 and press Enter
%20(1).png)
First run of the script
Port configuration:
- You will be asked to set up an HTTP/S proxy. Answer yes (or no) and specify the port (from 1 to 65535).
- Then set up the SOCKS5 proxy in the same way.
WARNING
Important: use different ports for HTTP/S and SOCKS5, as one port cannot be used for both protocols.
If you want to finish the setup quickly, just press Enter four times.
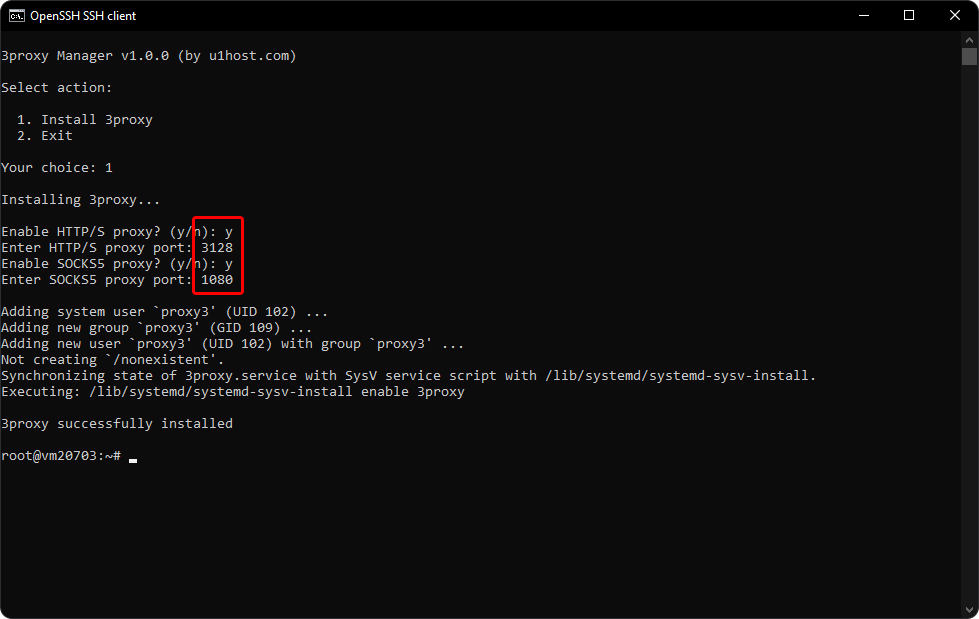
Successful installation of 3Proxy
Step 2. Creating a new user
To add a new user:
Run the script with the command:
/root/3proxy.shType 1 and press Enter
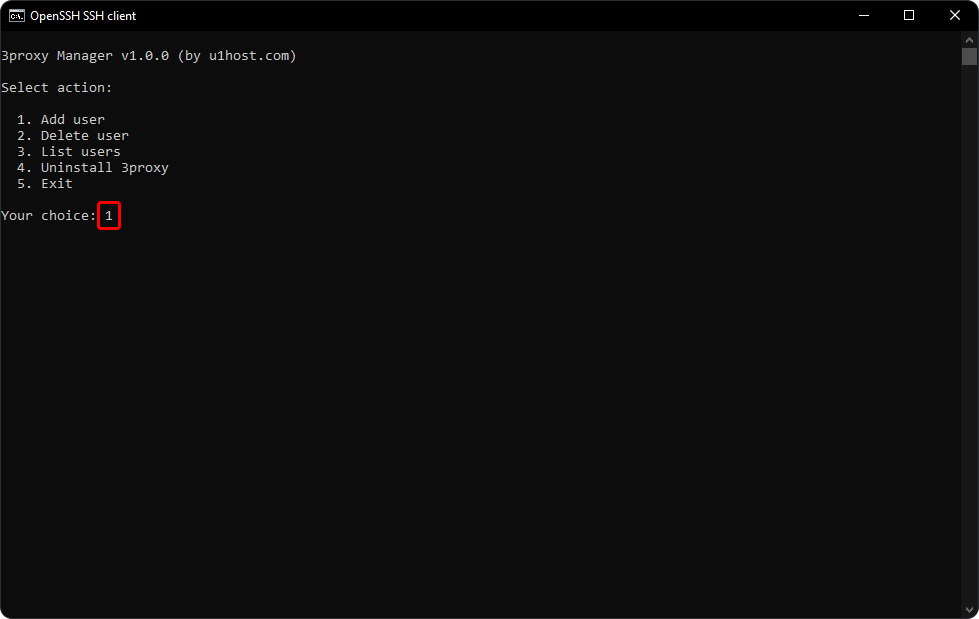
Second run of the script
Specify the login and password for the new user. Pressing Enter after each entry.
.png)
The created proxy
Once it is finished, you will see the proxy connection details in two formats. The proxies will start working right away.
Step 3. Getting the list of users
We run the script with the command:
/root/3proxy.shAfter it starts, we type 3 to view the list of users and press Enter
.png)
Output of the user list
Method 2. Manual installation and configuration of 3proxy
Step 1. Installing 3proxy on Debian
We update the package indexes and install build-essential to build 3proxy from the GitHub repository with the command
apt update && apt install build-essential -yNext, we download the repository from GitHub and install it:
wget https://github.com/z3APA3A/3proxy/archive/0.9.4.tar.gz
tar xzf 0.9.4.tar.gz
cd ~/3proxy-0.9.4
make -f Makefile.Linux
mkdir /etc/3proxy
cd ~/3proxy-0.9.4/bin
cp 3proxy /usr/bin/
Next, we create a new user for proxy3 (for better security)
adduser --system --no-create-home --disabled-login --group proxy3Next, we get the user's information (uid, gid) and remember it, it will be needed later
id proxy3Example of successful output in the console:
###
uid=102(proxy3) gid=109(proxy3) groups=109(proxy3)
###
Step 2. Setting up the 3proxy config
Next, we copy the code below into a notepad and start the configuration
setgid 109
setuid 102
nserver 8.8.8.8
nserver 1.1.1.1
nscache 65536
timeouts 1 5 30 60 180 1800 15 60
users $/etc/3proxy/.proxyauth
daemon
auth cache strong
proxy -n -p3128 -a
socks -p1080 -a
First of all, we replace the setgid and setuid values with our own (gid, uid).
Next, we choose which protocols we will use, if you want to remove the http(s) protocol, then remove the line proxy -n -p3128 -a, the same goes for the socks5 protocol (remove the line socks -p1080 -a), you can also change the ports to any others.
Next, we go back to the server and create a new config file with the command:
nano /etc/3proxy/3proxy.cfgWe paste the config from the notepad by pressing RMB (right mouse button) in the terminal, then press the CTRL + O key combination (to write the file), then Enter, then CTRL + X to exit the nano editor.
Step 3. Creating the 3proxy service
For the proxies to start automatically when the server reboots – you need to create a service, enter the command:
nano /etc/systemd/system/3proxy.serviceAnd paste the following config into the terminal with RMB (right mouse button)
[Unit]
Description=3proxy Proxy Server
After=network.target

[Service]
Type=simple
ExecStart=/usr/bin/3proxy /etc/3proxy/3proxy.cfg
ExecStop=/bin/kill `/usr/bin/pgrep -u proxy3`
RemainAfterExit=yes
Restart=on-failure

[Install]
WantedBy=multi-user.target
Next, we press the CTRL + O key combination (to write the file) , then Enter, then CTRL + X to exit the nano editor.
Now we add the service to autostart, enable it and start it:
systemctl daemon-reload
systemctl enable 3proxy
systemctl start 3proxy
Step 4. Creating 3proxy users
Next, we need to create a user, enter the following command in the console:
nano /etc/3proxy/.proxyauthAnd enter the users in the format <LOGIN>:CL:<PASSWORD>, you can create as many of them as you like, the separator - a new line
## addusers in this format:
#user:CL:password
##see for documentation: http://www.3proxy.ru/howtoe.asp#USERS
puser1:CL:p@ssw0rd
Next, we press the CTRL + O key combination (to write the file) , then Enter, then CTRL + X to exit the nano editor.
If you have added users before – restart the 3proxy service with the command
systemctl restart 3proxyStep 5. Removing the installation files
We clean up the installation files with the command:
rm ~/0.9.4.tar.gz
rm -r ~/3proxy-0.9.4
Great, you can test the proxies, fill in the server IP address, port, login and password, this is what I got:
http://<ip>:3128:puser1:p@ssw0rd
socks5://<ip>:1080:puser1:p@ssw0rd
INFO
Don't forget to put your server IP address instead of <ip>, as well as your own login and password from the section “Creating 3proxy users”.
Conclusions
By using one of these approaches, you get high-quality proxies of your own that only you use, with no speed limits or any restrictions.
Our resources
Telegram channel: https://t.me/
F3 Cloud: https://f3cloud.com