
Nextcloud is a cloud storage that runs on your own server. Just like Google Drive or Dropbox, it lets you store files, sync them between devices and share links, and on top of that you can keep calendars and contacts, edit documents and make calls. The difference is that all your data lives on your VPS instead of with a third-party service. In this article we will install Nextcloud the official way with Nextcloud All-in-One, connect a domain with a certificate, log in to the cloud and go through how to manage it. We repeated every step on a test server with Debian 12. At the time of testing, the AIO version was 14.3.0 and Nextcloud itself was 34.0.4.
How Nextcloud All-in-One works
Nextcloud is made up of several programs. There is the PHP web application itself, a PostgreSQL database, a Redis cache and a web server, and documents and calls need separate services on top of that. It used to be that you had to install and connect all of this by hand. Nextcloud All-in-One, or AIO for short, does it for you. You start a single management container, it shows a web panel, and through that panel it downloads, configures and starts all the other components, each in its own Docker container.
AIO has two web interfaces, and it is important not to mix them up. The AIO panel runs on port 8080 and is only used for management, meaning installation, updates, backups and turning components on and off. Nextcloud itself opens on your domain on the regular port 443, and that is what your users work with. AIO gets the Let's Encrypt certificate for the domain on its own, so you do not need to set up HTTPS by hand.
Nextcloud is demanding on resources, and most of all on disk space. On our test server the AIO container images took about 12 GB, and almost 7 GB of that went to the office suite. All the running containers together used about 2.5 GB of memory, and almost half of it was again taken by the office suite.
What you will need
- A server with Debian 12 or Ubuntu 24.04 and at least 4 GB of memory, for example the DE-RZ9-2 plan. For your own files, leave space on top of the 12 GB that the programs themselves will take. If you do not have a server yet, order one using this guide.
- Docker. How to install it is explained in the article about Docker and Docker Compose.
- A domain or subdomain, for example
cloud.example.com, with an A record pointing to the server's IP address. How to create one is described in the article about connecting a domain. - Free ports 80 and 443. The server must not have another web server using them, otherwise AIO will not be able to work in its normal mode.
Step 1. Start the management container
Connect to the server over SSH and run the official AIO start command.
docker run \
  --init \
  --sig-proxy=false \
  --name nextcloud-aio-mastercontainer \
  --restart always \
  --publish 80:80 \
  --publish 8080:8080 \
  --publish 8443:8443 \
  --volume nextcloud_aio_mastercontainer:/mnt/docker-aio-config \
  --volume /var/run/docker.sock:/var/run/docker.sock:ro \
  ghcr.io/nextcloud-releases/all-in-one:latest
Docker will download the image and start the container. Do not change the name nextcloud-aio-mastercontainer, because the AIO update mechanism relies on it.
AIO uses several ports. Nextcloud itself works through 443, the AIO panel takes 8080, 80 is needed for redirecting to Nextcloud and for getting the panel's certificate, and 3478 over TCP and UDP is needed for calls in Nextcloud Talk.
Docker opens ports around UFW
Ports that Docker publishes are reachable from the internet even if the UFW firewall has no rule for them. We checked this on the test server. The AIO panel on port 8080 opened from outside even though that port was not open in UFW. So do not count on closing the panel with UFW, it is protected only by the passphrase. You can read more about this behavior in the article about Docker.
Step 2. Save the passphrase
Open the AIO panel in your browser using the server's IP address, for example https://203.0.113.10:8080. The AIO developers advise opening this port by IP address and not by domain. The certificate here is self-signed, so the browser will show a warning, and you need to accept it.
On the first page AIO shows a passphrase of eight words. This is the key to the management panel.
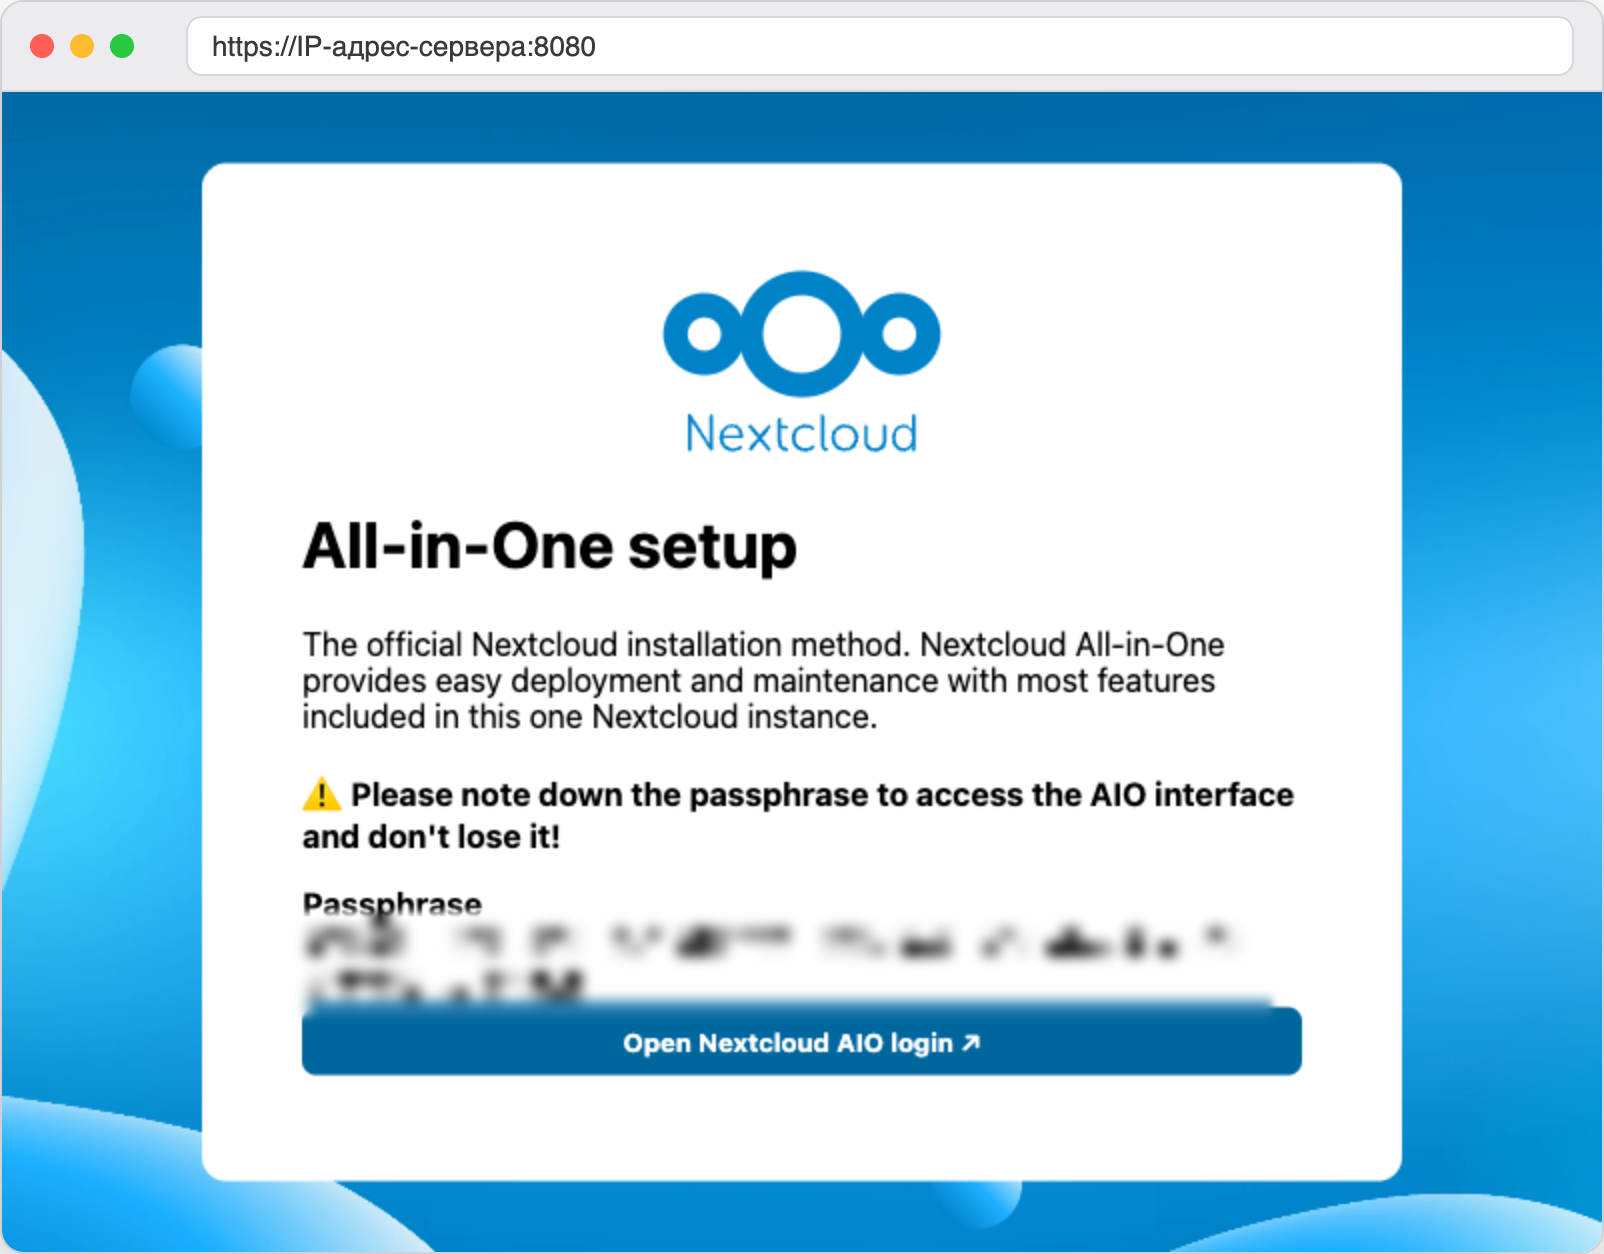
The passphrase is shown only once, here it is hidden
Write the phrase down right away
We checked that when you open the page again, the phrase is no longer shown. Save it in a password manager before you go any further.
Click Open Nextcloud AIO login, paste the phrase and log in.
Step 3. Enter your domain
AIO will ask for the domain that Nextcloud will be opened on. Type it into the field and click Submit domain.
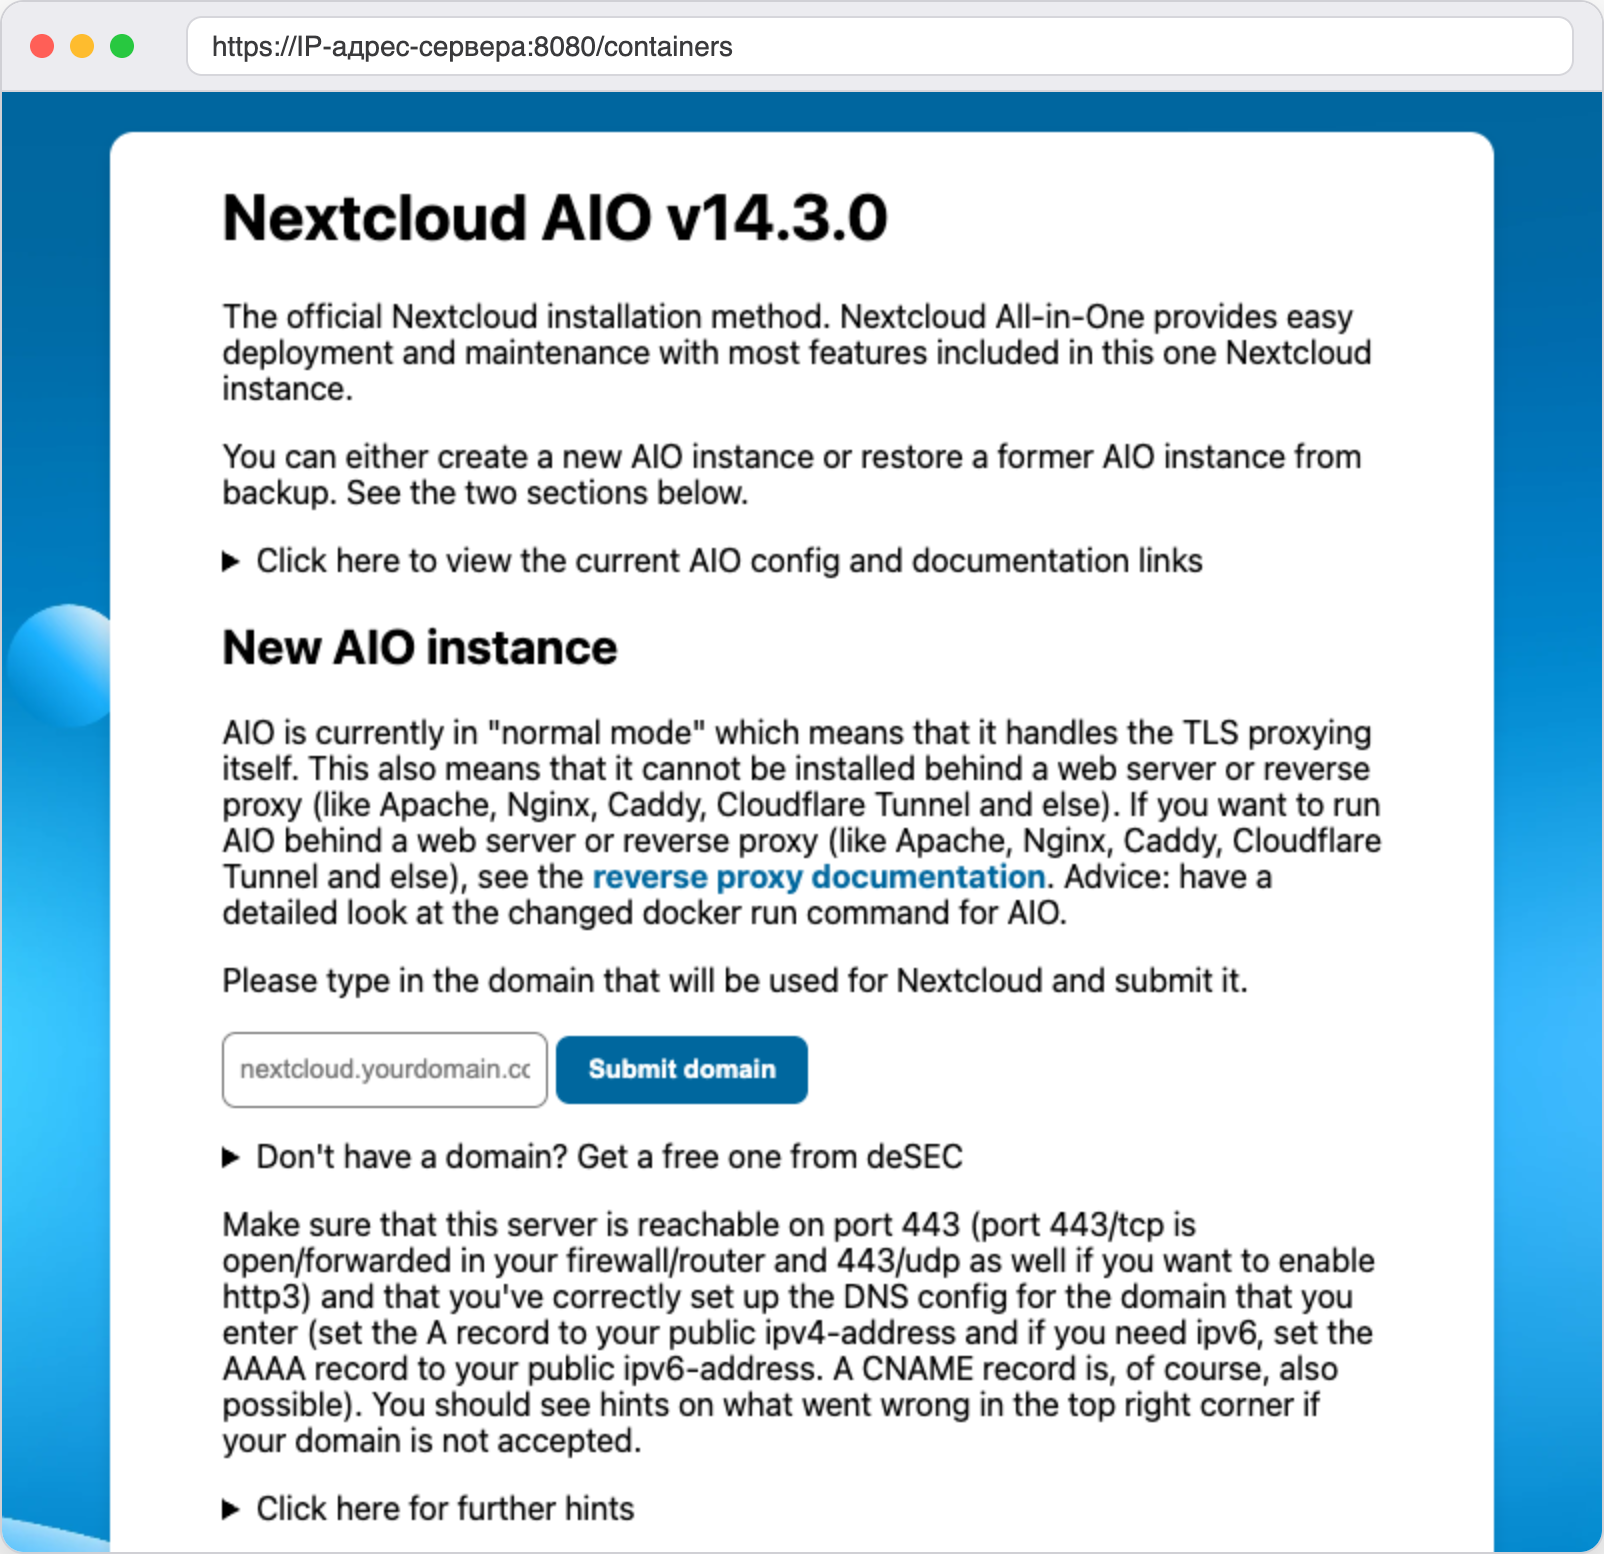
You enter the domain once, during installation
Before it accepts the domain, AIO checks that it really points to this server and that port 443 is open. If the check fails, AIO shows hints in the top right corner. Most often the reason is that the A record has not updated yet or the port is closed by a firewall.
No domain of your own
The panel has a section called Don't have a domain? Get a free one from deSEC. Through it, AIO can register a subdomain in the dedyn.io zone for free and keep track of its record on its own.
Step 4. Choose components and start the installation
After the domain check, AIO will show the install button and a list of Optional containers, which are additional components.
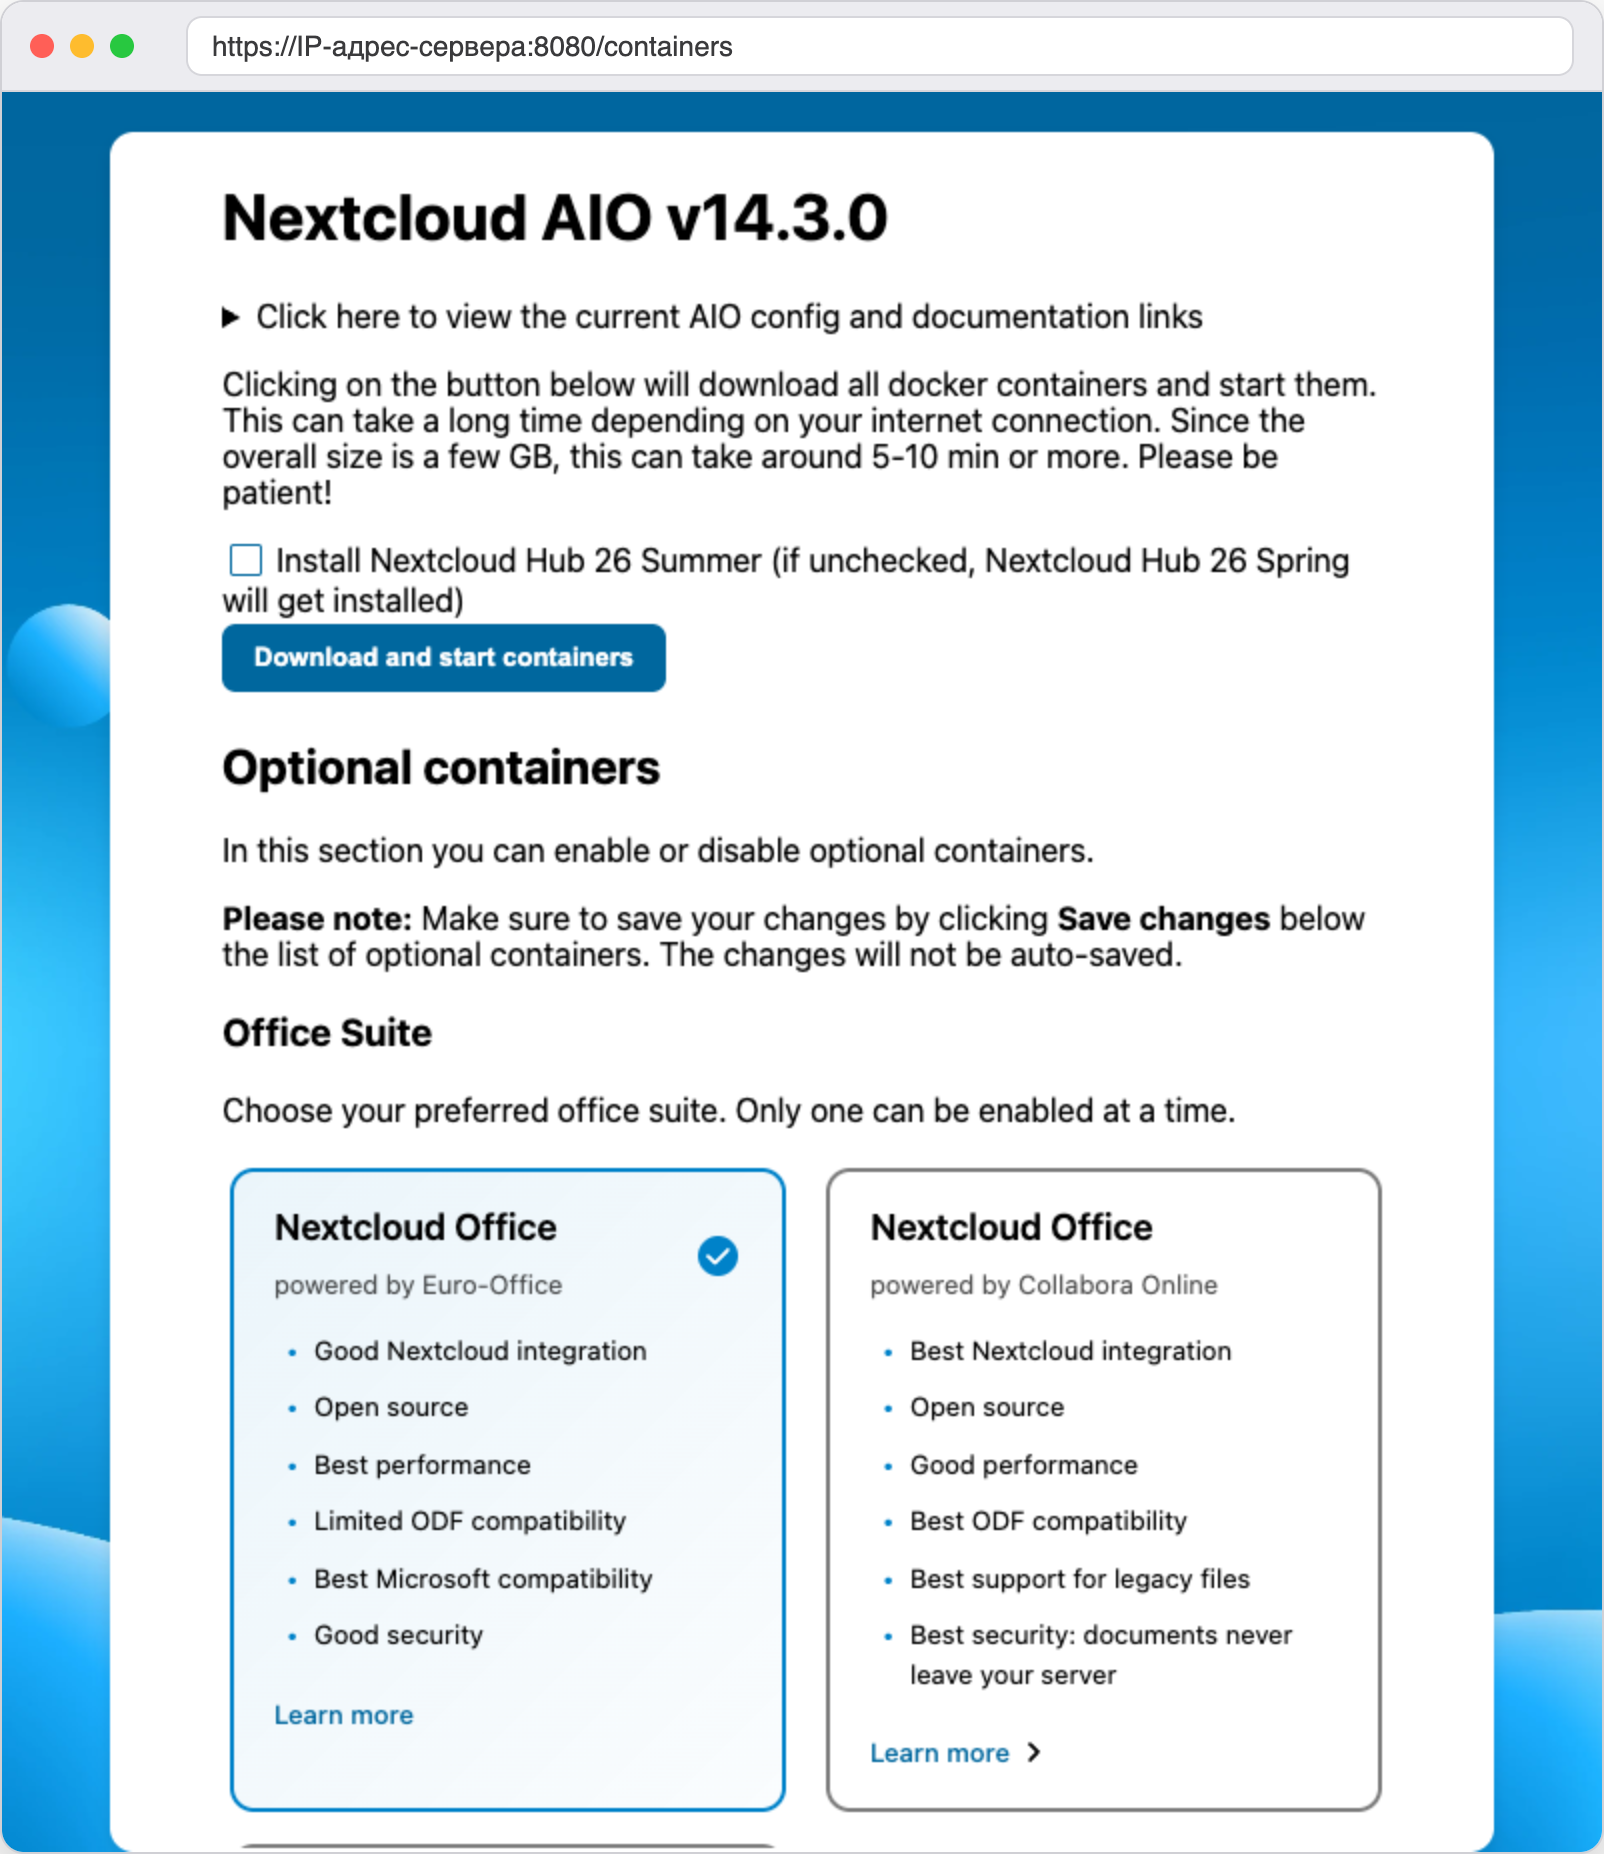
The install button and the choice of office suite
By default, these were enabled for us:
- Nextcloud Office based on Euro-Office, for working with documents right in the browser. Instead of it you can choose the option based on Collabora Online, and only one of them works at a time;
- Nextcloud Talk for voice and video calls;
- Imaginary for image previews in HEIC, HEIF, PDF, SVG, TIFF, WebP and other formats;
- Nextcloud Whiteboard, a shared board.
You can turn off anything you do not need and click Save changes. For example, if you only need file storage, turn off the office suite. It takes the most space and memory. You can turn components on or off later in the same panel.
When everything is chosen, click Download and start containers. On our server AIO downloaded and started all the containers in about 4 minutes. When the installation finishes, every container gets a green Running mark, and at the top of the page you will see the admin login and the initial password.
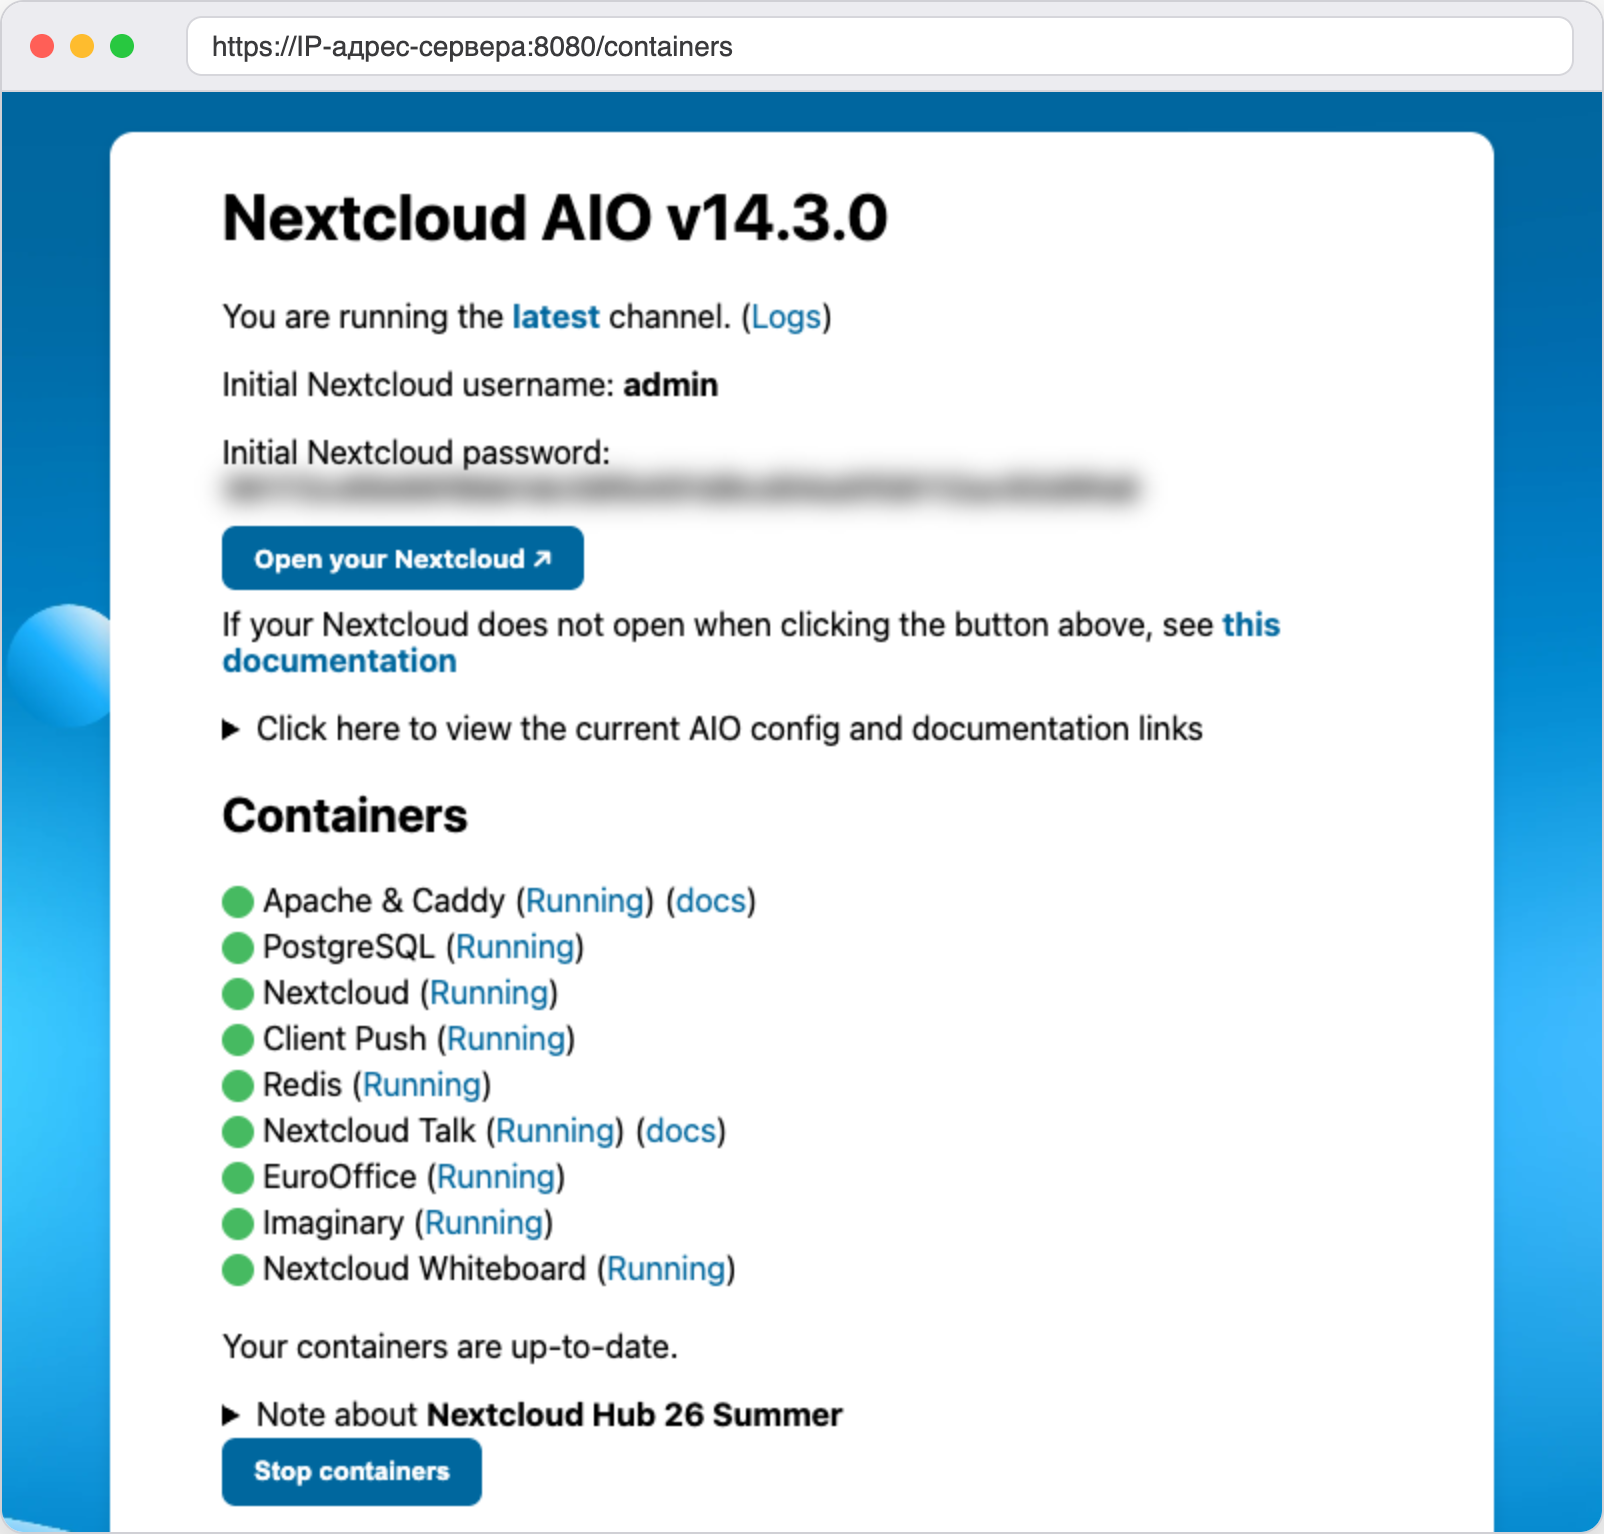
All containers are running, the admin password is hidden
Step 5. Log in to Nextcloud
Copy the Initial Nextcloud password and click Open your Nextcloud. Nextcloud will open on your domain, already with a real certificate. On our server AIO got the Let's Encrypt certificate on its own. Log in with the login admin and the password you copied.
On your first login Nextcloud shows welcome windows. You can scroll through them or close them. In the Files section there are already sample documents and folders, and you can delete them.

The cloud is ready, you can start uploading files
Change the admin password to your own in the personal settings right away, and create separate accounts for yourself and your family. It is better not to work under admin every day.
How to manage Nextcloud after installation
AIO panel. While Nextcloud is running, direct login to the AIO panel with the passphrase is blocked. We checked this. The login page says The direct login is blocked since Nextcloud is running.
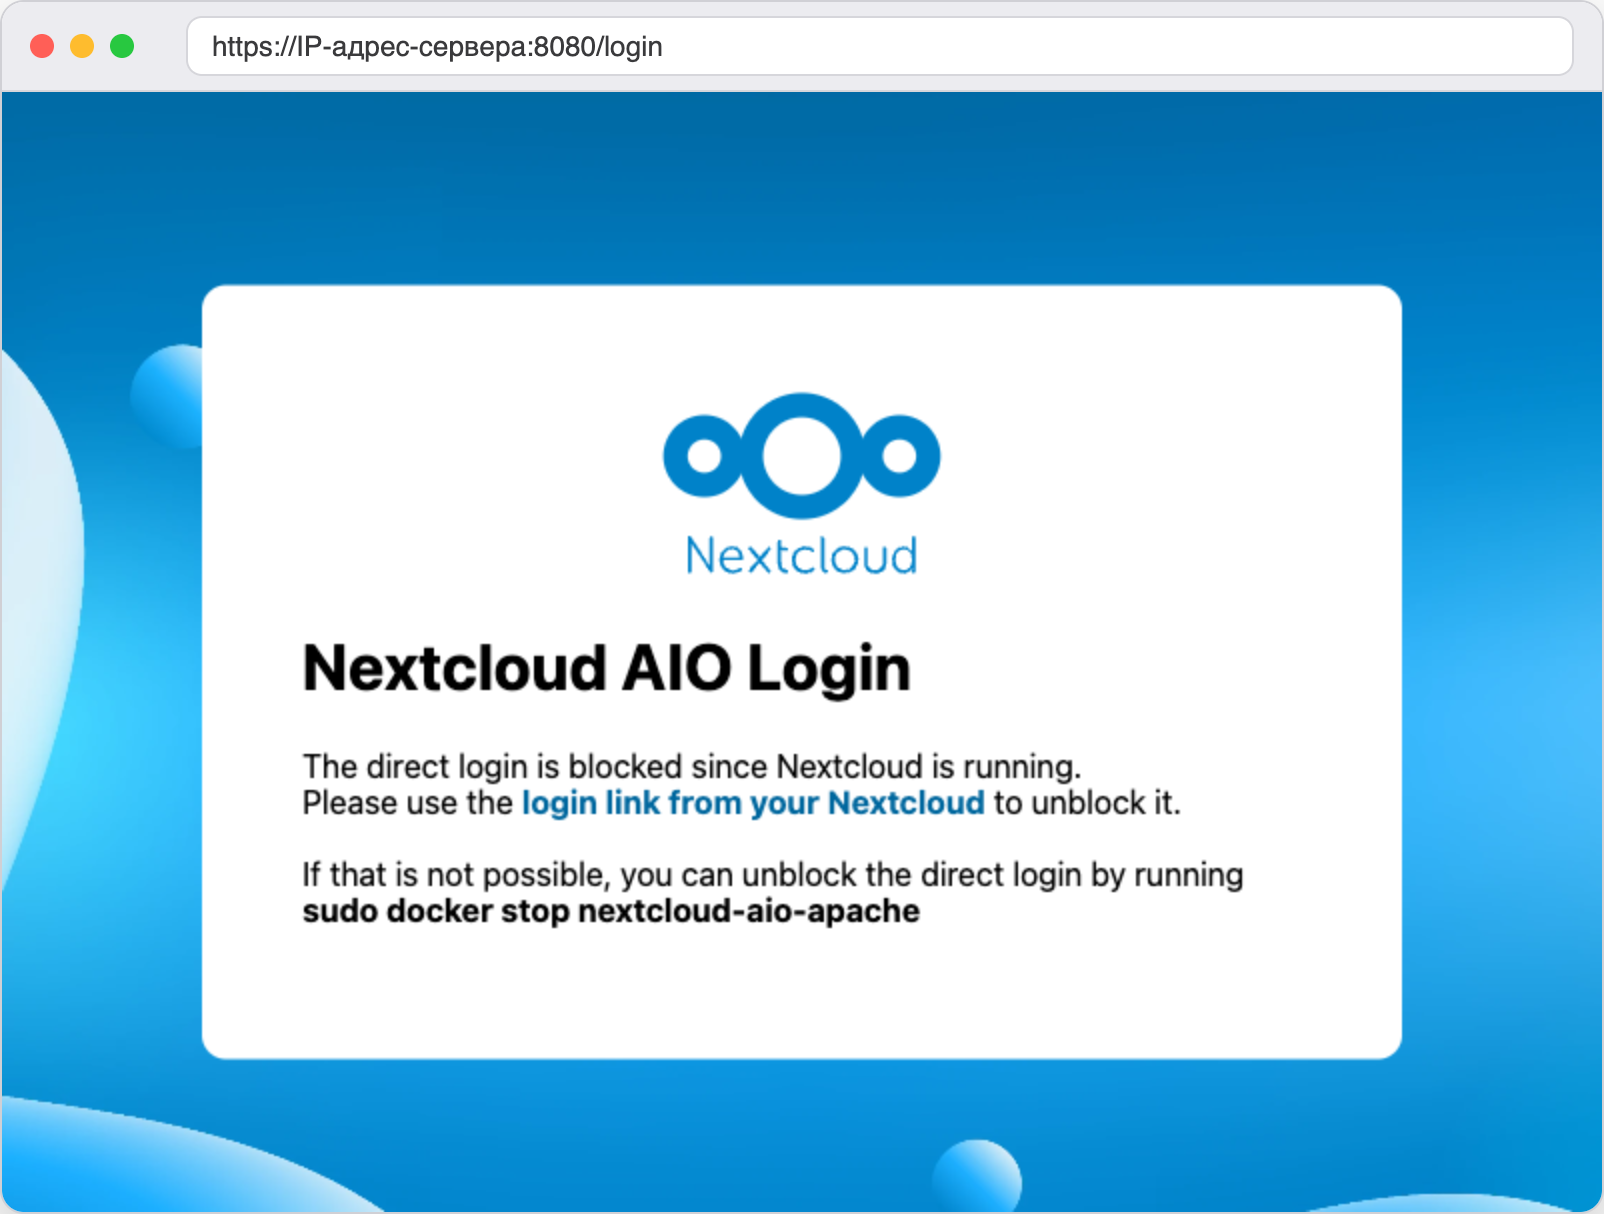
While Nextcloud is running, the panel opens only through Nextcloud itself
To get into the panel, log in to Nextcloud as an administrator and open the page https://your-domain/settings/admin/overview. At the top there will be an Open Nextcloud AIO Interface button. After you follow it, you will be able to enter the passphrase on the AIO login page.
occ commands. For maintenance Nextcloud has a console utility called occ. In AIO it runs inside the container.
docker exec --user www-data nextcloud-aio-nextcloud php occ statusThe command shows the version and the state of Nextcloud. Other occ commands are run the same way, for example the settings check occ setupchecks.
Backups. The AIO panel has a Backup and restore section. Enter a folder on the server where backups should be saved, for example /mnt/backup, and click Submit backup location. AIO will show the password used to encrypt the backups. Keep it as safe as the passphrase, because without it you will not be able to restore your data from a backup. According to the AIO documentation, in this same section you can turn on daily backups followed by an automatic update of the containers, Nextcloud and its apps.
Frequently asked questions
The direct login is blocked since Nextcloud is running
This is not an error, it is protection for the AIO panel. Open it through Nextcloud with the Open Nextcloud AIO Interface button on the page https://your-domain/settings/admin/overview. If you cannot log in to Nextcloud, AIO suggests the command docker stop nextcloud-aio-apache on this same page, after which the login with the phrase opens up again.
The domain fails the check
- Check that the domain's A record points to the server's IP address, for example with the command
dig cloud.example.com +short. You can read more about checking DNS in the article about nslookup and dig. - Make sure port
443is not used by another web server, for example with the commandss -tlnp | grep ':443'. - If the record was only just created, wait for it to update.
The setup check shows a warning about default phone region
Nextcloud wants to know the default country for phone numbers. We saw this warning right after the installation. Set the country with the command below, and replace RU with your country code.
docker exec --user www-data nextcloud-aio-nextcloud php occ config:system:set default_phone_region --value="RU"I lost the Nextcloud admin password
The initial password is shown in the AIO panel until you change it. If you have already changed the password and forgotten it, set a new one with an occ command.
docker exec -it --user www-data nextcloud-aio-nextcloud php occ user:resetpassword adminOur resources
Telegram channel: https://t.me/f3cloud_news
F3 Cloud: https://f3cloud.com