
Immich is an open-source program for storing photos and videos on your own server. It works like Google Photos. Pictures are gathered into a timeline by date, searched by content, for example by the word beach, grouped by faces and opened in the browser and in the mobile app. The difference is that all the files live on your VPS and not with a third-party service. In this article we will install Immich the official way through Docker Compose, create an administrator, upload photos, see how search and face recognition work, close an unneeded port and set up backups with a restore check. We repeated every step on a test server with Debian 12, and the Immich version at the time of testing was 3.3.4.
How Immich works
Immich is not a single program but four containers started by one Docker Compose file. The main one, immich-server, shows the web interface, accepts uploads from the browser and the phone and runs background jobs. Next to it works PostgreSQL, which stores shooting dates, albums, names of people and settings, but not the photos themselves. The third container, Valkey, is compatible with Redis and keeps the job queue. The originals of photos and videos stay as ordinary files in a folder on the server disk, and the path to that folder is set by the UPLOAD_LOCATION parameter. That is why an "Immich backup" always consists of two parts, the database and the folder with files, and the library cannot be restored from just one of them.
The fourth container, immich-machine-learning, is what makes Immich look like Google Photos. When you upload a photo, the server saves the original, makes thumbnails, reads metadata such as the shooting date and the camera, and then hands the picture to the machine learning container. There the CLIP neural network turns the image into a set of numbers that describes its meaning, and this set is written to the database. When you later type the word beach into the search, the same neural network turns the word into the same kind of set of numbers, and the database picks the photos whose numbers are closest. This is why beaches are found even though the file name and the metadata contain no such word. Faces work in a similar way. A separate model finds faces in photos, calculates its own set of numbers for each one and merges similar faces into one person. All of this is calculated on the processor of your server inside the container, and no graphics card is needed.
Because of the neural networks, Immich is noticeably heavier than an ordinary file cloud. The Immich documentation names 6 GB of memory and 2 cores as the minimum and recommends 8 GB and 4 cores, and it says that with 4 GB you can work with machine learning turned off. We measured this on our own server. While Immich was processing the first 11 photos, the four containers together took up to 2.8 GB of memory, of which about 1.4 GB went to the server and about 1.2 GB to the machine learning container. The models are unloaded from memory after 300 seconds of idle time, and at rest the whole of Immich took about 1 GB. The neural networks are downloaded on first use and take about 2 GB more on disk.
What you will need
- A server with Debian 12 and at least 6 GB of memory, for example the DE-RZ9-3 plan. For comfortable work the DE-RZ9-4 with 8 GB of memory and 120 GB of NVMe will do, and that is exactly what we had. The disk size depends on your library, and according to the Immich documentation thumbnails and transcoded videos add 10–20 percent to it on average. If you do not have a server yet, order one using the guide.
- An SSH connection, for example via Termius. Commands are run as
root. - Docker with the Compose plugin. How to install them is described in a separate article. We had Docker 29.9.2 and Compose 5.6.1.
- About 7 GB of free space for the images and the neural networks, not counting your photos. You do not need a domain for the first launch.
Step 1. Check Docker
Immich works only with the modern Compose plugin, so the command must be docker compose with a space. The Immich documentation calls the old docker-compose unsupported. Check the versions.
docker --version
docker compose version
If the reply shows the versions of both programs, move on. If Docker is not found or the old docker.io package from the standard repositories is installed, install a fresh Docker using our guide.
Step 2. Download the Immich files
Create a folder for the project and download two official files. The first describes the containers, and the second holds the settings.
mkdir -p /opt/immich-app && cd /opt/immich-app
wget -O docker-compose.yml https://github.com/immich-app/immich/releases/latest/download/docker-compose.yml
wget -O .env https://github.com/immich-app/immich/releases/latest/download/example.env
The Compose file must be taken from the latest release and not from the main branch of the repository, because they may not match, and a comment in the file itself warns about this. The file sets the project name immich and the container names immich_server, immich_postgres, immich_redis and immich_machine_learning, so they will not be confused with your other containers. You do not need to edit the contents of docker-compose.yml, all the settings are in .env.
Step 3. Fill in the settings in .env
In the .env file you need to change two things, the database password and the time zone.
Generate a password. The command prints 32 characters made of digits and Latin letters, and Immich allows only the characters
A-Za-z0-9in this password, otherwise Docker may parse the file incorrectly. Copy the result.bashopenssl rand -hex 16Open the file in an editor.
bashnano .envFind the line
DB_PASSWORD=postgresand replacepostgreswith the password you copied. The password is needed only for the containers to talk to each other, and the database is not open to the outside, but you should not leave the default value.Find the line
# TZ=Etc/UTCand delete the hash and the space at the start. If you like, replace the value with your own time zone from the tz database list, for exampleEurope/Moscow. We leftEtc/UTC.Save the file with Ctrl + O, then Enter, and leave the editor with Ctrl + X.
Protect the file from outsiders, because it holds the password.
bashchmod 600 .env
Check the result. This command shows only the lines with settings, without the comments.
grep -vE '^(#|$)' .env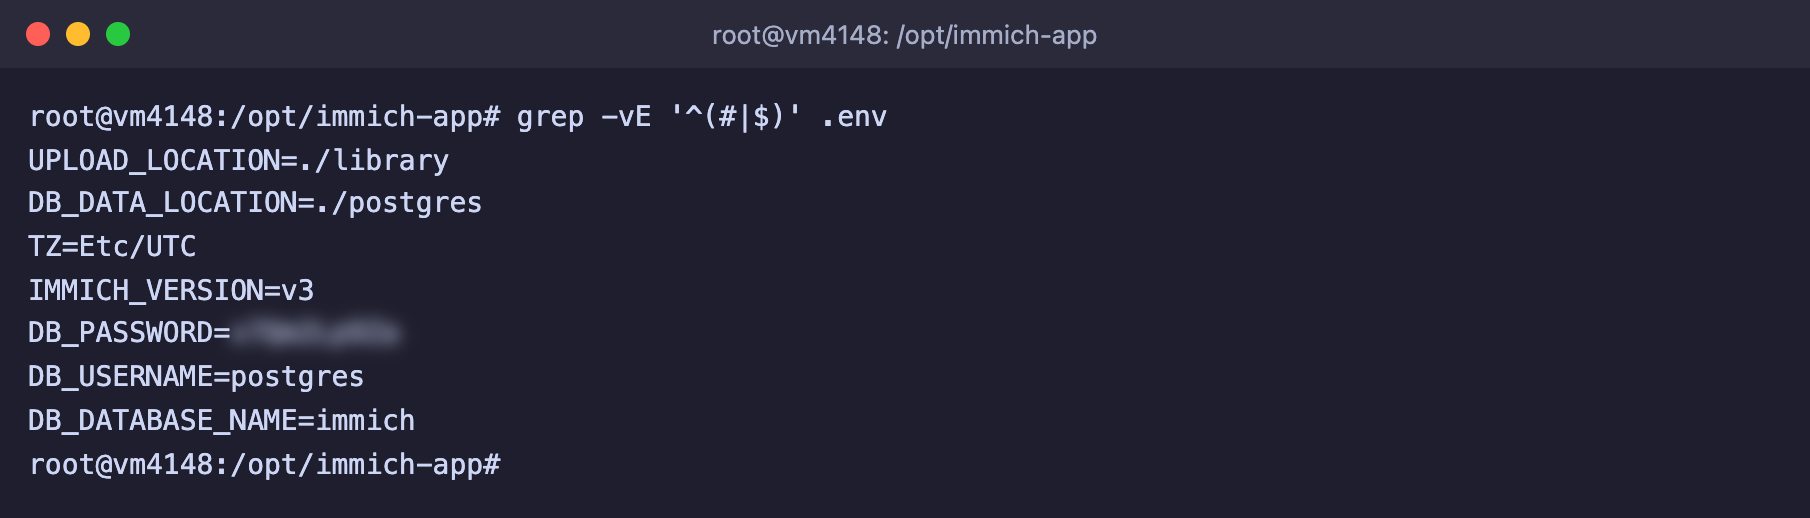
The finished settings, the database password is hidden
You can leave the other parameters alone.
UPLOAD_LOCATION=./library– the folder for photos and videos. The path starts with a dot, which means it will be created next to the project files, that is in/opt/immich-app/library.DB_DATA_LOCATION=./postgres– the folder with the database files. The Immich documentation requires a local disk and expressly forbids network drives for this folder.IMMICH_VERSION=v3– the Immich version. The valuev3means "the current third version", and you get fresh releases within it by updating. You can pin an exact version, for examplev3.3.4, and then you will have to update by hand.
Step 4. Start Immich
Start all four containers in the background.
docker compose up -dOn the first start Docker downloads images with a total size of about 4.7 GB. On our server the download took about 35 seconds, and the containers themselves started in a second.
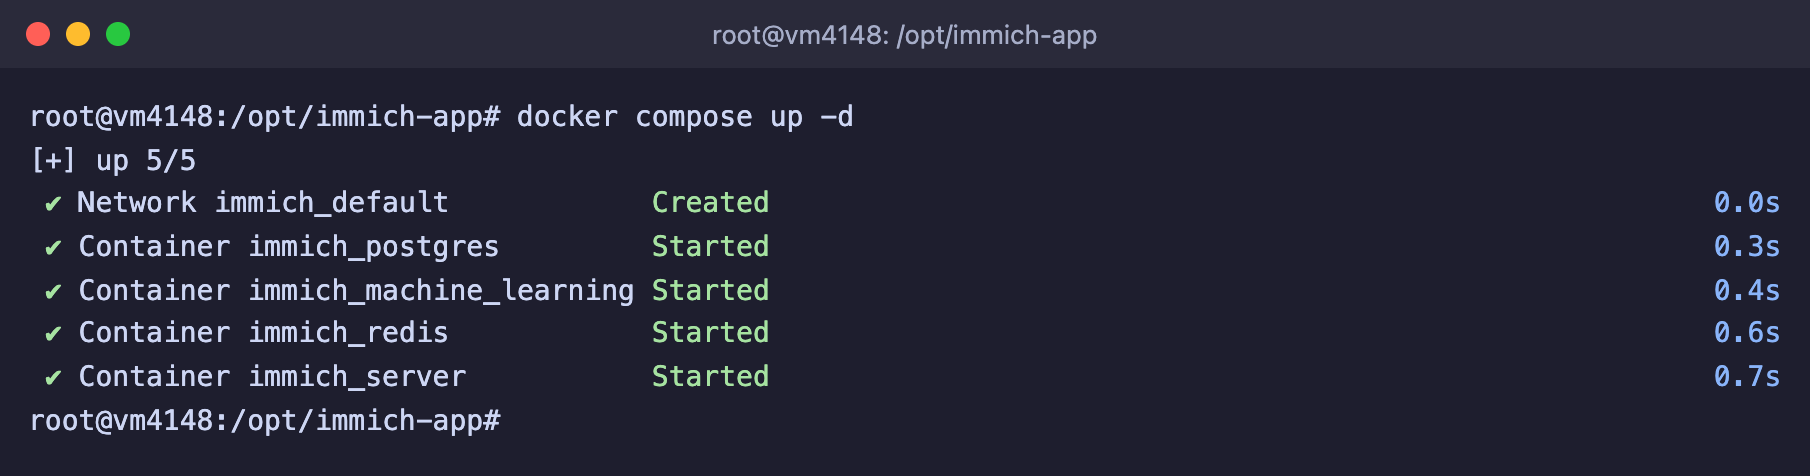
The network and four containers are running
Wait about a minute and check the status. When all four containers show the word healthy in the STATUS column, Immich is ready.
docker compose psPort 2283 is open to the whole internet
Docker publishes port 2283 with its own rules, bypassing UFW. We checked this on a test server. UFW had no rule for 2283 at all, and yet a connection from another computer was established. Moreover, even after the command ufw deny 2283/tcp it kept being established. Until you have created the administrator, anyone who finds this port can register first and become the administrator. So go straight to the next step, and in step 9 we will close the port. You can read more about this behavior in the article about Docker.

The port listens on all addresses, and there are no rules in UFW
Step 5. Create the administrator and go through the first setup
Open http://server-IP:2283 in the browser. You will see the Immich welcome screen.
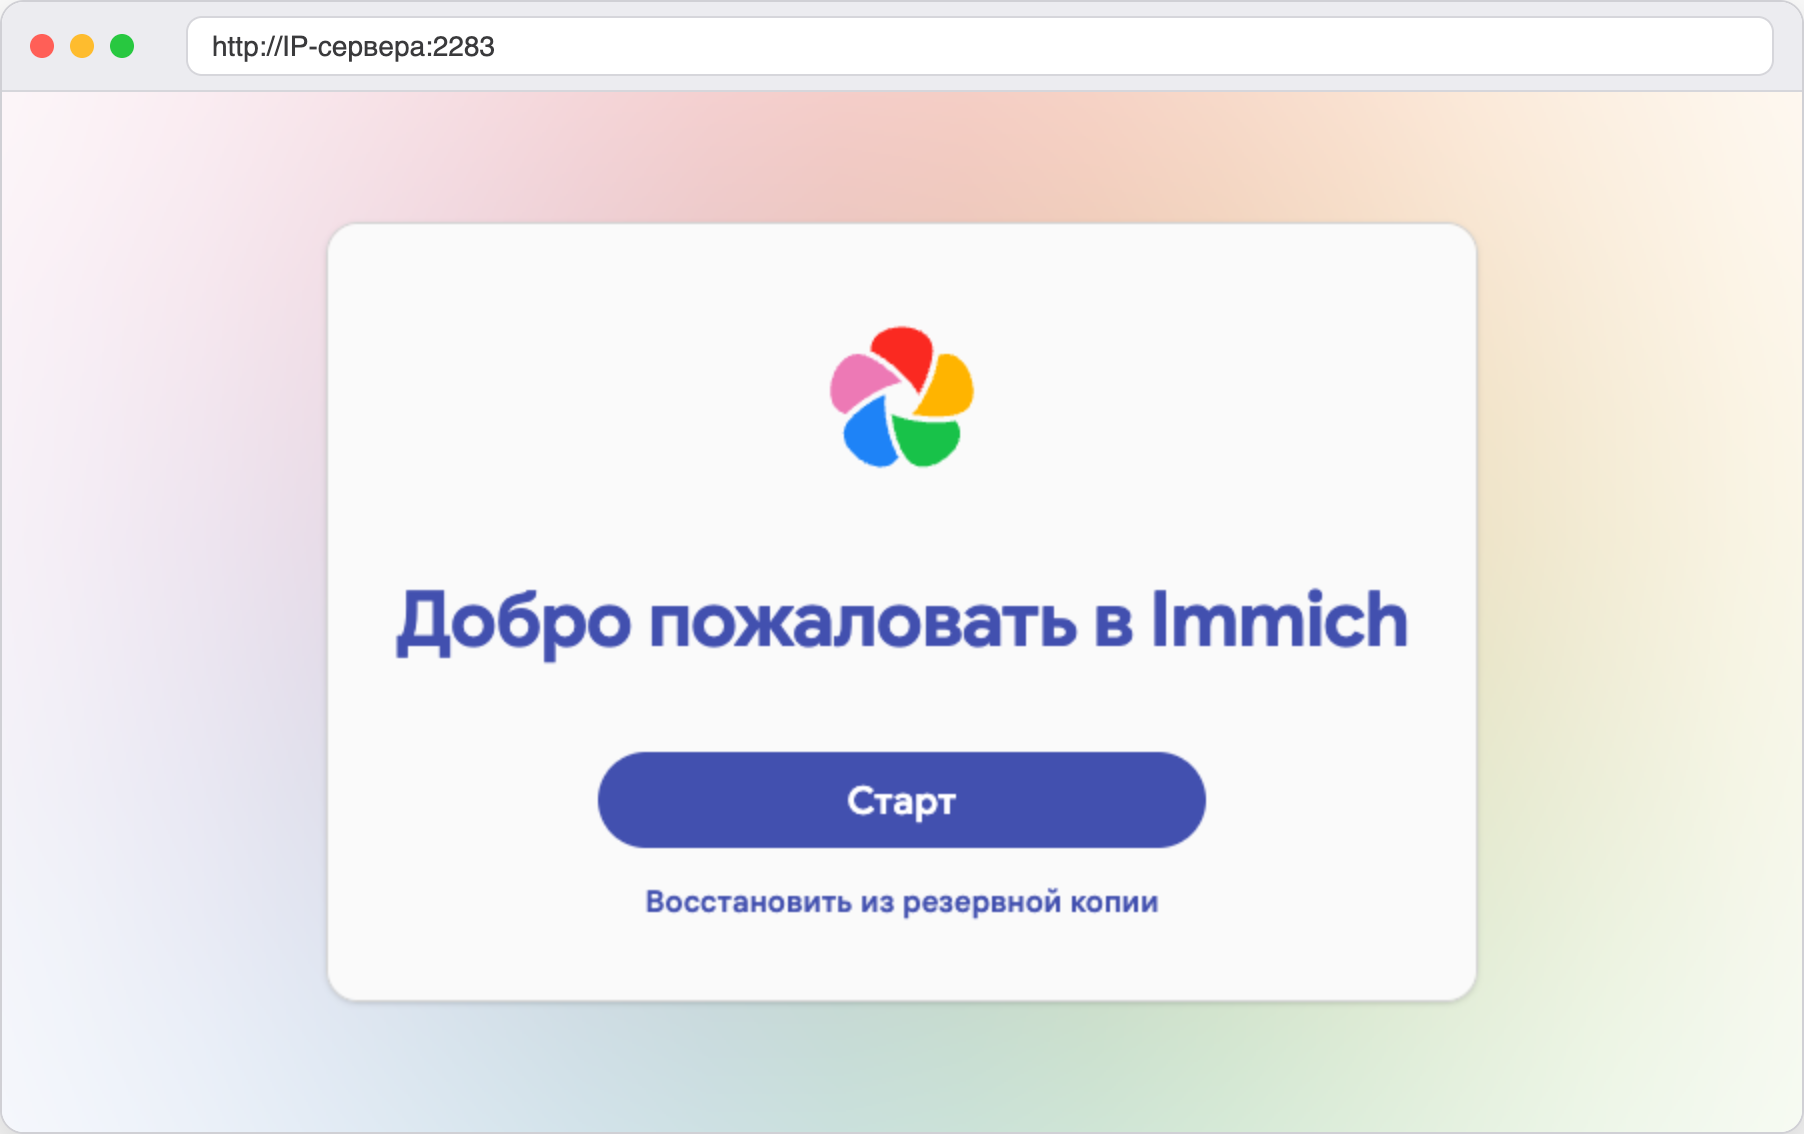
The first screen of a new server
Click Getting Started. We will use the Restore From Backup button below, when we check the restore.
- In the Admin Registration form enter an email address, which will become your login, and come up with a strong password. Immich itself warns that the first registered user becomes the administrator and will be able to create others. Save the password in a password manager.
- In the Name field enter the name that will be visible in the interface.
- Click Sign up, then on the login page enter the same email and password and click Login.
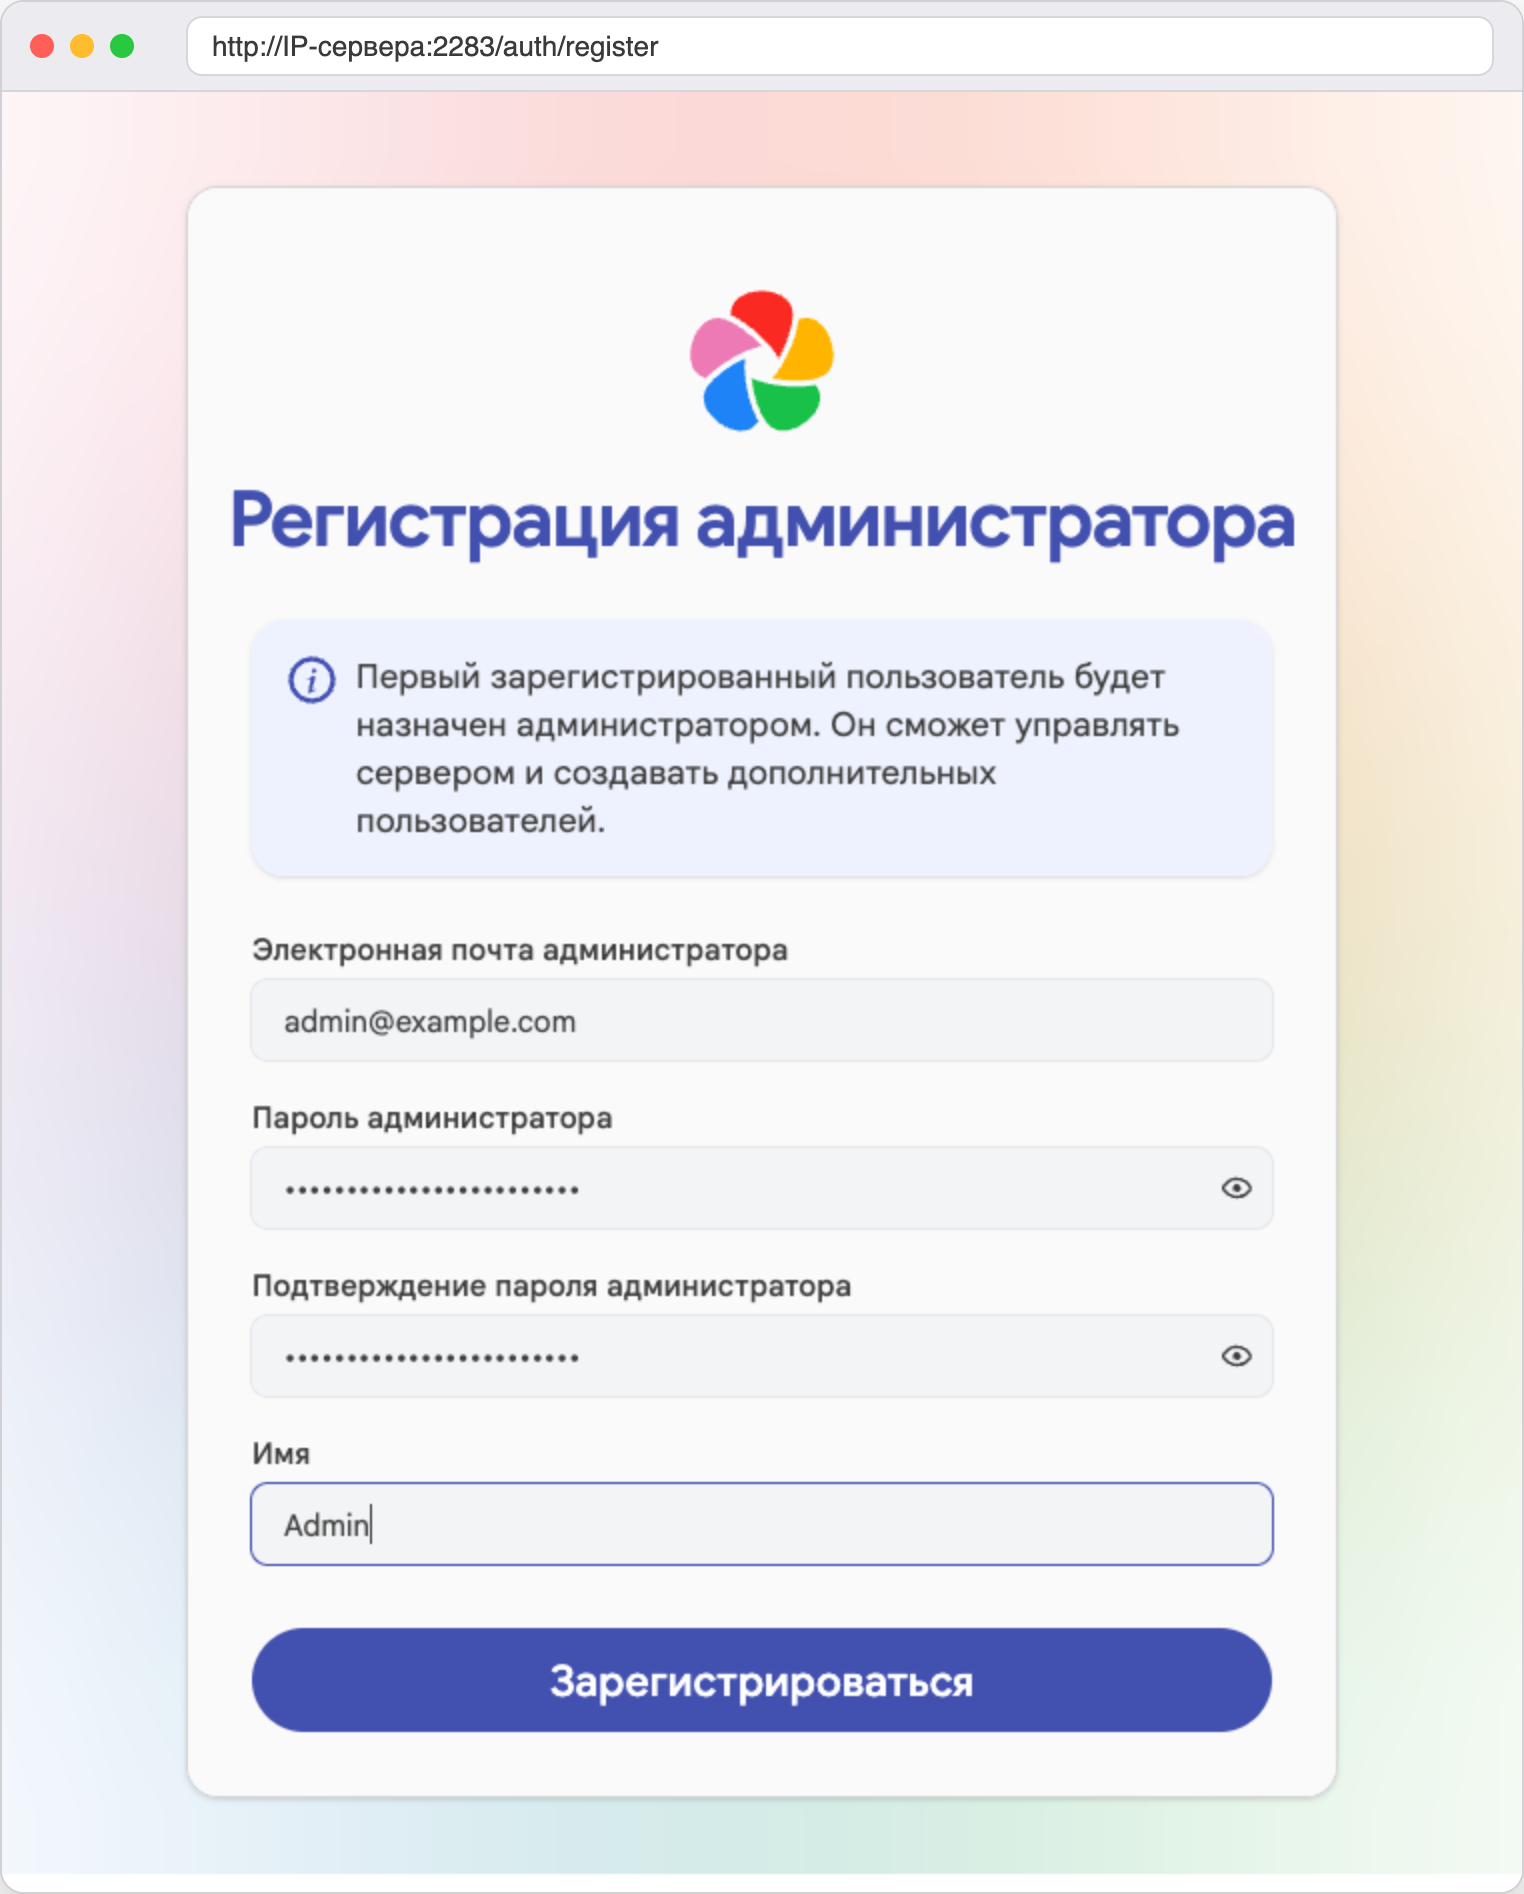
The administrator creation form
After you log in, Immich walks you through a short wizard of several screens, where you press the button at the bottom of the card. The first two screens offer you to choose the interface Theme and Language, and the rest are worth reading more carefully.
- Server Privacy – there are two toggles here, and both are on by default. The map takes tiles from the external service
tiles.immich.cloud, and the version check periodically contactsversion.immich.cloud. If you want the server not to reach external services at all, turn both off, and you can turn them back on later in the settings. - User Privacy – a toggle for Google Cast, which needs to load resources from Google servers.
- Storage Template – how to arrange the originals in folders, more about this in step 8.
- Backups – a reminder about the 3-2-1 strategy, we will come back to it in step 11.
- Mobile App – links to the app stores and Obtainium setup.
At the end click Done.
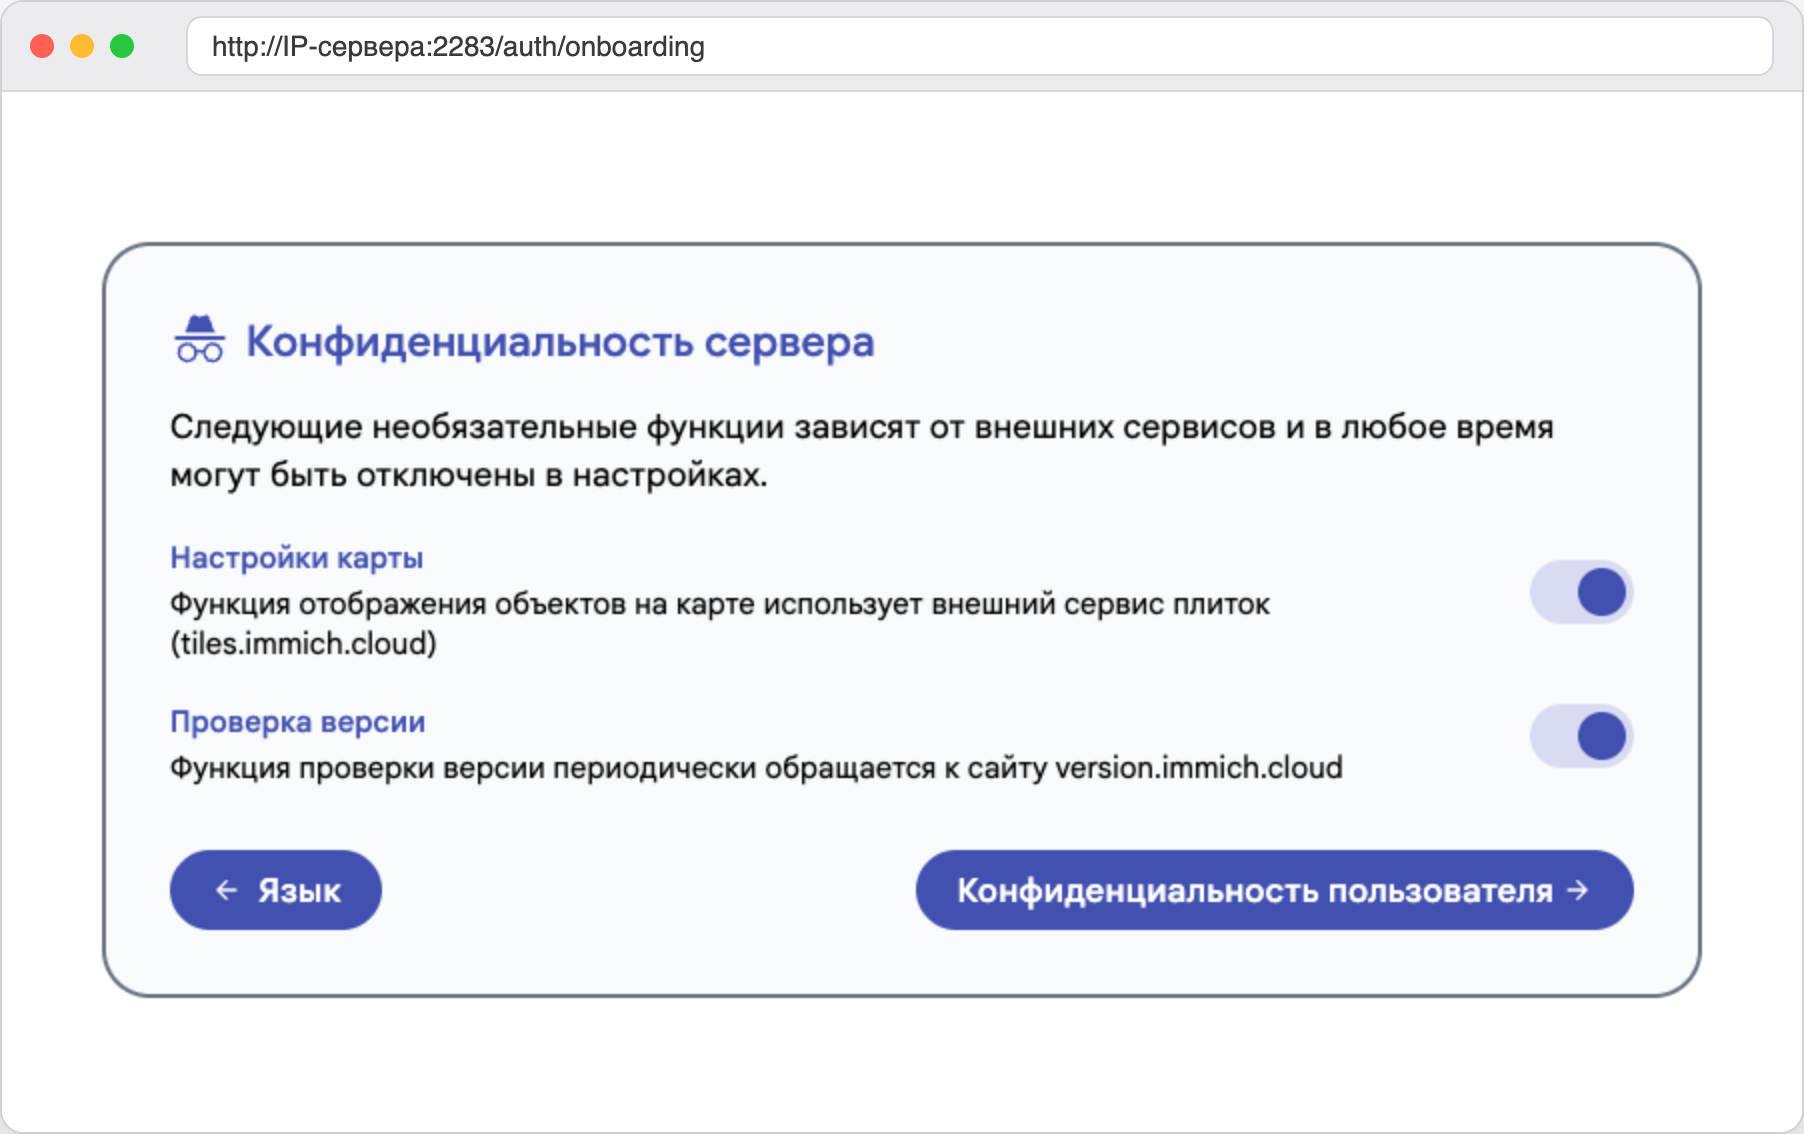
Two optional requests to external services
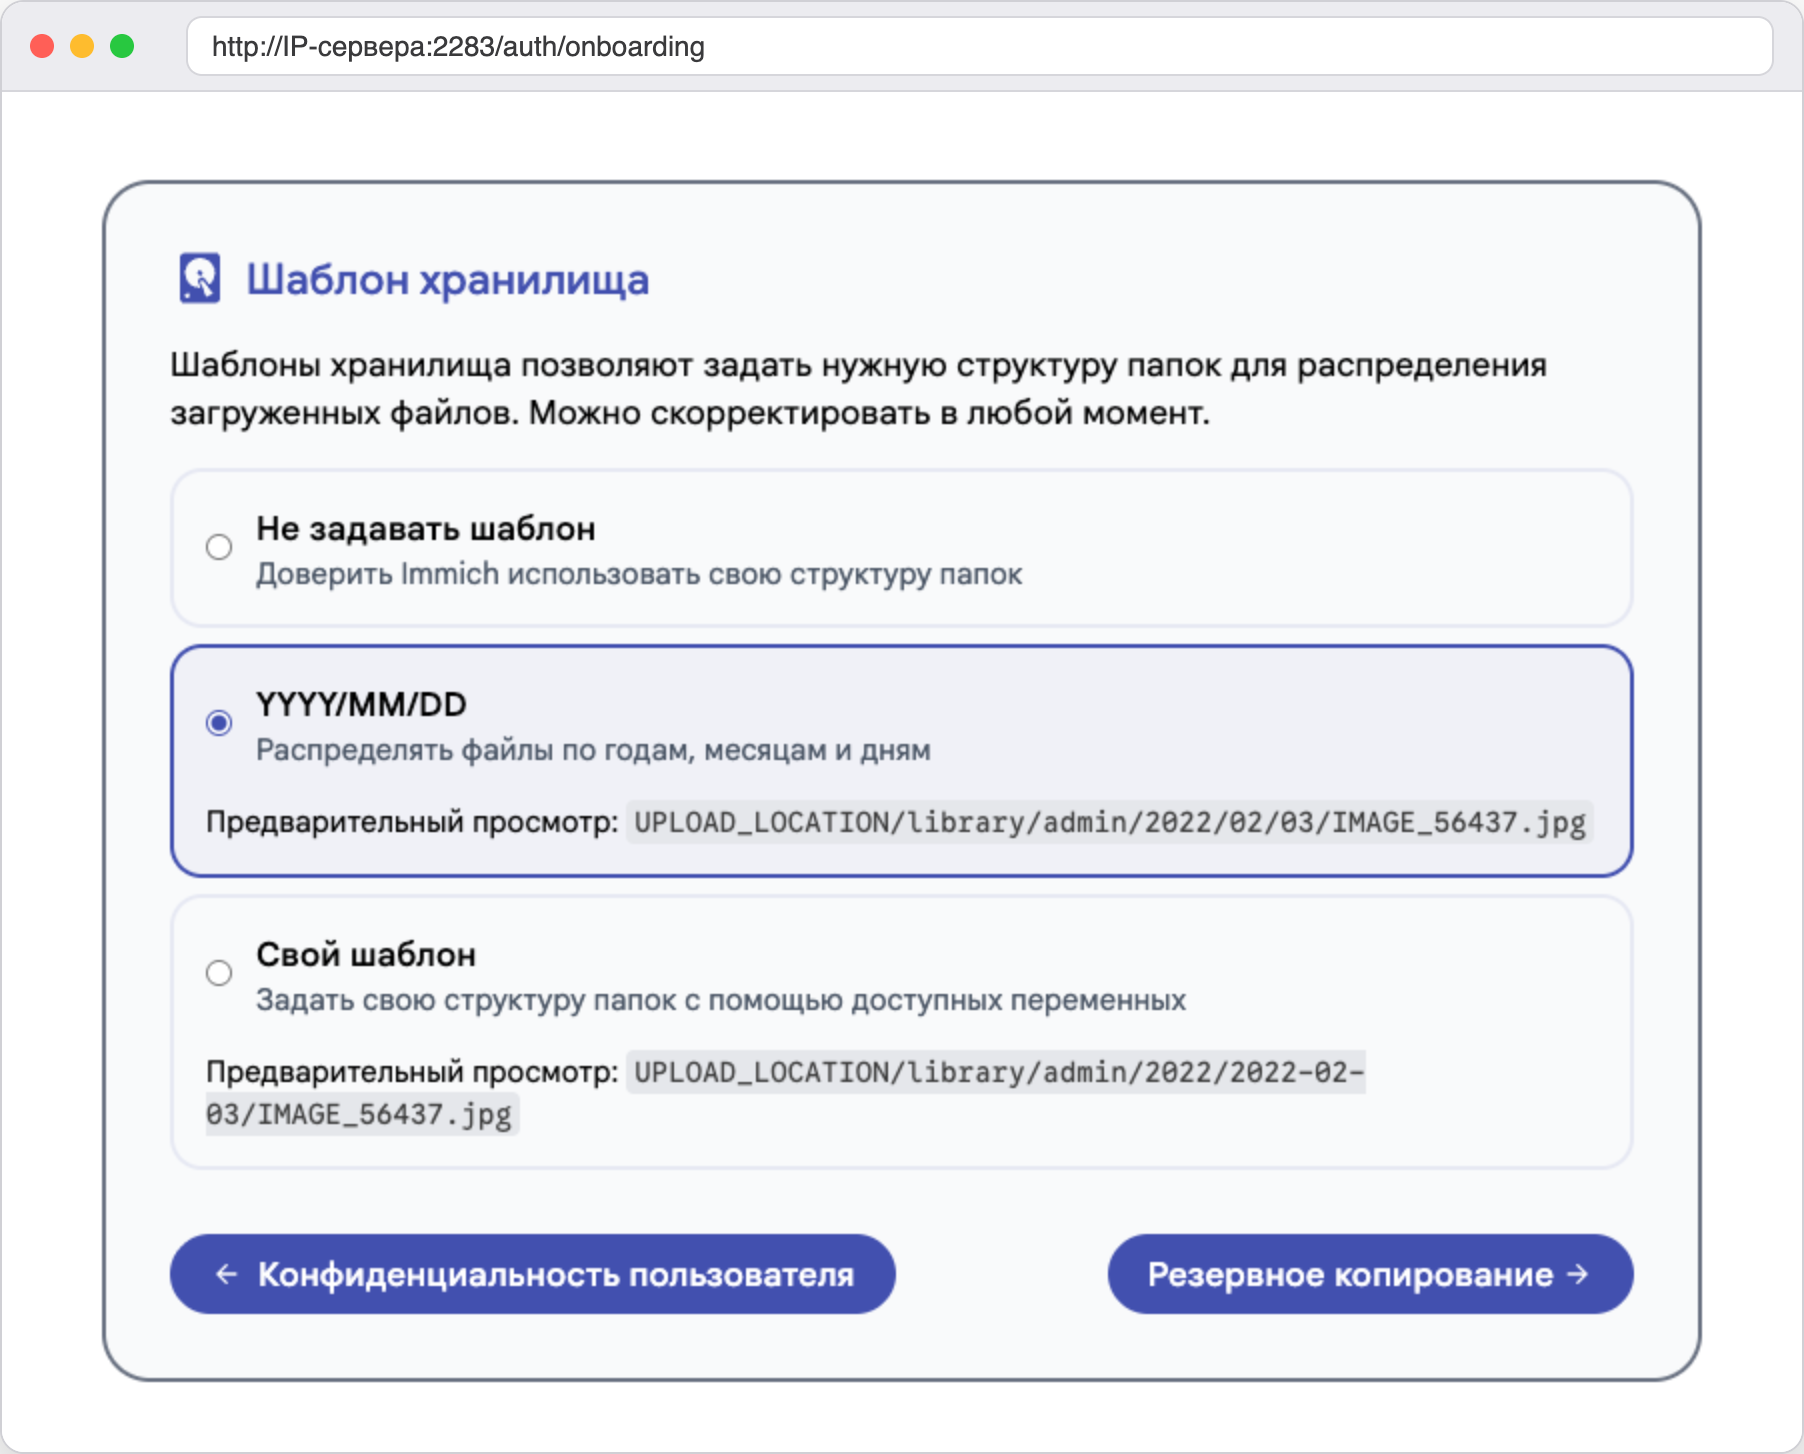
By default the originals are arranged by years, months and days
Step 6. Upload photos
Click Upload in the top right corner and choose files, or drag them into the browser window. We uploaded 11 publicly available photos, and they appeared in the timeline right away. The date for the timeline is taken from the photo's metadata, and if there is none, from the file modification date. That is why a camera photo taken in 2005 landed in 2005, and a file without metadata ended up on the date it was last changed.
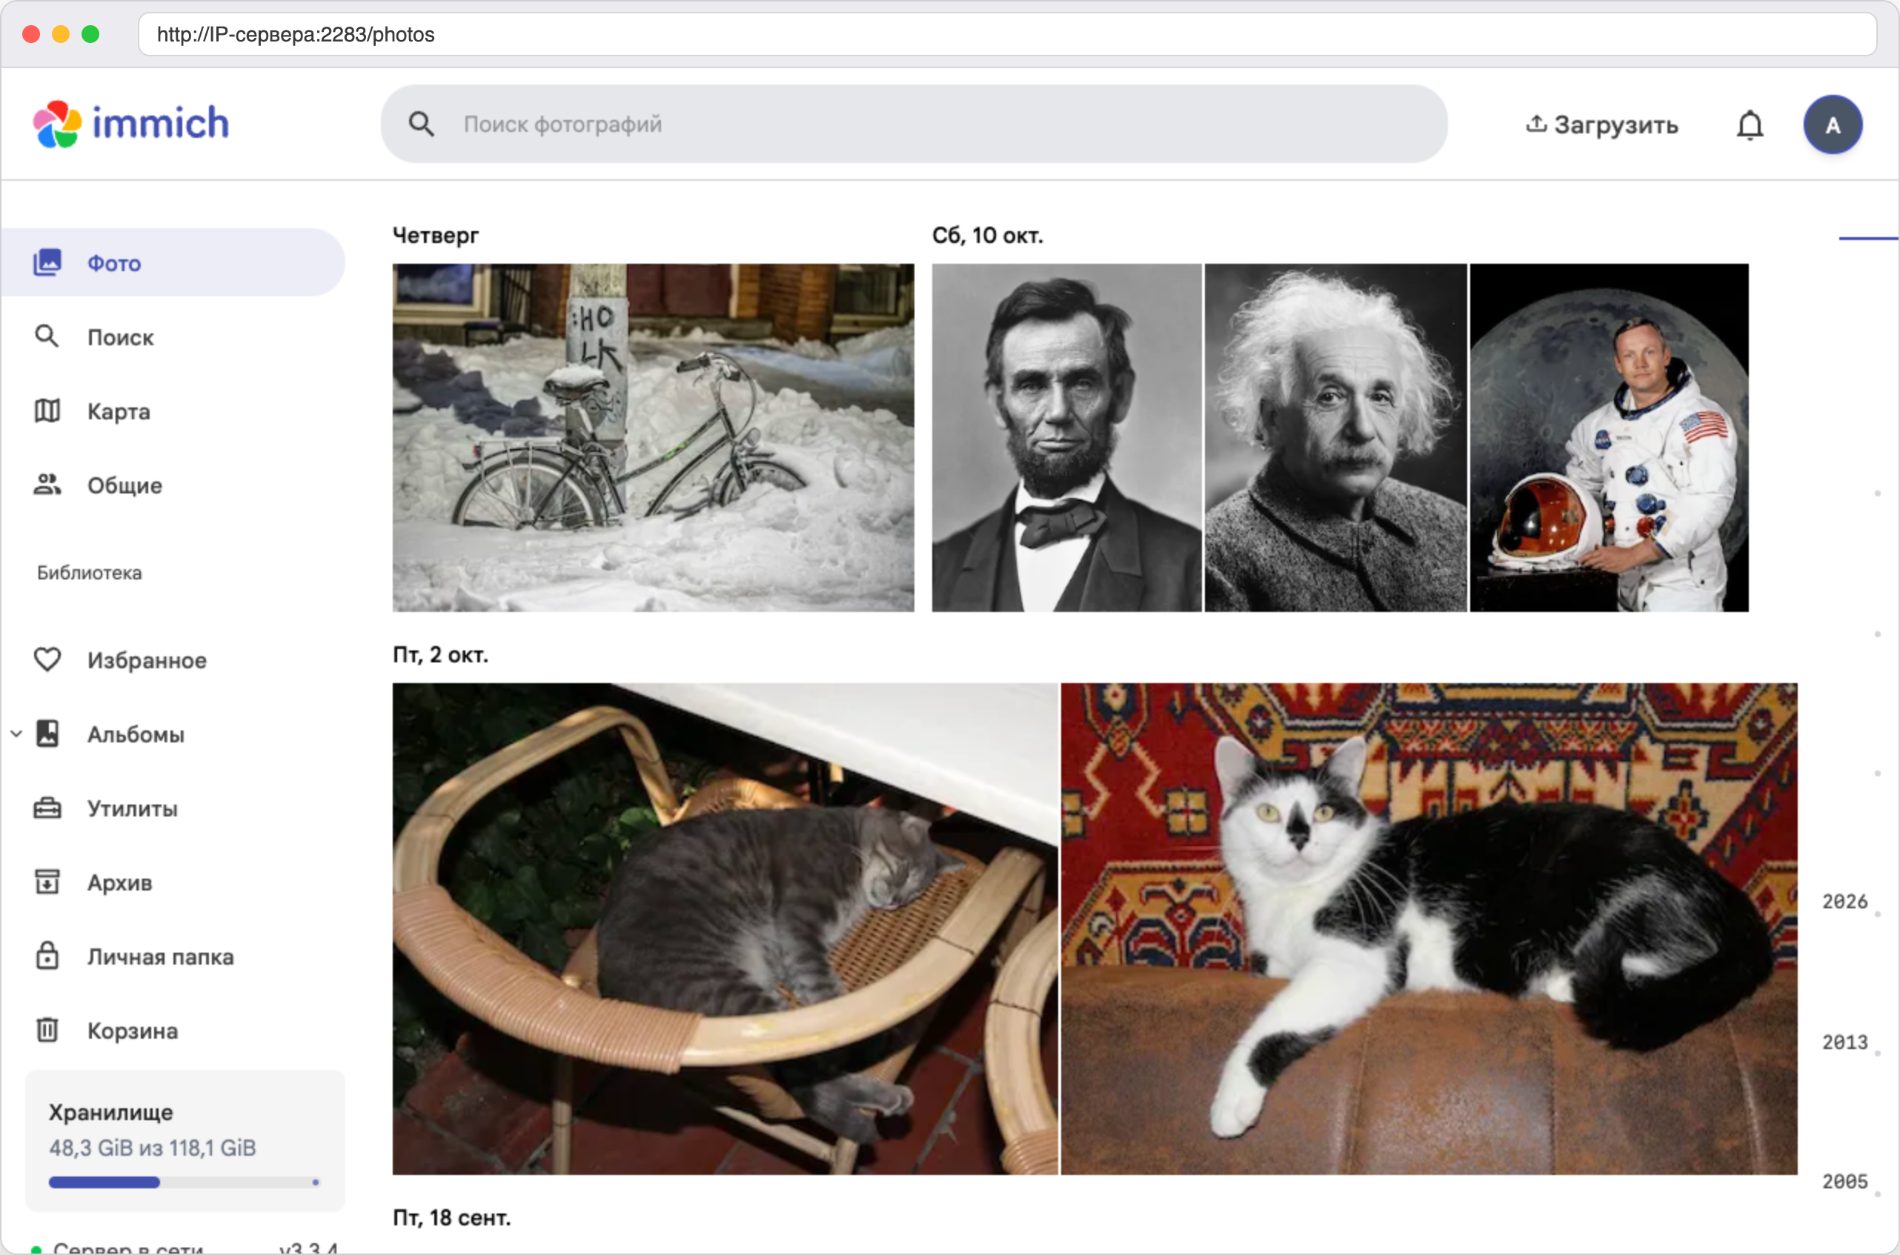
Uploaded photos in the timeline by date
In the bottom right corner during the upload a panel is shown with the counters Remaining, Uploaded, Errors and Duplicates. The upload goes fast, but afterwards the server spends about another minute in the background making thumbnails, reading metadata and handing the photos to the neural networks. You can follow the queues in Administration > Job Queues, which is an item in the menu that opens when you click your avatar. While anything is left in the queues, search and people will not work for all photos.
Immich detects repeats. When we uploaded the same photo a second time, it did not appear again, and the Duplicates counter showed 1. Immich does not accept a file of an unsupported type at all, for example a plain text file.
Step 7. Try search and people
Search by content
Click the Search your photos field at the top, enter a query and press Enter. Immich searches "by meaning" and not by file name. For the query beach the first results were a beach with the Golden Gate Bridge and a beach with umbrellas, and the third was a dog on the seashore.
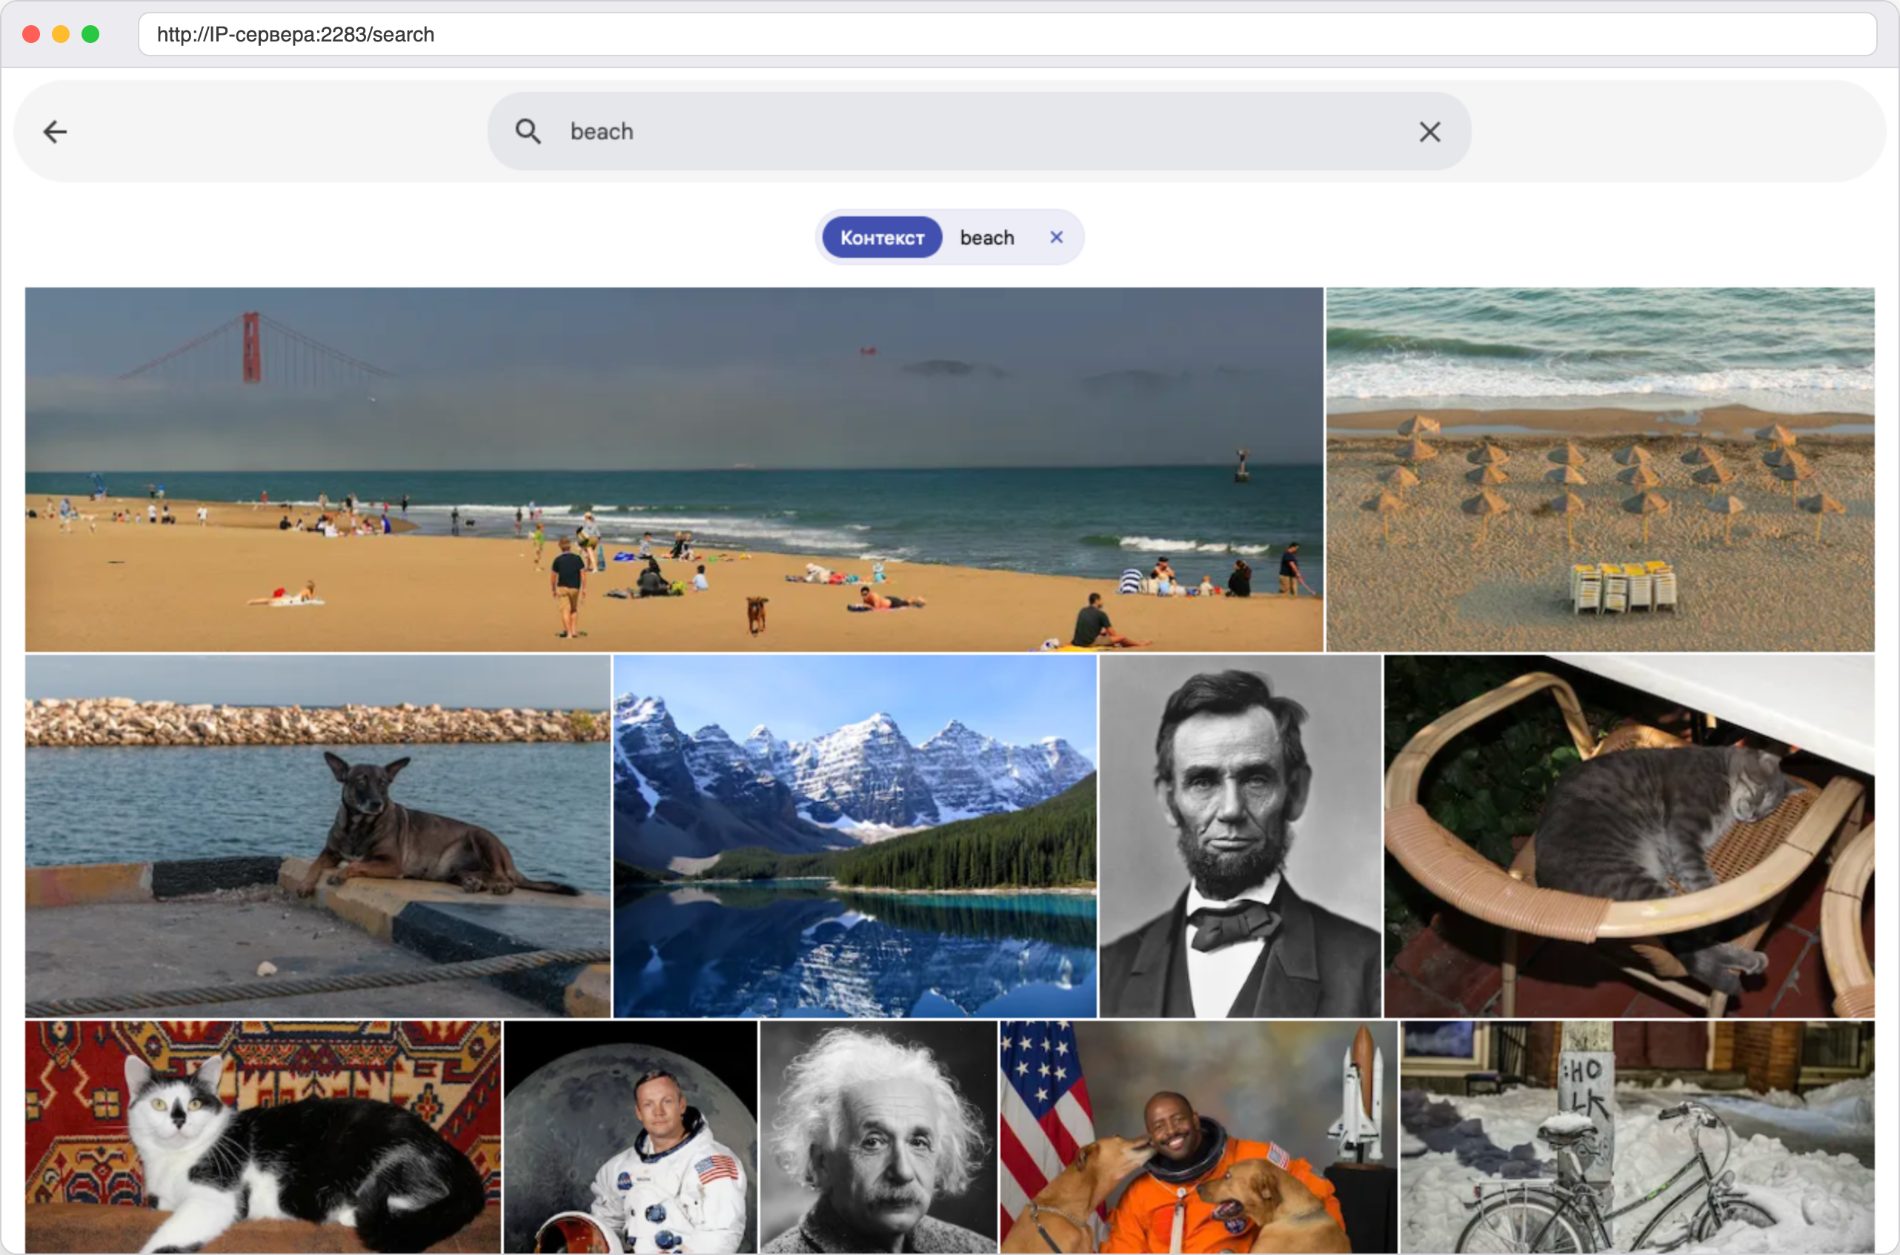
Search for the word beach, the best matching photos come first
Pay attention to the language of your query. The default model is called ViT-B-32__openai, and it works unpredictably with Russian words. On our photos the queries "кошка" (cat) and "снег велосипед" (snow bicycle) found the right photo first, while "пляж" (beach), "горное озеро" (mountain lake) and "космонавт" (astronaut) did not. English queries worked noticeably better. The queries cat, dog, beach, snow bicycle, mountain lake and astronaut brought the right photo to first place, although the query bridge did not bring the bridge to the top, and our library is very small. The Immich documentation recommends multilingual models for other languages, with xlm, siglip2 or nllb in their names. They are heavier, and according to the documentation table they need about 3 GB of memory or more, so we did not test them on our server. To change the model, do the following.
- Open Administration > Settings > Machine Learning Settings > Smart Search.
- Enter the name of the new model in the CLIP model field and save the settings.
- Open Job Queues, find the Smart Search job and click All so that Immich processes all photos again with the new model.
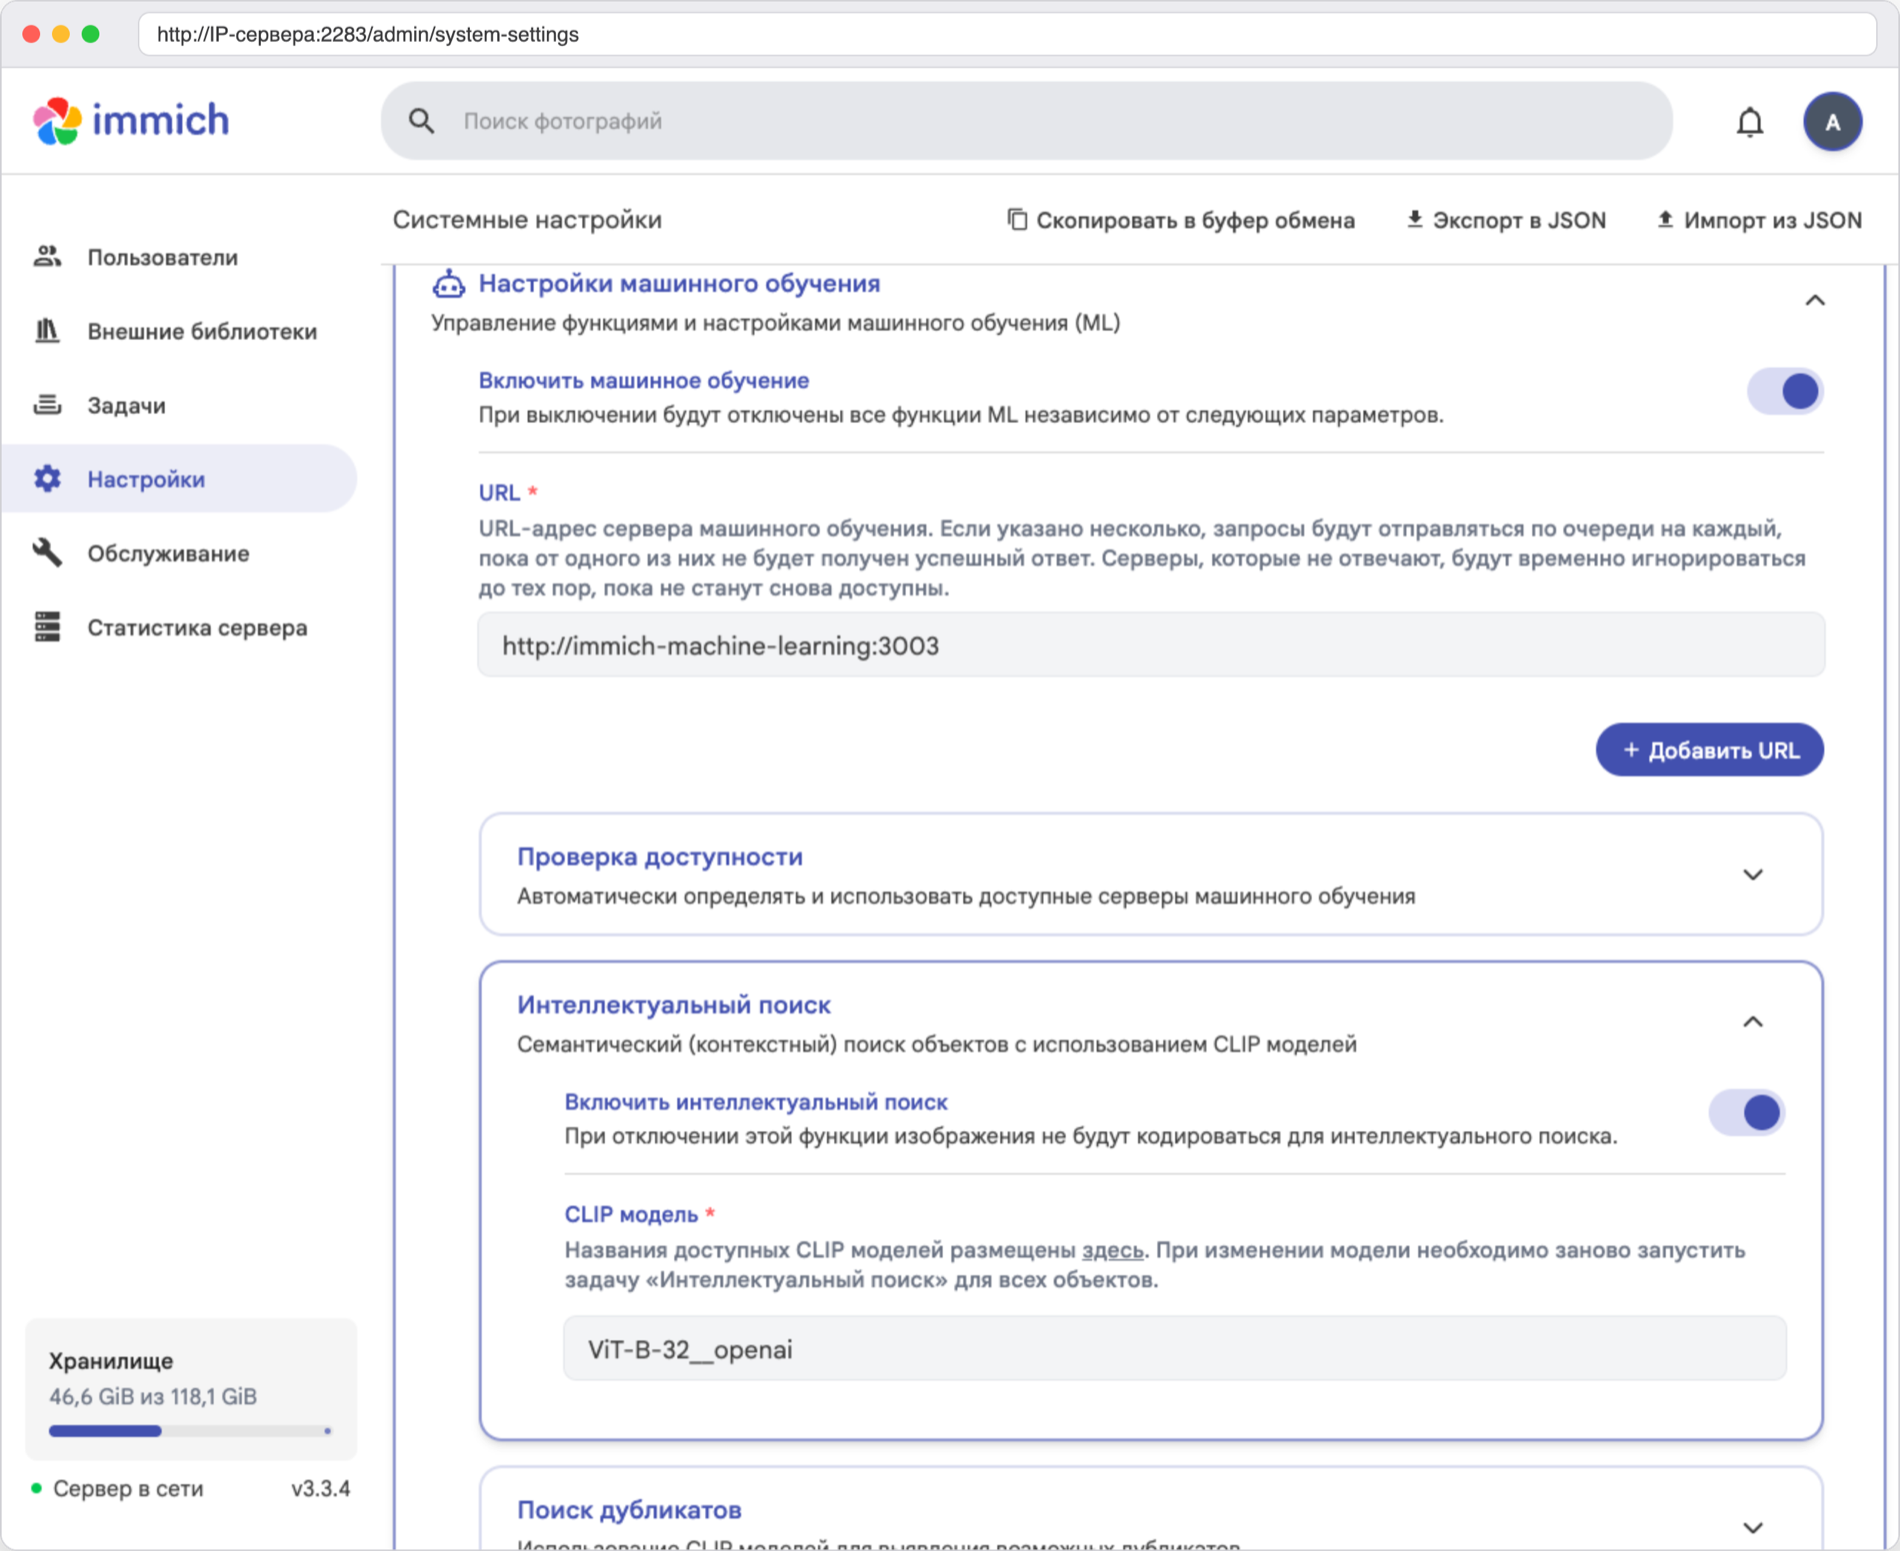
The model for search is set in the machine learning settings
Faces
Face recognition works in two stages. First Immich finds faces in photos, and then it merges similar ones into people. On our photos faces were found in all three portraits and in the photo of the astronaut with dogs. However, the People page stayed empty. In the same machine learning section, in the Facial Recognition block, there is a setting called Minimum recognized faces. In the interface it is described as the minimum number of recognized faces for a person to be created, and it equals 3 by default. In our case each face appeared once.
We set the value to 1 and on the Job Queues page clicked Reset next to the Facial Recognition job. Entries about creating four people appeared in the server log, but the People page stayed empty until we gave them names. We did not look into why unnamed groups are not shown even with the value 1. The practical conclusion is simple, give the people names. You can do it like this.
- Open a photo and click the i icon to see the Info panel.
- In the People block click a face.
- Click Add a name, enter a name and press Enter.
The message "Changed name successfully" will appear, and the person will end up on the People page.
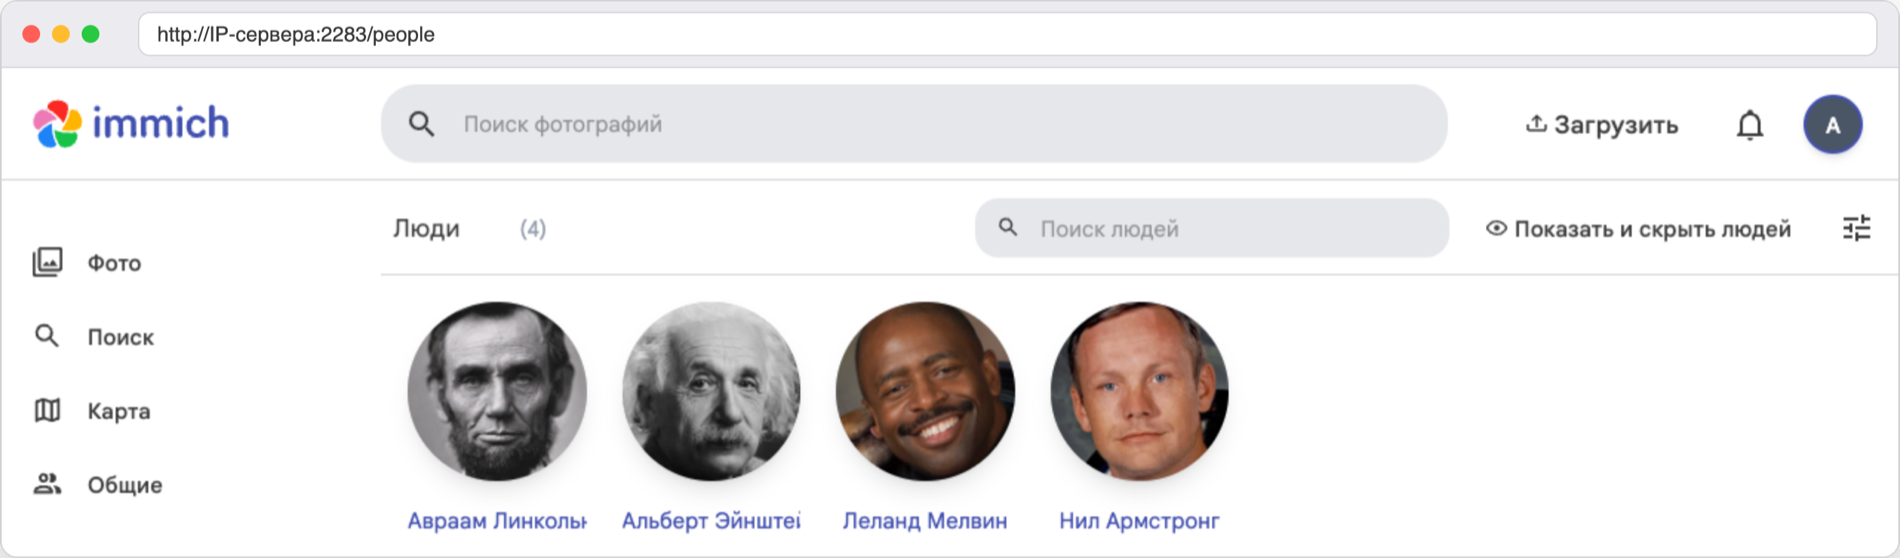
People after we gave them names
Step 8. Find out where the files are
Everything that Immich stores on disk is in the UPLOAD_LOCATION folder, that is in /opt/immich-app/library. It has its own subfolders inside.
library– the originals that Immich arranged according to the storage template. We kept the template from the wizard, so the path looks likelibrary/library/admin/2026/10/02/cat-1.jpg, that is the user name, year, month and day.thumbs– thumbnails and previews.encoded-video– transcoded versions of videos.profile– user avatars.upload– another place for originals, and the Immich documentation counts this folder as important together withlibraryandprofile.backups– automatic database dumps, more about them in step 11.
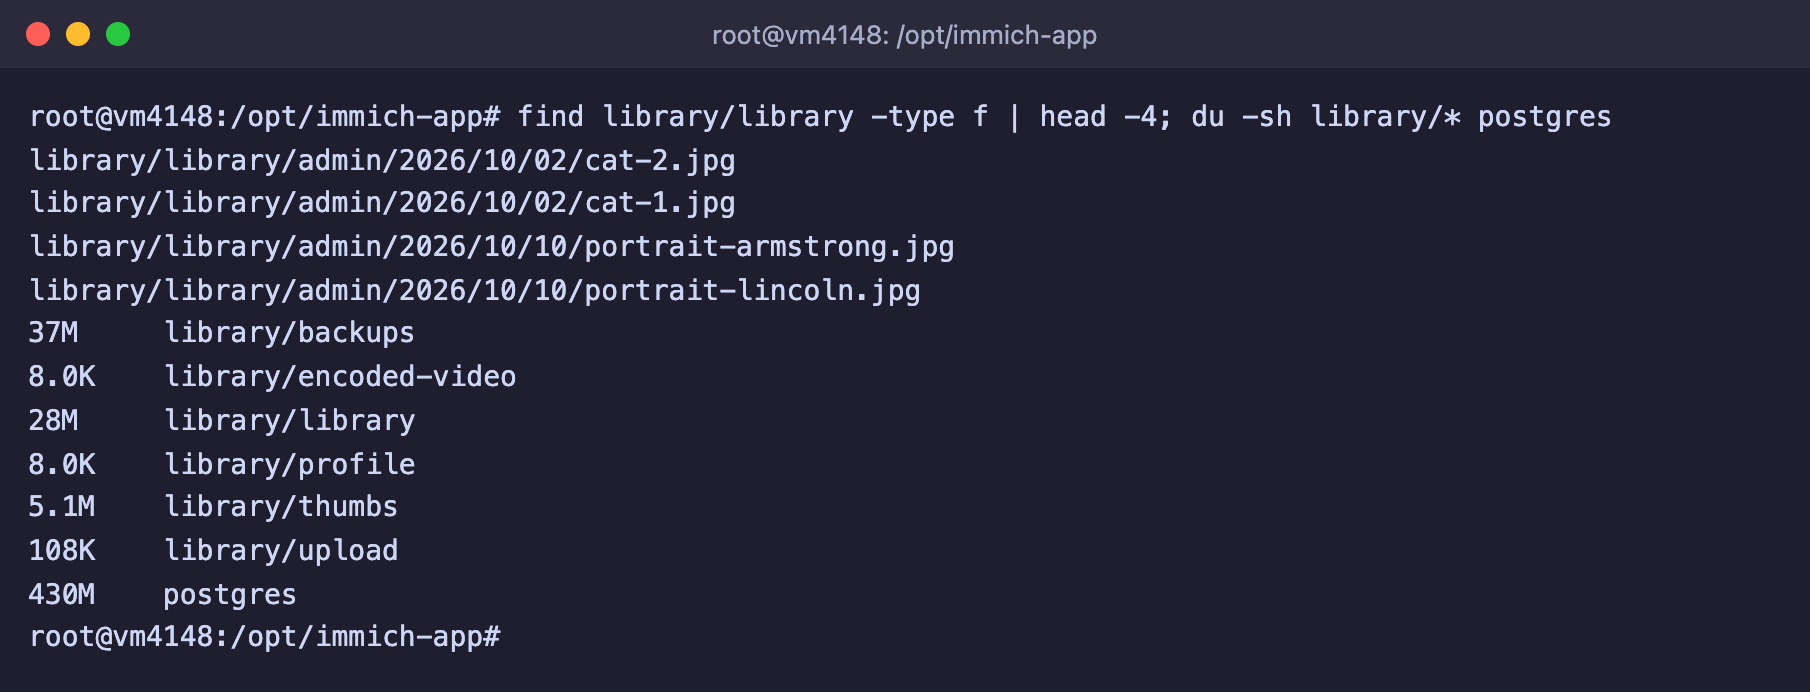
Originals in library, thumbnails in thumbs, the database separately in postgres
The numbers in our example are as follows. The originals of 11 photos took 28 MB, the thumbnails for them 5.1 MB, and the postgres database folder almost 430 MB. The Immich documentation names 1 to 3 GB as the typical database size. The neural networks are stored not here but in the Docker volume immich_model-cache, where we have 2.1 GB.
Do not edit these folders by hand
The Immich documentation asks not to change files in the storage folders, except for backups. Upload, delete and rename photos only through the web interface or the mobile app, otherwise the database will stop matching the files.
Step 9. Close the port and connect a domain
The official Immich documentation directly warns that you must not forward port 2283 to the internet without extra protection, because the login and passwords would travel over plain HTTP. So we will leave Immich reachable only on the server itself. For this you do not need to edit the official docker-compose.yml, which you will be replacing during updates. Create a docker-compose.override.yml file next to it, and Compose picks it up by itself.
nano docker-compose.override.yml# Port 2283 listens only inside the server
services:
immich-server:
ports: !override
- "127.0.0.1:2283:2283"The !override tag is needed to replace the list of ports and not add a second one to it. Apply the change.
docker compose up -dCompose will recreate only the immich-server container. Now the port listens on the address 127.0.0.1, and a connection from another computer is not established. We checked that from our computer it ends in a timeout, while through an SSH tunnel Immich still opens.
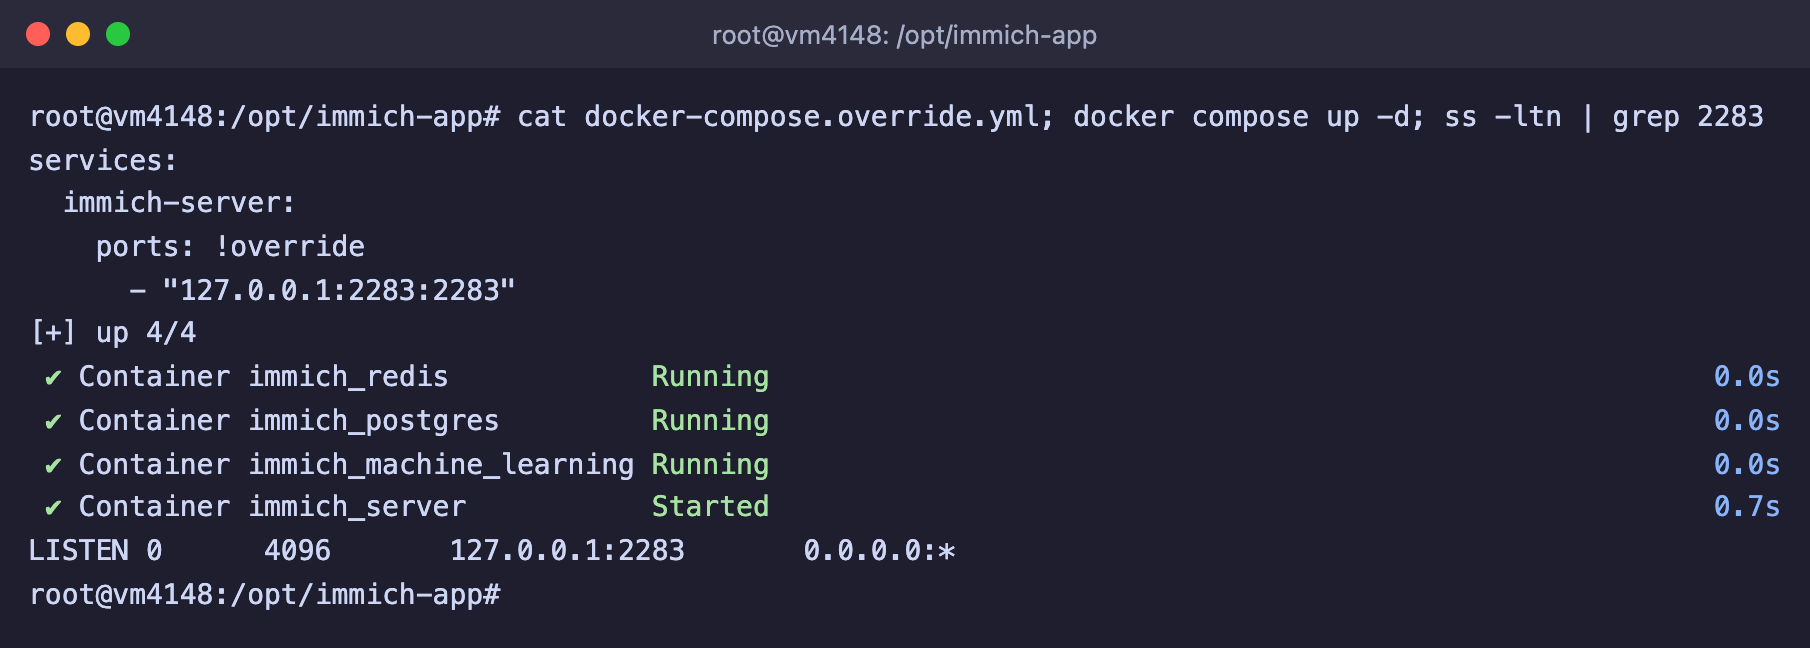
Port 2283 now listens only on 127.0.0.1
There are two ways to open Immich from here.
An SSH tunnel suits personal use. Run the command below on your own computer and open
http://127.0.0.1:2283in the browser. The window with the tunnel must be kept open.bashssh -L 2283:127.0.0.1:2283 root@server-IPA domain with HTTPS is needed for the mobile app and for access from any device. Point the domain to the server using the guide, install Nginx and connect a free certificate. Nginx will forward requests to
http://127.0.0.1:2283.
We did not set up HTTPS on this server, so there is no ready-made Nginx file here. Take a proven example from the Immich reverse proxy page and keep in mind the requirements that the documentation lists for any proxy.
- The proxy must pass the
Host,X-Real-IP,X-Forwarded-ForandX-Forwarded-Protoheaders. - You need WebSocket support and permission for very large uploads, and the Nginx example sets
client_max_body_size 50000M. If you leave the limit small, uploading large files will break with error 413, which is described in the article about Nginx. - The timeouts in the example are increased to 600 seconds, otherwise large videos do not have time to upload.
- Immich must work at the root of a domain or subdomain, and addresses like
/immichare not supported.
Step 10. Connect the mobile app
We did not run the mobile app on the test server, so this step is based on the official Immich documentation. The app can copy photos from the phone to the server so that they are not lost along with the phone.
- Install the Immich app. It is in the App Store and Google Play, and for Android also as an APK on the GitHub releases page, through Obtainium and FUTO F-Droid. Links to the stores are also in the first-run wizard.
- Open the app and enter the server address. In the documentation the example is written as
http://server-IP:2283, but we closed this port, so enter the address of your domain, for examplehttps://photos.example.com. - Log in with the email and password from step 5.
- Click the cloud icon in the top right corner, choose the phone albums you want to copy and click the Enable Backup button at the bottom of the screen. That is how the button name is written in the documentation, and in the Russian version of the app it may read differently.
Update the app before the server
The Immich documentation warns that the server works only with apps of its own major version, and the app usually supports the current one and the previous one. So before updating the server to a new major version, update the apps on all phones.
Step 11. Set up backups
Immich does not copy photos by itself, and if the server disappears, the library disappears with it. The documentation recommends the 3-2-1 rule, that is three copies of the data, on two different media, with one of them outside the server. You need to copy both parts of Immich, the database and the folder with files, because a database without files contains not a single photo, and files without the database lose albums, people and order.
Database dumps made by Immich itself
Go to Administration > Settings > Database Dump Settings. Dumps are on by default. Immich creates them every night at 2:00 and keeps the 14 latest, and the schedule is set by an expression in the cron format. The files appear in the backups folder inside UPLOAD_LOCATION.
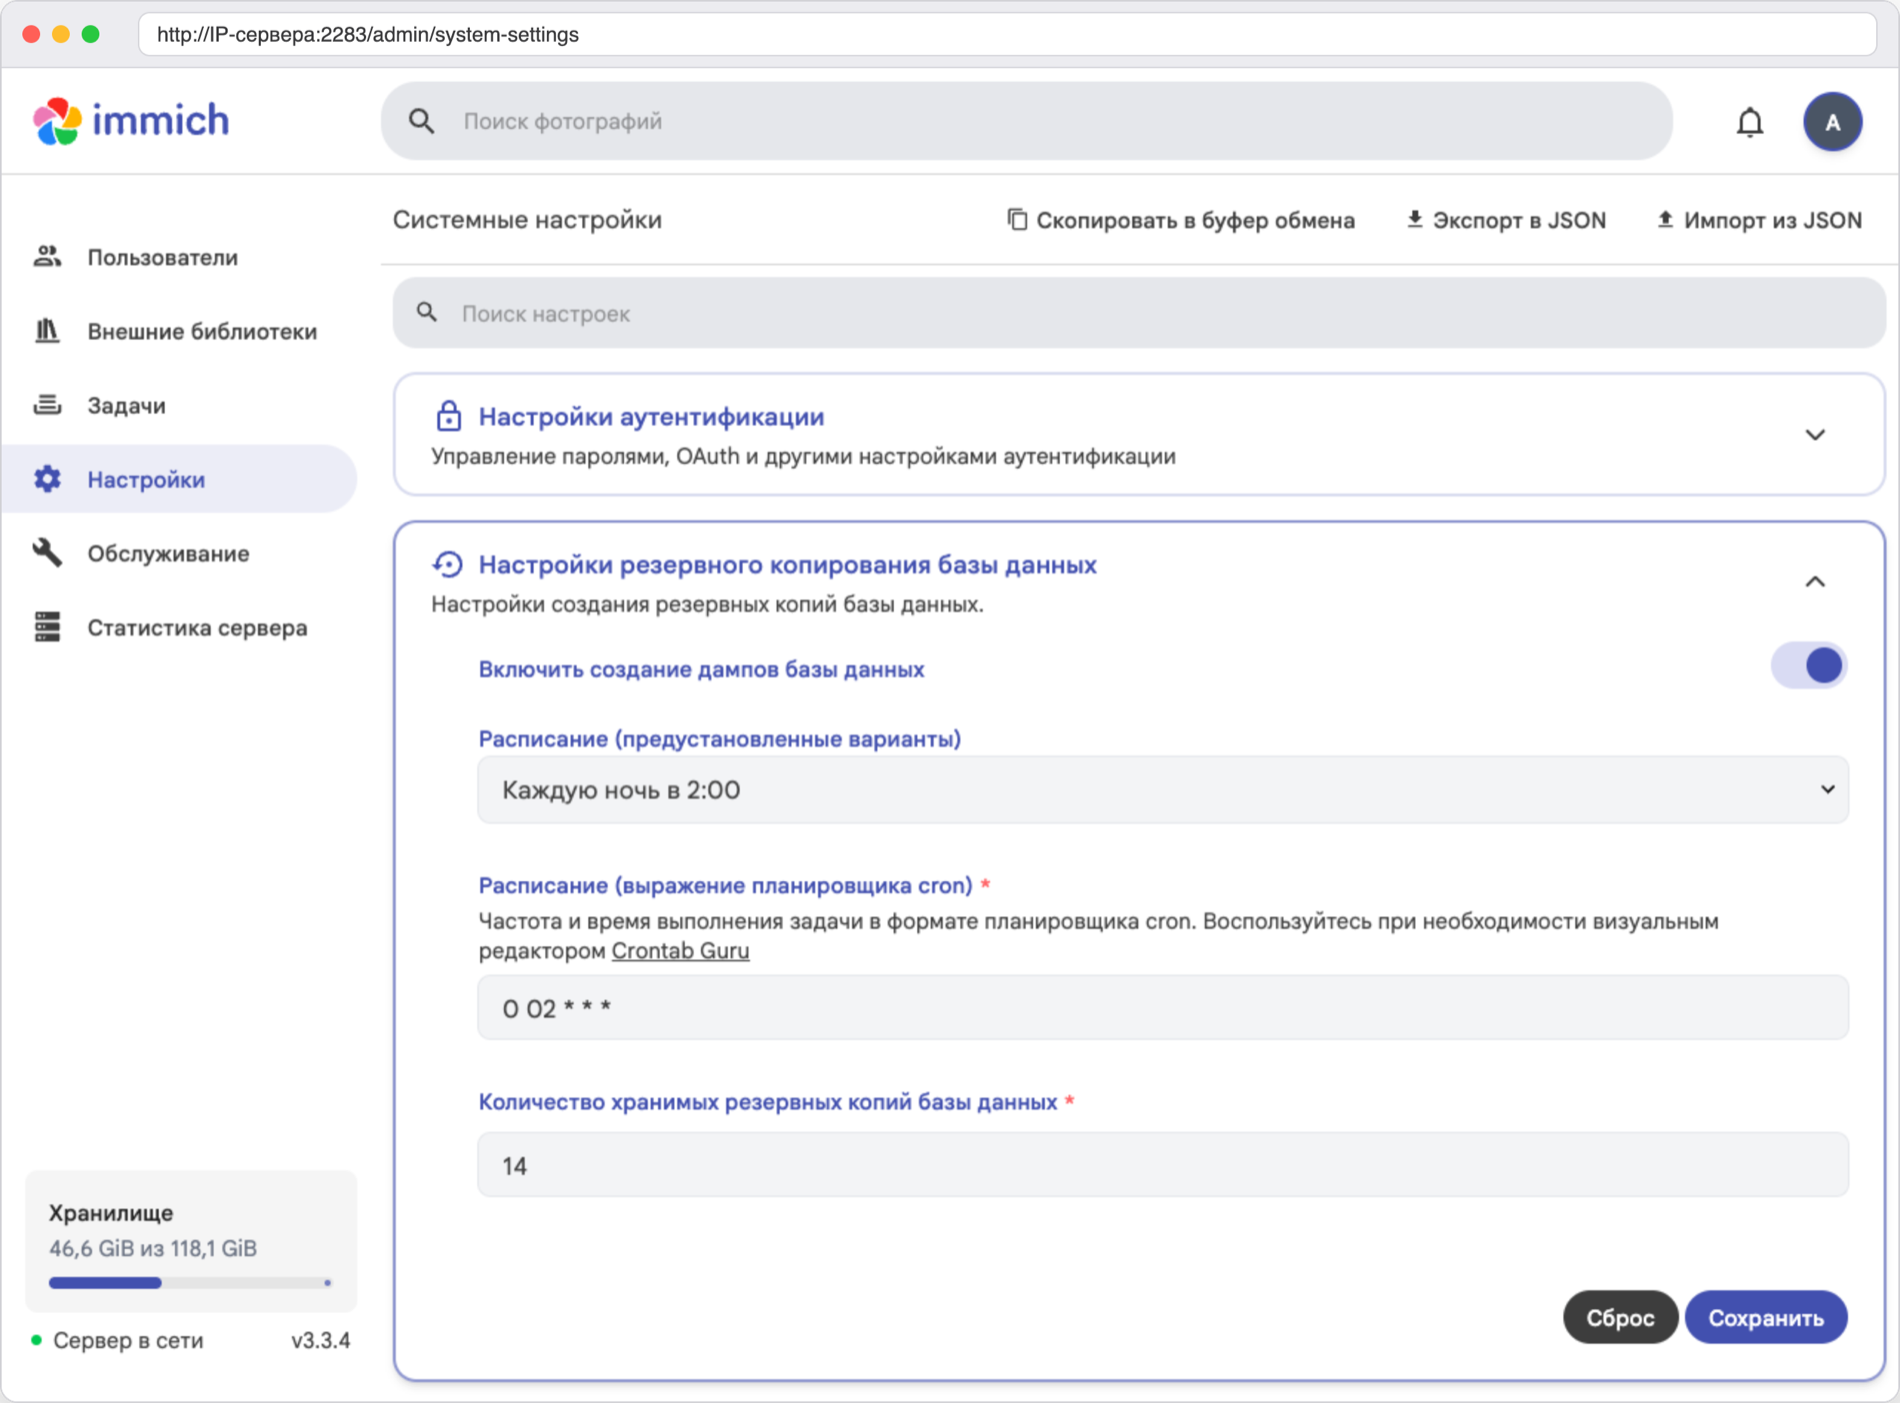
The schedule and the number of dumps kept
You can create a dump by hand too. Open Administration > Job Queues, click Create job, choose Create Database Dump and click Create. A few seconds later a file like immich-db-backup-20261021T134144-v3.3.4-pg14.19.sql.gz of about 19 MB appeared in /opt/immich-app/library/backups. The name records the date, the Immich version and the PostgreSQL version.
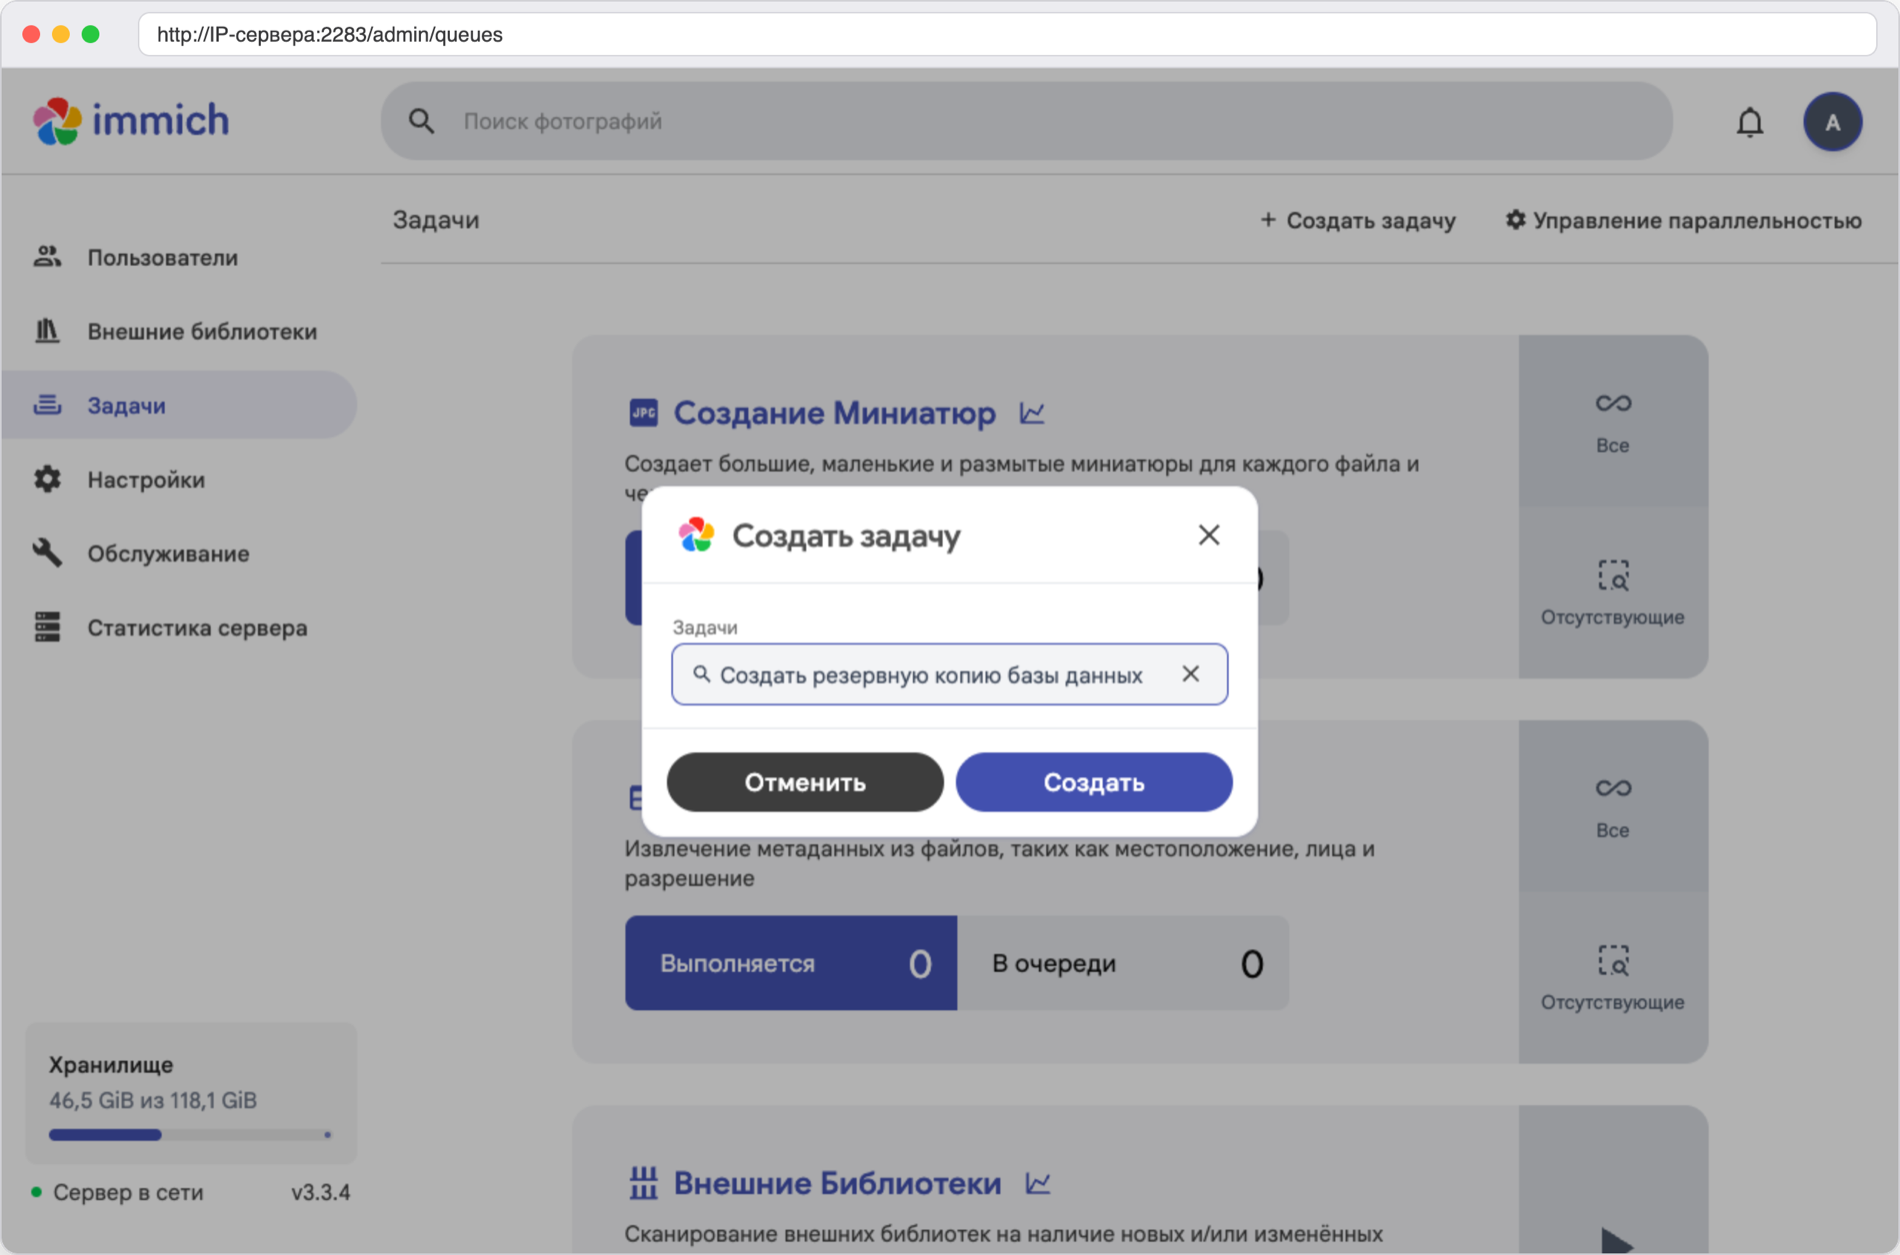
Starting a database dump by hand
Do not be surprised by the size. Even a database without a single photo gave us a dump of about 18 MB, because it contains the table of geographic names geodata_places with 228,820 rows.
A script for copies on the server itself
The dumps made by Immich lie on the same disk as the photos. So we will make a script that collects both the database and the files into one folder, from where they are easy to take away. The database goes first, then the files, as the Immich documentation advises. This way in the worst case you get a file without a record in the database, which can be uploaded again, and not a record without a file.
nano /opt/immich-app/backup.sh#!/bin/sh
# Immich backup: the database dump first, then the archive with photos
BACKUP_DIR=/root/immich-backups
STAMP=$(date +%F-%H%M)
mkdir -p "$BACKUP_DIR"
# Database (metadata, albums, people, settings)
docker exec immich_postgres pg_dump --clean --if-exists --dbname=immich --username=postgres | gzip > "$BACKUP_DIR/db-$STAMP.sql.gz"
# Original photos and videos, uploads and avatars
tar -czf "$BACKUP_DIR/files-$STAMP.tar.gz" -C /opt/immich-app/library library upload profile
# Keep the 7 latest copies of each kind
ls -1t "$BACKUP_DIR"/db-*.sql.gz | tail -n +8 | xargs -r rm --
ls -1t "$BACKUP_DIR"/files-*.tar.gz | tail -n +8 | xargs -r rm --Thumbnails and transcoded videos are not included in the archive, because Immich creates them again, while there is nothing to replace the originals with. Make the script executable and run it.
chmod +x /opt/immich-app/backup.sh
/opt/immich-app/backup.sh
ls -lh /root/immich-backups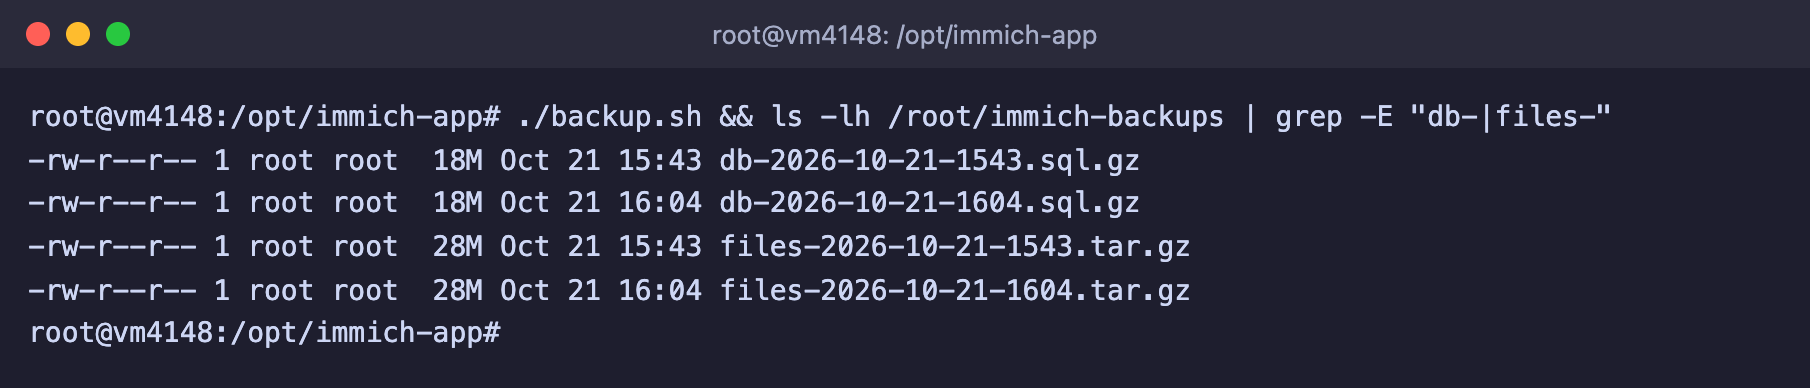
The database dump and the archive with files
To make the copies run by themselves, add the script to the schedule with the crontab -e command, for example for 3:00 every night.
0 3 * * * /opt/immich-app/backup.shWe checked the script launched by the scheduler, and it ran and created both files. You can read more about the schedule in the article about cron. Copies on the same server will not save you if the server itself disappears, so from time to time take them to another computer or server, for example with the rsync command.
How to restore Immich from a copy
We checked the restore on a test server, as after losing a server. We stopped Immich, deleted the postgres database folder, kept the folder with files, started Immich again and restored the database from the dump. Moving to a new server looks the same, only the folder with files first has to be put back in place.
On the new server do steps 1–4, but do not create an administrator yet. Then put the files back from the archive. The command below unpacks the
library,uploadandprofilefolders intoUPLOAD_LOCATION, and according to the documentation Immich will create the thumbnails again with separate jobs.bashtar -xzf files-2026-10-21-1604.tar.gz -C /opt/immich-app/libraryPut the database dump into the
backupsfolder insideUPLOAD_LOCATIONor upload it in step 5.Open Immich in the browser. Instead of creating an administrator, click Restore From Backup. The server will switch to maintenance mode and restart, and the page will show the message "Temporarily Unavailable".
Immich writes the address for entering maintenance mode to the server log. Run the command below and find the line with the link.
bashdocker logs immich_server 2>&1 | grep -A1 "log in using"The link starts with
https://my.immich.app/maintenance?token=.... We did not send the token to an external site, but opened the same path at Immich's own address, that is instead ofhttps://my.immich.appwe put in the address you use to open Immich, for examplehttp://127.0.0.1:2283in the case of an SSH tunnel. The token works like a password, do not show it to anyone.The Restore Your Library page will appear with a check of the folders. Immich checks that the folders are readable and writable and that there are files in them. In our case a red cross stood next to the
profilefolder, because it has no files, we did not set an avatar, and this did not get in the way of the restore. Click Next.Choose the dump from the list (according to the documentation you can also upload an
.sql.gzfile with the Select from computer button) and click Restore, then confirm the action. Immich warns that the database will be cleared and restored from the chosen copy, and it saves the current state beforehand to arestore-point-...sql.gzfile.Wait for it to finish. In our case a 19 MB dump was restored in 24 seconds, after which the server restarted by itself and left maintenance mode.
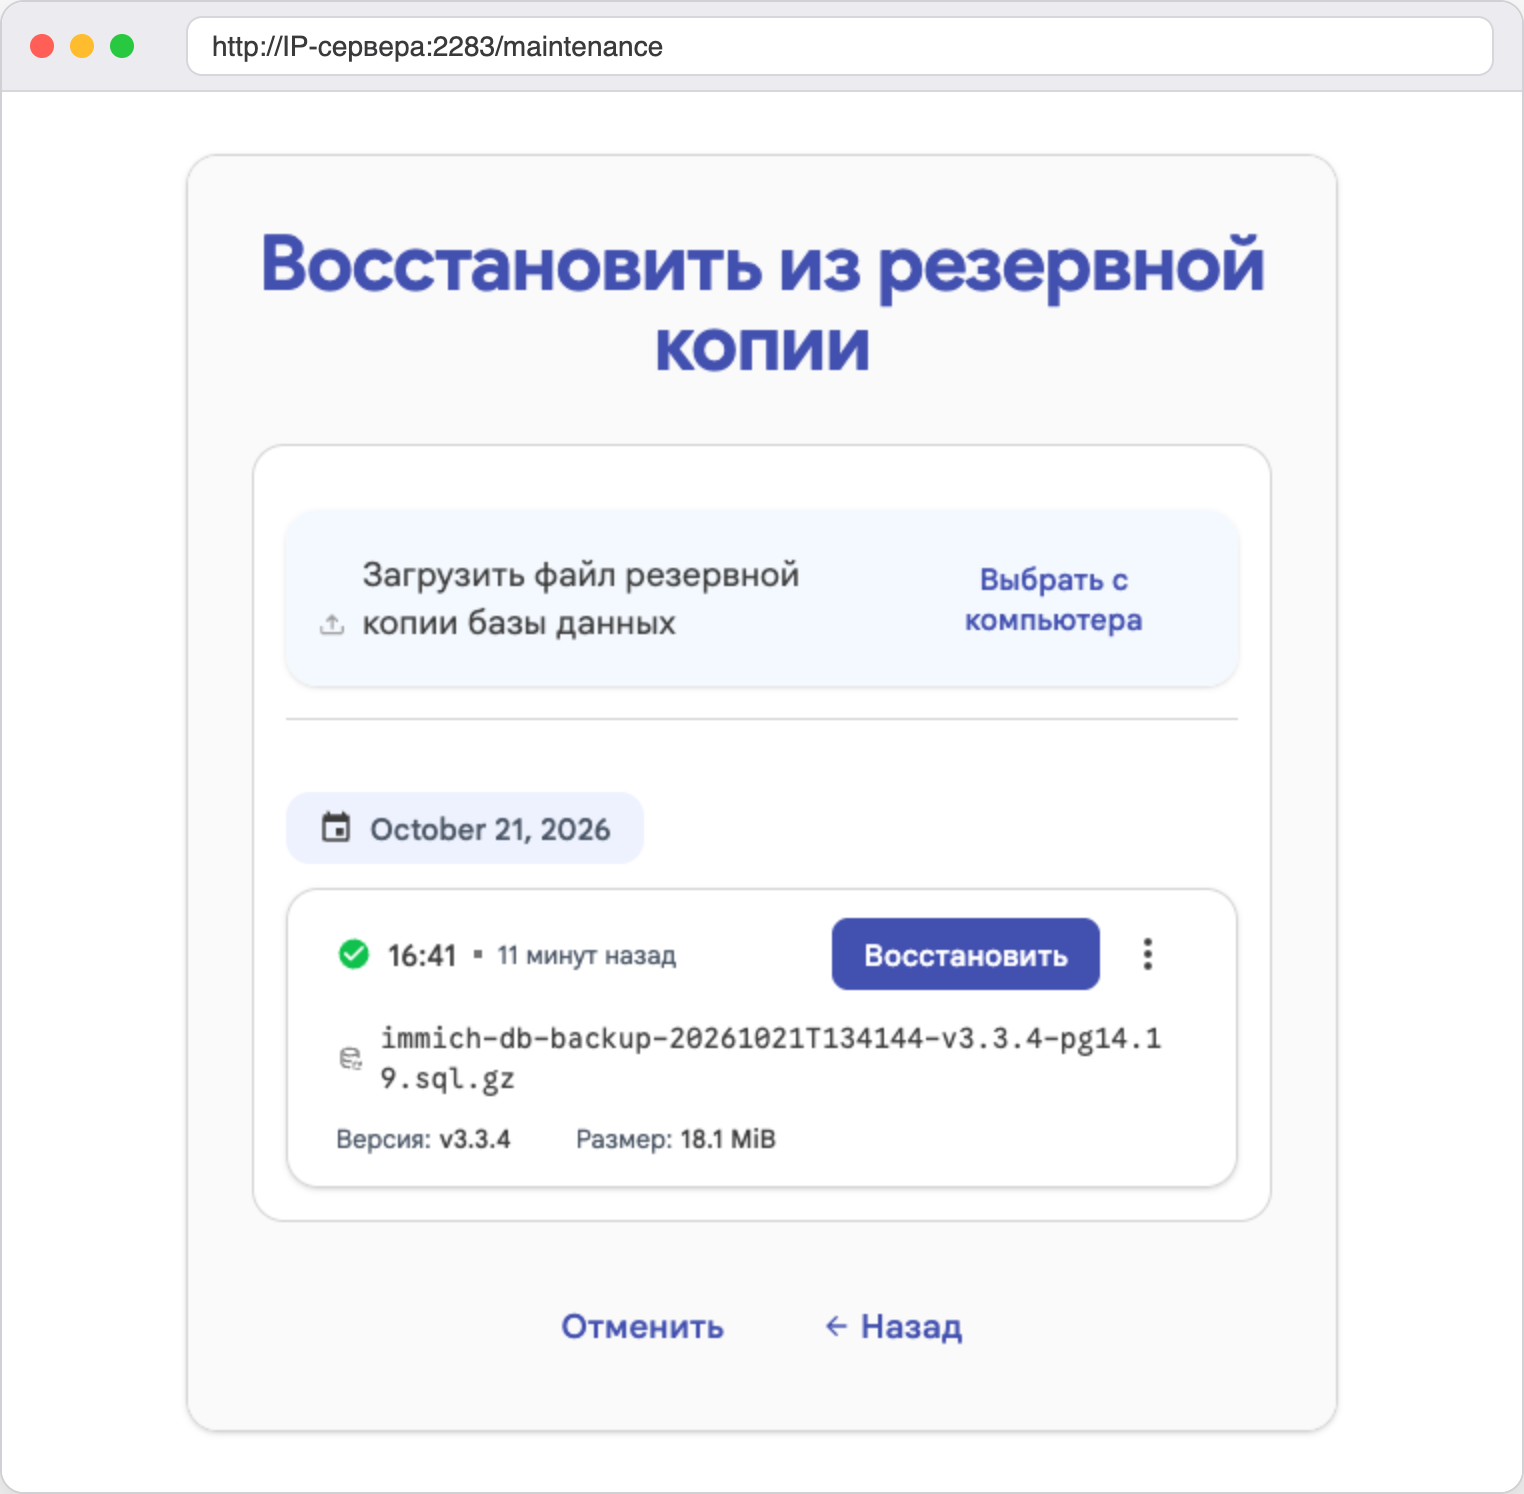
Choosing a dump from the backups folder
After the restore we logged in with the previous administrator password. The library had the same 11 photos and 4 people, and search by content worked.
The dump does not contain photos
The dump holds only metadata. Without the library, upload and profile folders the restored database will refer to files that do not exist.
How to update Immich
An update in Immich always starts with a backup. Run the script from step 11, look at the release notes on the releases page in case of changes that break compatibility, and then update the containers.
cd /opt/immich-app
docker compose pull && docker compose up -d
The first command downloads the new images, and the second recreates the containers whose image has changed. The data and settings are in folders and volumes, so they stay in place.
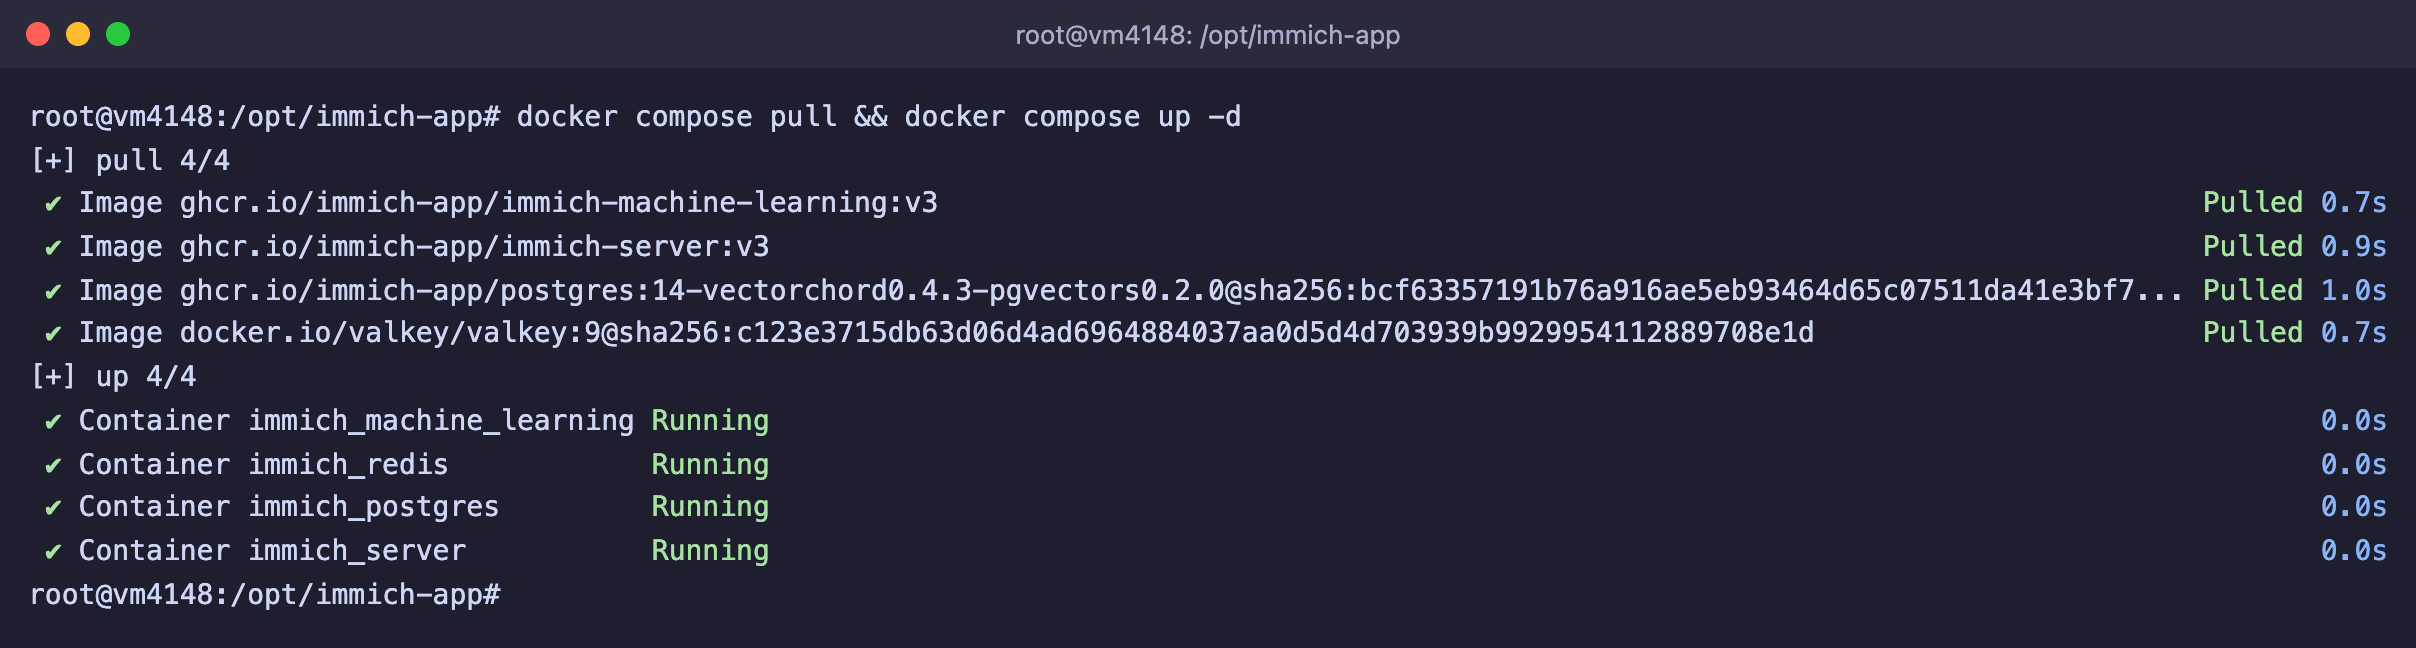
Updating the images and restarting the containers
The screenshot already shows the latest version, so the containers stayed as they were. We checked the version change itself separately. We put IMMICH_VERSION=v3.3.3 in .env, started Immich, then returned v3 and ran the same two commands. On a new installation without data the containers were recreated, and the server answered with version 3.3.4, which is also shown in the bottom left corner of the interface. Next come a few rules from the documentation.
- According to the documentation, changes that break compatibility should appear only in major versions.
- Rolling back to an old version is not supported, even within one minor version, so a copy before the update is truly needed.
- The documentation does not describe automatic updates, and the apps on phones have to be updated on time along with the server, so we advise updating by hand.
- Old images take up space. The documentation suggests the
docker image prunecommand, but it deletes all untagged images on the server and not only the Immich ones, so on a server with other projects run it with care.
Useful commands
All commands are run in the /opt/immich-app folder.
docker compose ps                      # container status
docker compose logs -f immich-server   # server log, press Ctrl+C to exit
docker compose stop                    # stop Immich, the data stays
docker compose start                   # start again
docker compose down                    # remove the containers, the data folders stay
docker stats --no-stream               # how much memory each container uses
docker exec -it immich_server immich-admin version   # Immich version
Do not add the -v flag to docker compose down unless you want to delete the volume with the neural networks as well, because Immich will download them again.
Frequently asked questions
password authentication failed for user "postgres"
Immich cannot connect to its database, and the immich_server container keeps restarting. We got this error when we changed DB_PASSWORD in .env after the first start. The database remembers the password at the moment it is created and does not accept a new one, while the server comes to it with the new one.
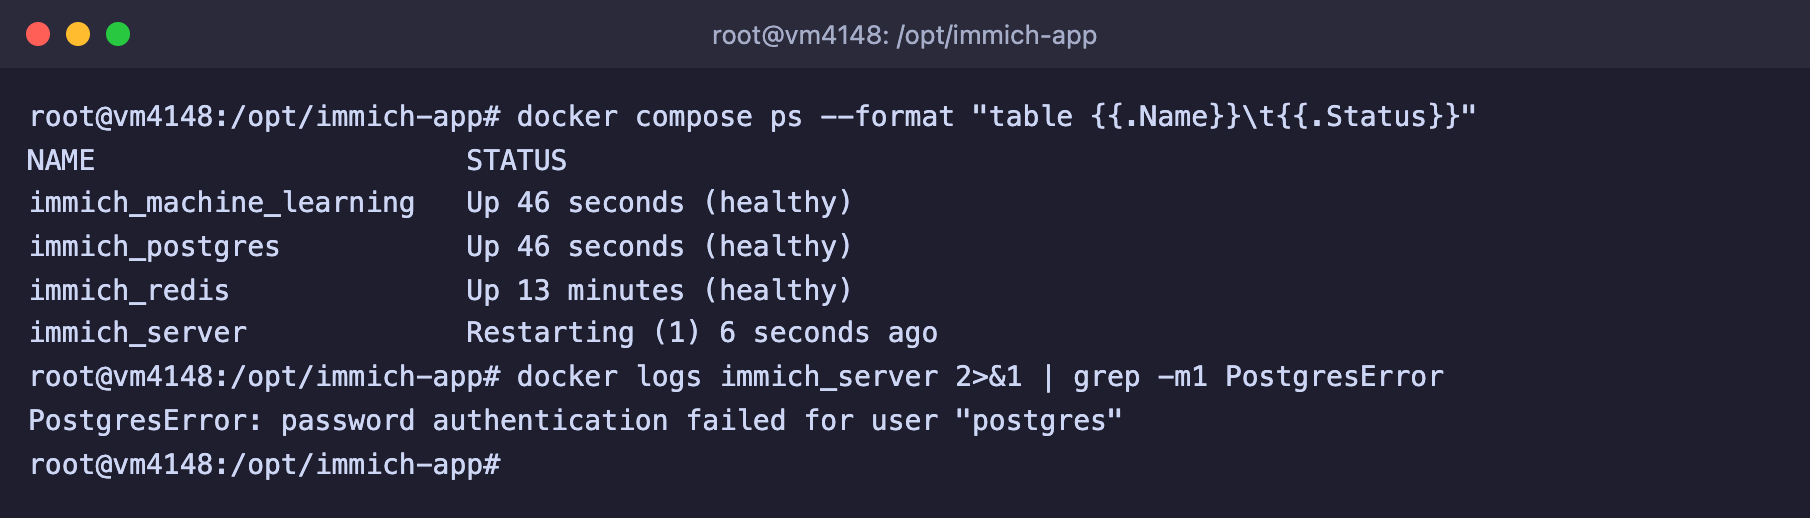
The server keeps restarting because of a wrong database password
Put the old password back in .env and run docker compose up -d. A minute later the server became healthy again. So the password must be set before the first start and saved in a safe place.
no configuration file provided: not found
You are running docker compose in the wrong folder. We got this message when we ran docker compose up -d in /root. Go to the project folder with cd /opt/immich-app and repeat.
The page does not open after closing the port
After step 9 the address http://server-IP:2283 stops responding, and that is normal. From our computer the connection ended in a timeout. Open Immich through an SSH tunnel at http://127.0.0.1:2283 or through a domain with HTTPS, as described in step 9. If the tunnel does not open either, check with docker compose ps that the containers are running, and that the command ss -ltn | grep 2283 shows the address 127.0.0.1:2283.
Forgot the administrator password
You can reset the password with a command inside the container.
docker exec -it immich_server immich-admin reset-admin-passwordThe command finds the administrator, shows their email and name and asks for a new password. We entered our own, and to the question about resetting sessions we left the default answer, that is Yes, after which the message The admin password has been updated. appeared. Keep in mind that the password you type is visible on screen in plain text.
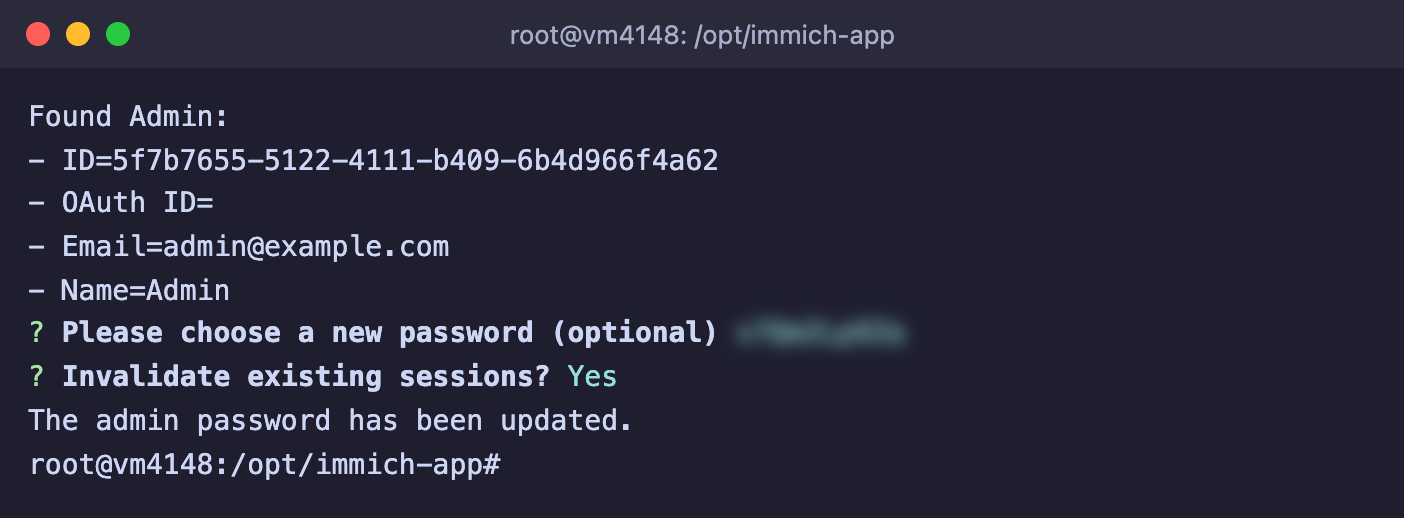
Resetting the administrator password
The "People" page is empty although faces were found
The page does not show unnamed groups of faces. The Minimum recognized faces setting equals 3 by default. We set 1, and Immich created four groups, but they appeared on the People page only after we gave them names. How to do this is described in step 7.
Search in Russian finds the wrong things
The ViT-B-32__openai model, which is set by default, understands Russian queries unreliably. Try English words or install a multilingual model as described in step 7. Keep in mind that such models need noticeably more memory.
Temporarily Unavailable. Immich has been put into maintenance mode
Immich turns this mode on when you click Restore From Backup. We saw it while checking the restore. You can enter the mode through the link from the server log, as described in the section about restoring. If you did not intend to restore the database, leave the mode with the End maintenance mode button on the mode page or with the command docker exec immich_server immich-admin disable-maintenance-mode, which is in the Immich documentation.
The server is short on memory, Immich is slow or containers crash
The minimum according to the documentation is 6 GB, and we saw peaks of up to 2.8 GB on just 11 photos, and with a large library the consumption grows. On a server with 4 GB the documentation allows working with machine learning turned off. To do this, open Administration > Settings > Machine Learning Settings and turn off Enable machine learning. Then search by content and face recognition disappear, but Immich remains a storage with a timeline and albums. You can check the memory usage with the docker stats --no-stream command.
Our resources
Telegram channel: https://t.me/f3cloud_news
F3 Cloud: https://f3cloud.com