

Installing OpenClaw (ClawdBot) on a VPS
OpenClaw – a fully fledged engine for neural networks that runs autonomously on your server 24/7. Switched off your computer, closed your laptop – and your bot keeps working in the background and is always reachable in your messenger.
INFO
Unlike standard neural networks (AI), the bot actually remembers context. It builds your personal base of knowledge: it keeps a user profile, takes your habits into account and remembers what you talked about a week ago.
The bot can not only chat, but also do useful stuff. Thanks to scripts, you can delegate a whole bunch of routine tasks to it: from collecting a morning news digest to managing a smart home or a server.
Step 1. Server preparation and system requirements.
To ensure stable and uninterrupted operation of the ClawdBot service, deployment on a virtual private server (VPS) is required.
For a reliable infrastructure, we recommend using our F3 Cloud servers. They fully meet the system requirements of the project and provide perfect compatibility with the instructions set out below.
| Parameter | Minimum requirements |
|---|---|
| vCPU (virtual core) | Minimum 2 cores. |
| RAM | From 4 GB. |
| Storage | From 40 GB SSD. |
| Operating system | OS_:_ Ubuntu 24.04 (recommended). |
For smooth and fast operation of the AI assistant, we suggest taking a look at the DE-5950X-2, NL-5950X-2 or FI-5950X-2 configurations.
These servers are based on powerful processors that handle the neural network's background tasks perfectly and fully cover the project's system requirements. You can choose any of the available locations: Germany (DE), the Netherlands (NL) or Finland (FI).
Step 2. Choosing a server configuration.
After logging in or signing up in the F3 Cloud panel, click the Order service button to go to server selection.
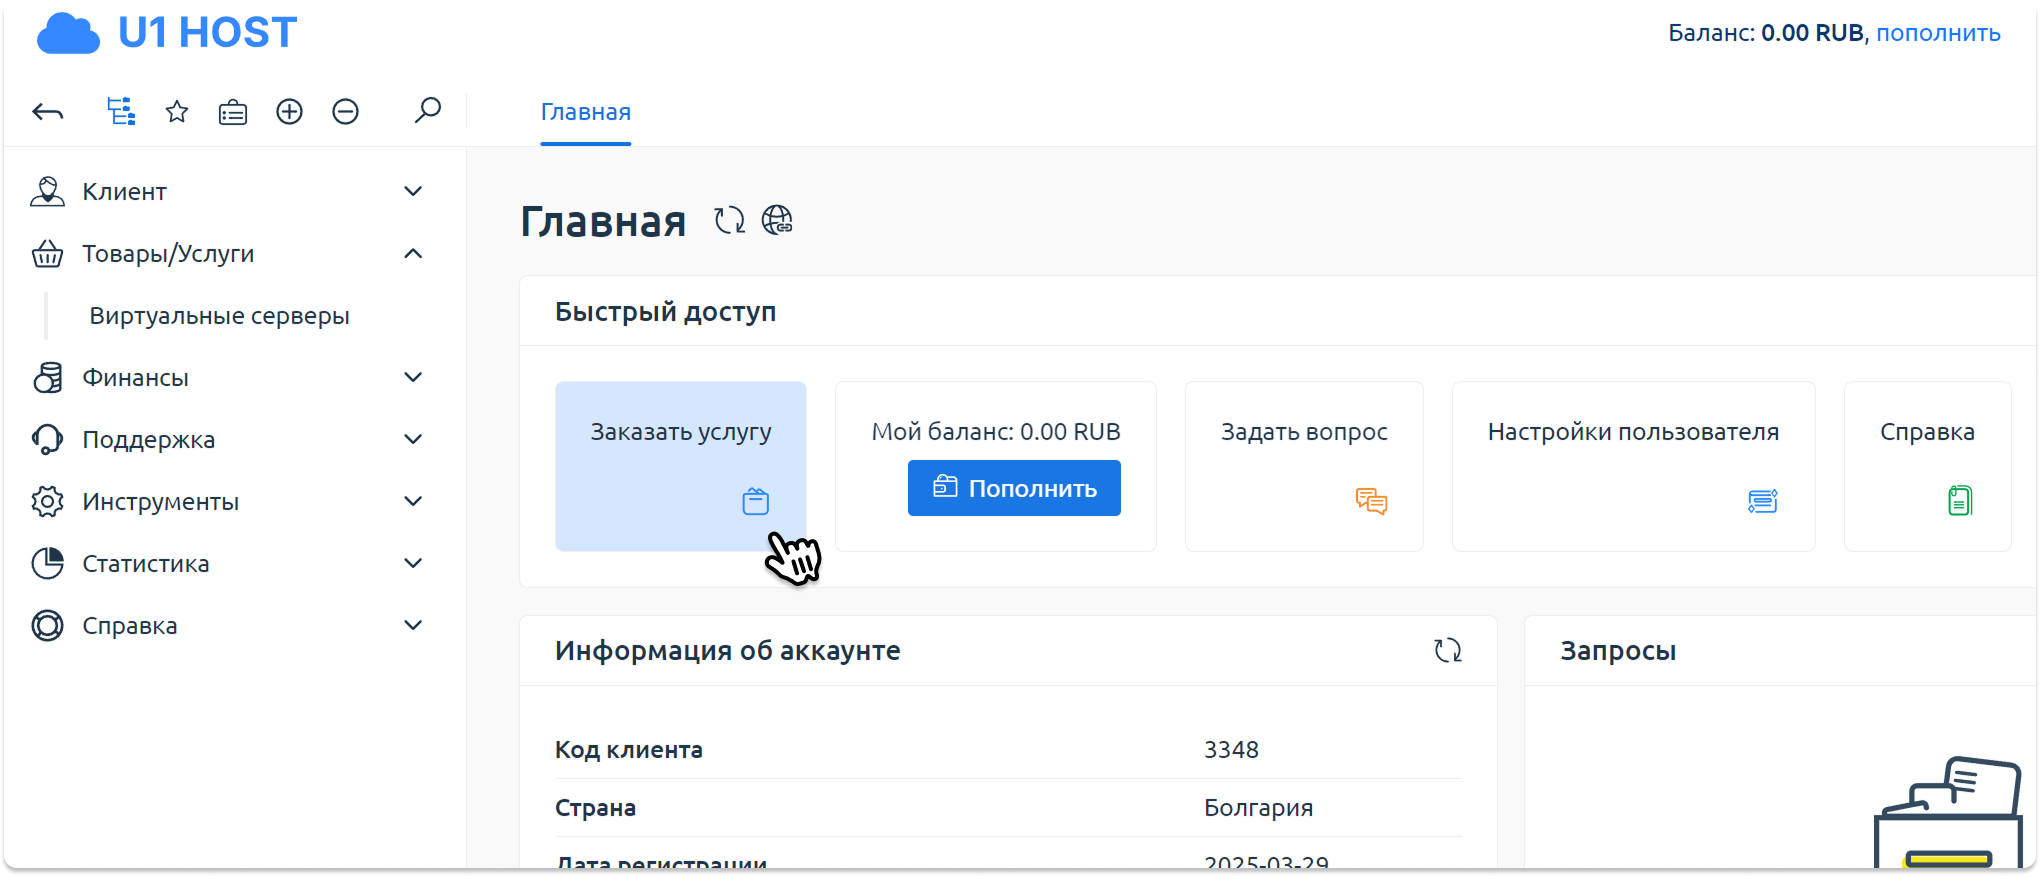
- The Order service menu shows the main plans suitable for speeds of up to 100 Mbit per second. To see the full list, click View all.
How to choose a server:
- On the DE-5950X-2, NL-5950X-2 or FI-5950X-2. card, click the Order button.
- In the server configuration, select the operating system Ubuntu 24.04 .
- Click the Pay button to complete the order.
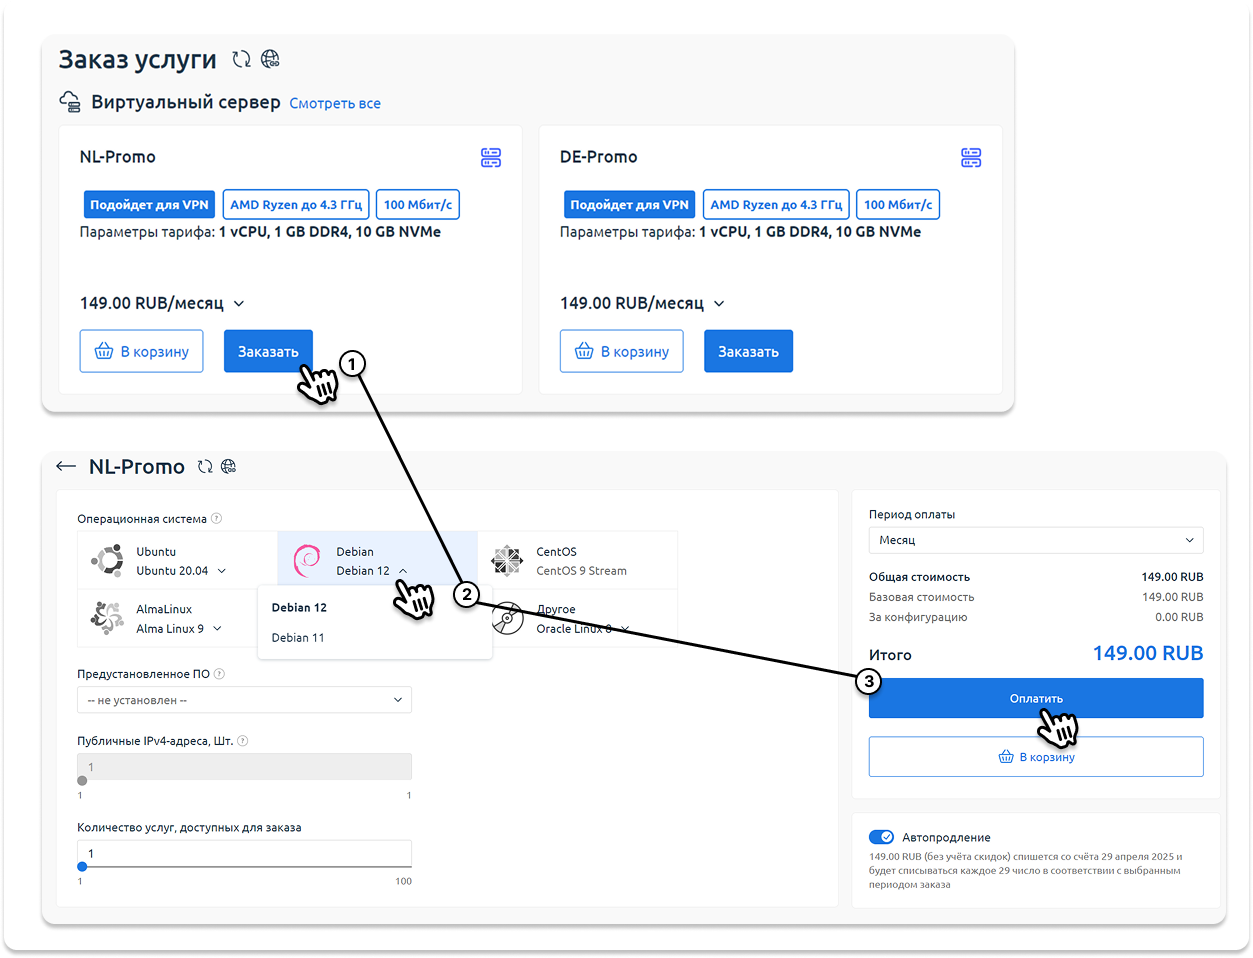
The picture is an example of how to set up a server order, in your case you need to select Ubuntu 24.04 and not Debian.
Step 3. Server activation.
After payment, automatic processing of the order begins. Server activation usually takes no more than 120 seconds.

The server status is "processing", you need to wait a little.
You can track the current status in the control panel. As soon as the server is ready to use, the status will change to Active.
INFO
Sometimes activation may take a little longer due to increased load and the order processing queue in the selected location. If the server has not been activated within 10 minutes – please write to us in a ticket, and we will promptly check the order status.
Step 4. Getting the server details.
- Wait until the server is fully activated.
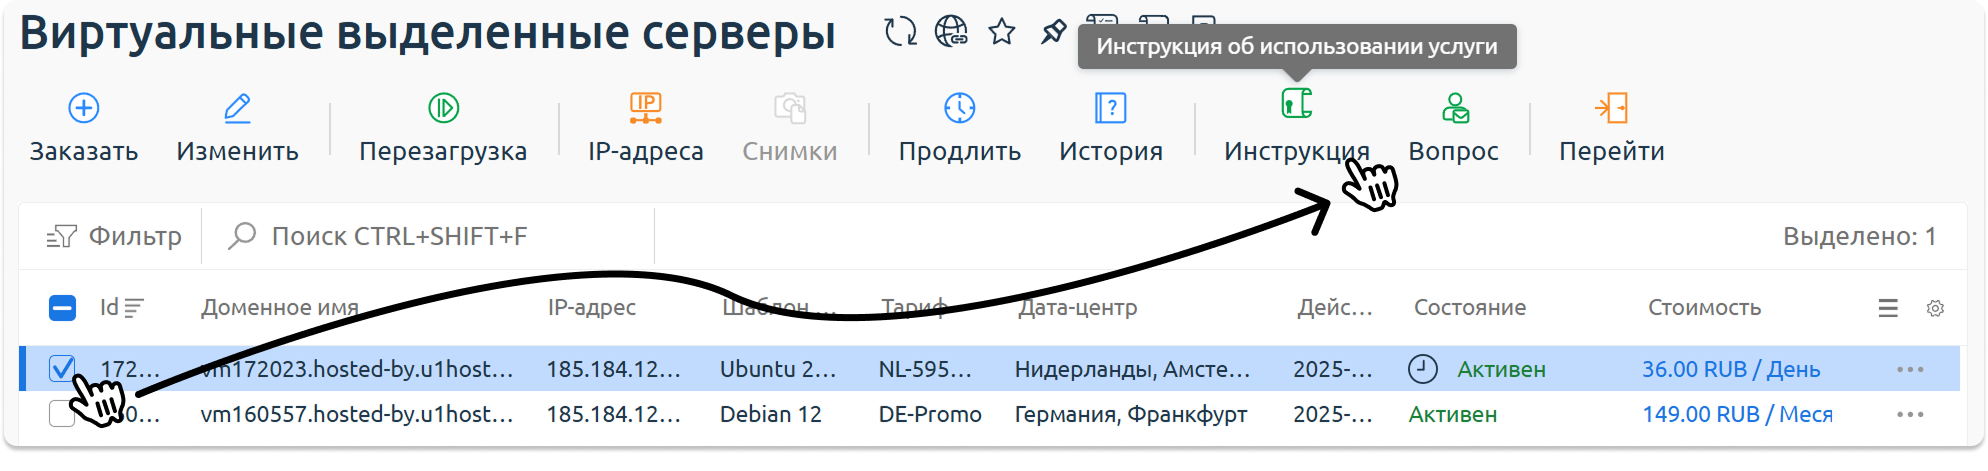
- In the client area, tick the checkbox next to the server you need and click the Instructions button in the top menu.
- Copy the connection details given in the instructions:
- Server IP address .
- Username .
- Password .
The screenshot below shows exactly where you can find this information.
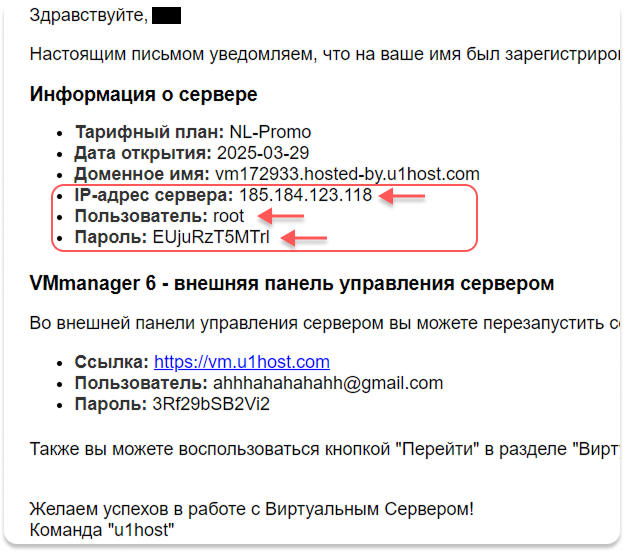
The server details are also sent to your email.
Step 5. Installing Node.js and the OpenClaw core.
Connect to the server via an SSH client, then follow the instructions below.
Run the commands one at a time:
Step 1. Installing dependencies and updating the distribution.
apt update && apt upgrade -y
apt install -y curl gnupg lsb-release jq fail2ban ufw git nano
reboot
After the reboot - return to the terminal.
Step 2. Installing Node.JS.
curl -o- https://raw.githubusercontent.com/nvm-sh/nvm/v0.40.4/install.sh | bash
source "$HOME/.nvm/nvm.sh"
nvm install 22
Step 3. Installing OpenClaw.
npm install -g openclaw@latestAfter a successful installation of OpenClaw, it needs to be configured via the setup wizard.
openclaw onboard --install-daemonThe wizard is controlled with the arrow keys (Up/Down/Space) on the keyboard, and a choice is confirmed with the Enter key.
Step 4. Configuring OpenClaw.
I understand this is personal-by-default...Choose Yes. The bot is simply warning you that by default it trusts only you.I understand this is personal-by-default...Choose Yes. The bot is simply warning you that by default it trusts only you.Model/auth provider(The bot's brains): We recommend choosing OpenAI (Codex OAuth + API key). The terminal will give you a link. Copy it, open it in a browser, log in to OpenAI and copy the issued token back into the console.Default model:Press Keep current (Keep the default) or choose the version you need from the list.Search provider:Choose Brave Search (optional) so that the bot can search the internet for fresh information. For example: Sign up on the Brave Search API website, get a free API key and paste it into the console.If you have an API key:
- In the terminal, run:
openclaw configure --section web - Select
Local, enableweb-search, paste the API key.
- In the terminal, run:
Select channel(Messenger): Choose Telegram (Bot API). Open Telegram, find the official bot @BotFather, send the/newbotcommand and create your own bot. Copy the issued token (in the form12345:ABC...) and paste it into the server console.Configure skills now?The wizard will offer to download additional plugins. You can skip this step, or install the plugins you need.
Step 5. Getting access to the Web UI.
Open a terminal (or command prompt) on your personal computer (not on the server!) and run the command:
ssh -N -L 18789:127.0.0.1:18789 root@YOUR_SERVER_IPDo not close this terminal window. Open in your browser: http://127.0.0.1:18789/
Step 6. Linking (Pairing)
- Send your bot its first message in Telegram.
- The bot will send a Pairing code.
- In the terminal on the server, enter:
openclaw pairing approve telegram YOUR_CODE - Choose the launch mode:
Hatch in TUI.
Step 6. Web-UI interface.
So, you have opened http://127.0.0.1:18789/ in your browser and successfully linked Telegram. What useful stuff is there in this panel and why do you even need it?
The OpenClaw web interface – your remote control for the bot's “brains”. You won't need to go into the server terminal any more, everything is done from here:
.png)
- Installing skills (Skills): Remember we skipped installing plugins during the setup in the console? This is where it is most convenient to install them. In a couple of clicks, you can teach the bot to google (Brave Search, etc.), read PDF documents, watch YouTube videos and much more.
- Managing memory (Memory): The neural network keeps a “dossier” on you. In the admin panel, you can open the profile file (
USER.md) and hard-code rules. For example: "Only talk to me informally, keep it short and no emojis". The bot will apply this to all future conversations. - System logs (Logs): If you have given the bot a complex task in Telegram and it has been silent for a long time – open the admin panel. The logs show in real time what is happening under the hood: how the bot writes a script, how it googles and how it analyses text.
- In case of errors - you can reach out to our F3 Cloud chat.