

Installing N8N on a VPS server
Solution architecture
The stack consists of two main containers:
- Caddy: An edge server responsible for TLS termination and traffic forwarding.
- n8n: The main automation node (Low-code platform).
INFO
Traffic arrives at host ports 80/443 -> Caddy (auto-SSL) -> Internal Docker network -> n8n (port 5678).
Step 1: Server preparation and system requirements
To ensure stable and uninterrupted operation of the n8n service, deployment on a virtual private server (VPS) is required. For a reliable infrastructure, we recommend using our F3 Cloud servers – they fully meet the system requirements of the project and provide perfect compatibility with the instructions set out below.
| Parameter | Minimum requirements |
|---|---|
| vCPU (virtual core) | Minimum 2 cores. |
| RAM | From 4 GB. |
| Storage | From 40 GB SSD. |
| Operating system | OS_:_ Ubuntu 24.04 (recommended). |
For smooth and fast operation of n8n, we suggest taking a look at the DE-5950X-2, NL-5950X-2 or FI-5950X-2 configurations. These servers are based on powerful processors that handle background tasks perfectly and fully cover the project's system requirements. You can choose any of the available locations: Germany (DE), the Netherlands (NL) or Finland (FI).
Step 2: Choosing a server configuration
After logging in or signing up in the F3 Cloud panel, click the Order service button to go to server selection.
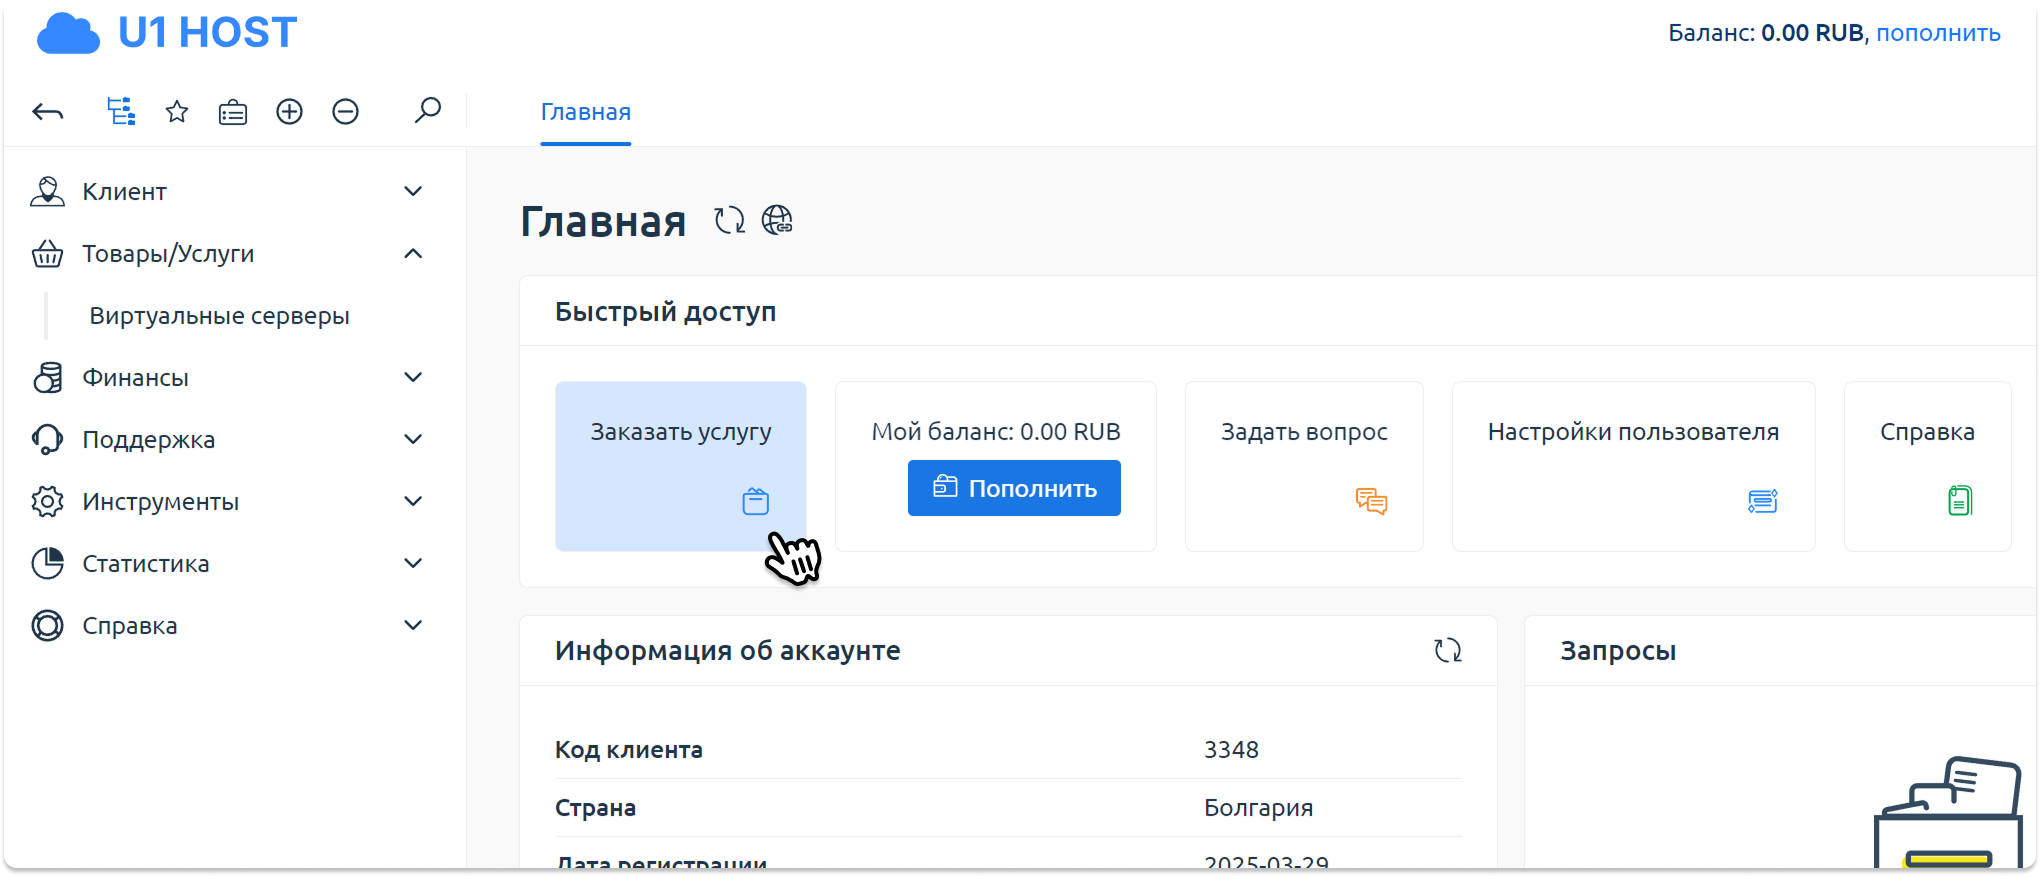
- The Order service menu shows the main plans suitable for speeds of up to 100 Mbit per second. To see the full list, click View all.
How to choose a server:
- On the DE-5950X-2, NL-5950X-2 or FI-5950X-2. card, click the Order button.
- In the server configuration, select the operating system Ubuntu 24.04 .
- Click the Pay button to complete the order.
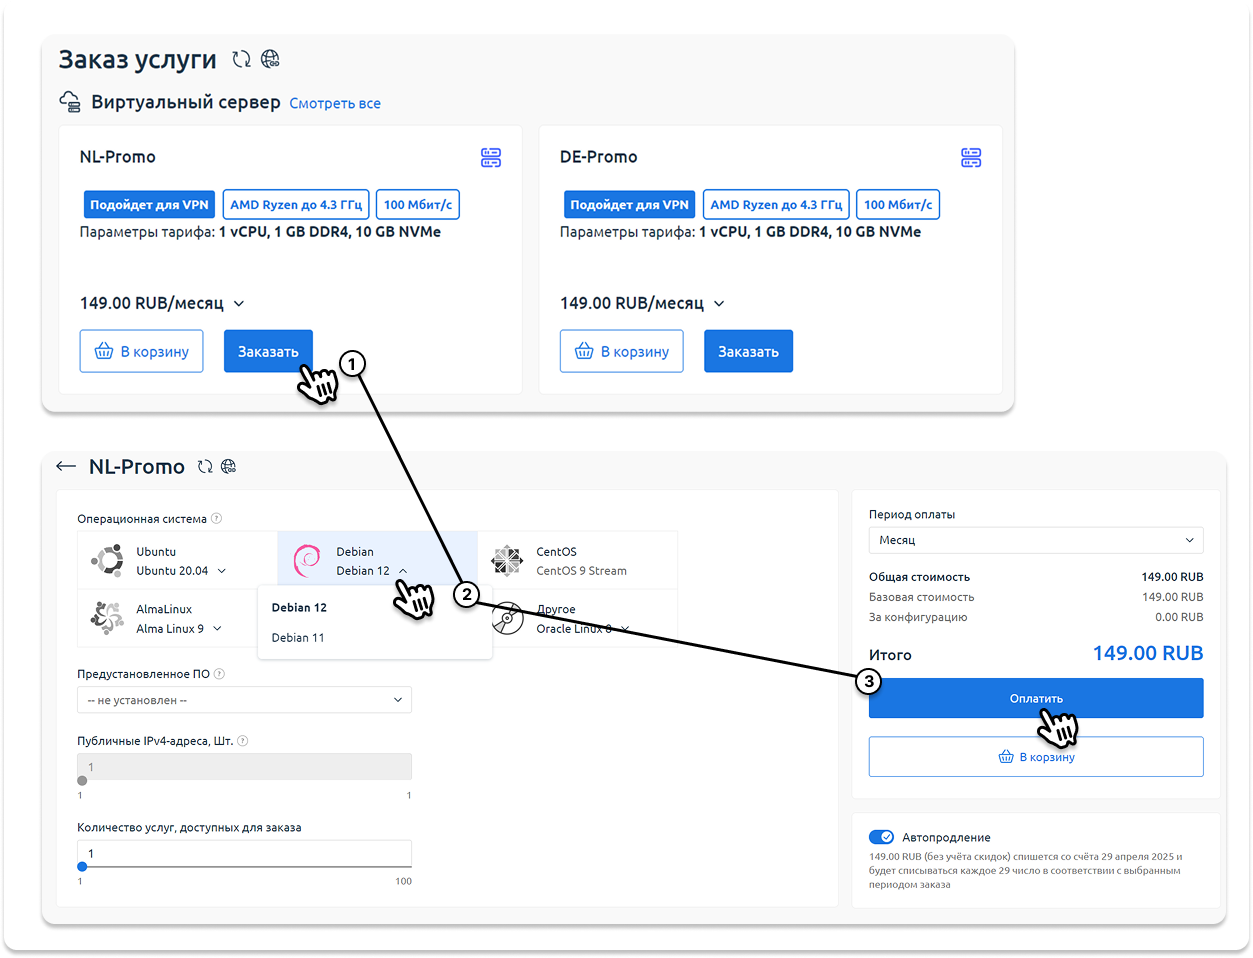
The picture is an example of how to set up a server order, in your case you need to select Ubuntu 24.04 and not Debian.
Step 3: Server activation
After payment, automatic processing of the order begins. Server activation usually takes no more than 120 seconds.

The server status is "processing", you need to wait a little.
You can track the current status in the control panel. As soon as the server is ready to use, the status will change to Active.
INFO
Sometimes activation may take a little longer due to increased load and the order processing queue in the selected location. If the server has not been activated within 10 minutes – please write to us in a ticket, and we will promptly check the order status.
Step 4: Getting the server details
- Wait until the server is fully activated.
- In the client area, tick the checkbox next to the server you need and click the Instructions button in the top menu.
- Copy the connection details given in the instructions:
- Server IP address .
- Username .
- Password .
The screenshot below shows exactly where you can find this information.
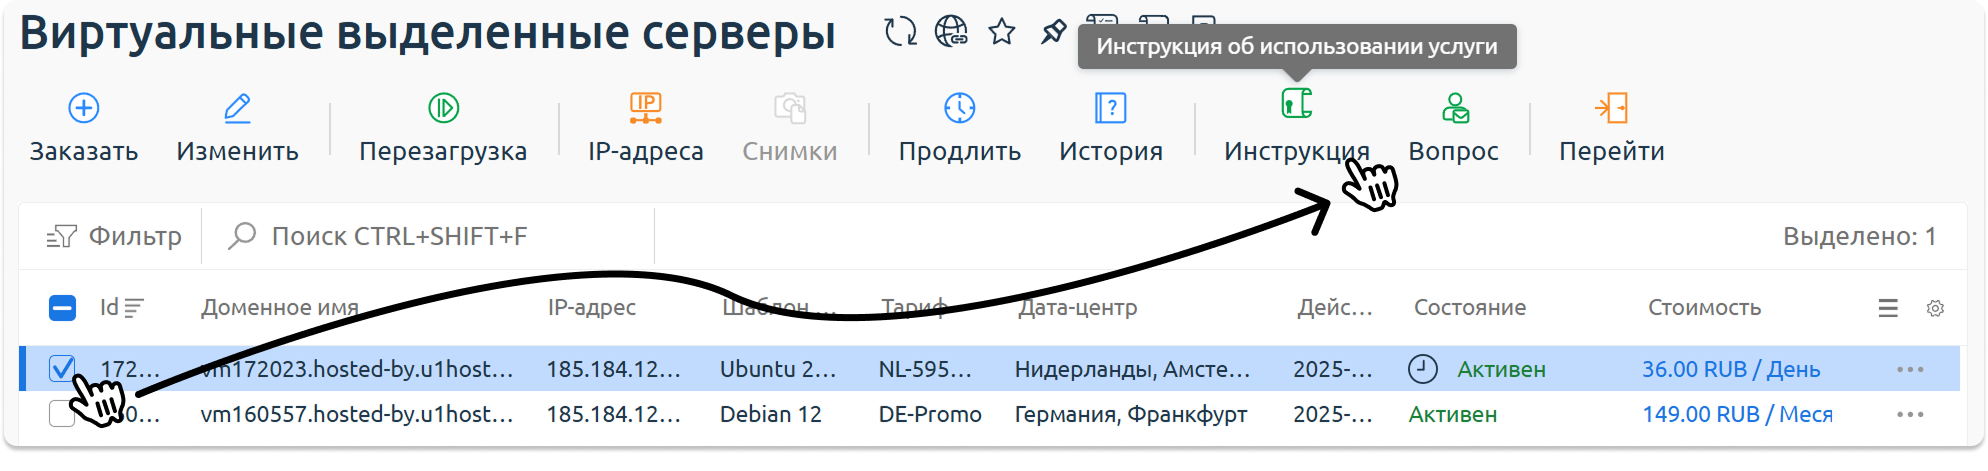
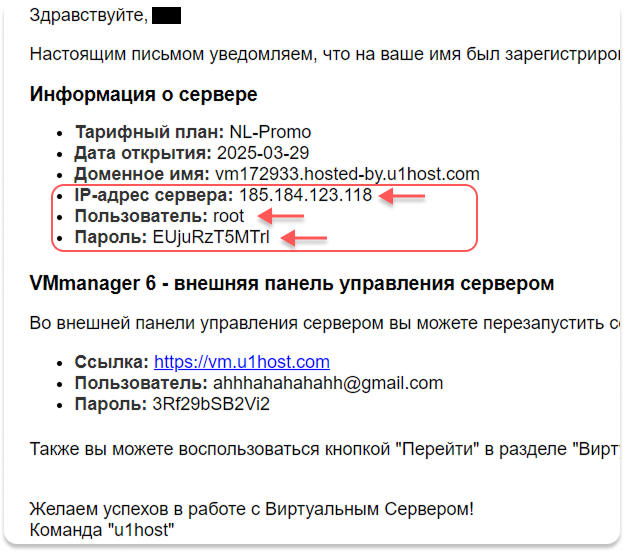
The server details are also sent to your email.
Step 5: Preparing the file structure
To mount volumes correctly, you need to create a working directory and configuration files.
apt update && apt upgrade -yreboot ## After the reboot, continue with the rest of the setup.mkdir -p /opt/n8n && cd /opt/n8ntouch Caddyfile docker-compose.ymlStep 6: Reverse Proxy configuration (Caddyfile)
Using an external Caddyfile is preferable to inline commands in Compose for easier debugging and maintenance.
nano /opt/n8n/CaddyfilePaste the following value:
your-domain.tld {
    reverse_proxy n8n:5678
}
TIP
Caddy will automatically determine whether a certificate needs to be issued via Let's Encrypt or ZeroSSL on startup.
Step 7: Service description (Docker Compose)
The orchestration file defines limits, networks and restart rules.
/opt/n8n/docker-compose.ymlPaste the following content, don't forget to change it to your own values.
services:
  caddy:
    image: caddy:latest
    container_name: n8n-caddy
    restart: always
    ports:
      - "80:80"
      - "443:443"
    volumes:
      - ./Caddyfile:/etc/caddy/Caddyfile
      - caddy_data:/data
      - caddy_config:/config
    networks:
      - n8n_net

  n8n:
    image: n8nio/n8n:latest
    container_name: n8n-app
    restart: always
    environment:
      - N8N_HOST=your-domain.tld
      - N8N_PORT=5678
      - N8N_PROTOCOL=https
      - NODE_ENV=production
      - WEBHOOK_URL=https://your-domain.tld/
    volumes:
      - n8n_data:/home/node/.n8n
    networks:
      - n8n_net

networks:
  n8n_net:

volumes:
  caddy_data:
  caddy_config:
  n8n_data:
Step 8: Deployment and verification
- Starting the stack in detached mode:
docker compose up -d- Monitoring the SSL certificate issuance process:
docker compose logs -f caddy- Checking the availability of n8n: The response should contain
HTTP/2 200.
curl -I https://your-domain.tldStep 9: Signing up in the n8n panel
- On your first visit to the page, you will see a sign-up form.
- First and last name: Used for display inside the panel.
- Email: This is your login. It will receive notifications about critical errors in workflows and password reset requests.
- Password: At least 8 characters. Since n8n will have access to your API keys, servers and Telegram bots, use the most complex combination possible.
- After you create an account, n8n will offer you a short survey.
- Role (What is your role?): Choose
EngineerorDevOps. This affects which workflow templates the system will suggest to you on the start page. - Usage Data: The system will ask for permission to send anonymous statistics. As a security specialist, you may feel more comfortable disabling this option to minimise outgoing traffic to third-party servers.
- As soon as you get into the main interface, the first thing you need to do is protect the login:
Go to Settings (the cog at the bottom left) -> Personal.
Find the section Multi-factor authentication.
Click Enable 2FA and scan the QR code with any authenticator.
Important: Save the recovery codes. In a Docker container, resetting 2FA via the database will be difficult without experience with SQLite.
Technical recommendations
- n8n data (workflows, accounts) is stored in the named volume
n8n_data. For a backup, it is enough to copy the contents of/var/lib/docker/volumes/n8n_n8n_data/. - Since Caddy runs on ports 80/443, make sure that the external Firewall (ufw/iptables) allows incoming traffic on these ports.