> The full list of articles is in [llms.txt](https://docs.f3cloud.com/llms.txt). Every page has a Markdown version: add .md to its address. This page as Markdown: [https://docs.f3cloud.com/en/web/lets-encrypt-ssl-nginx-apache.md](https://docs.f3cloud.com/en/web/lets-encrypt-ssl-nginx-apache.md).
# Let's Encrypt SSL for Nginx and Apache with Certbot
How to get a free Let's Encrypt SSL certificate with Certbot for a website on Nginx or Apache. Issuing a certificate and enabling HTTPS with one command, auto-renewal, expiry checks, several domains and common errors explained.
**An SSL certificate** lets your website open over the secure HTTPS protocol. Data between the visitor and the server is then encrypted, and the browser shows a padlock next to the address instead of a "Not secure" warning.
**Let's Encrypt** issues these certificates for free, and **Certbot** gets them, connects them to Nginx or Apache by itself and later renews them on its own. We tested all the commands below on Debian 12, and they work the same way on Ubuntu.
***
## Before you start
* **A domain** whose A record points to the server's IP address. You can check this with `getent hosts example.com`, which should show your server's IP.
* **The website already opens** at `http://your-domain` on Nginx or Apache. We explain how to set up Nginx in a [separate article](https://docs.f3cloud.com/en/web/nginx-installation.md).
* An open **port 80**, because Let's Encrypt checks the domain through this port. If a firewall is enabled, open ports 80 and 443 as shown in the article [about the firewall](https://docs.f3cloud.com/en/vps/security/firewall.md).
> **If the domain has an AAAA record.**
>
> If the domain has an AAAA record, Let's Encrypt checks it over IPv6 first. When the AAAA record points to another server or the website is not set up for IPv6, the check fails. Put this server's IPv6 address in the AAAA record or delete the record.
***
## 1. Install Certbot
#### Nginx
```bash
# Install Certbot and its Nginx plugin
apt update && apt install -y certbot python3-certbot-nginx
```
#### Apache
```bash
# Install Certbot and its Apache plugin
apt update && apt install -y certbot python3-certbot-apache
```
***
## 2. Issue the certificate
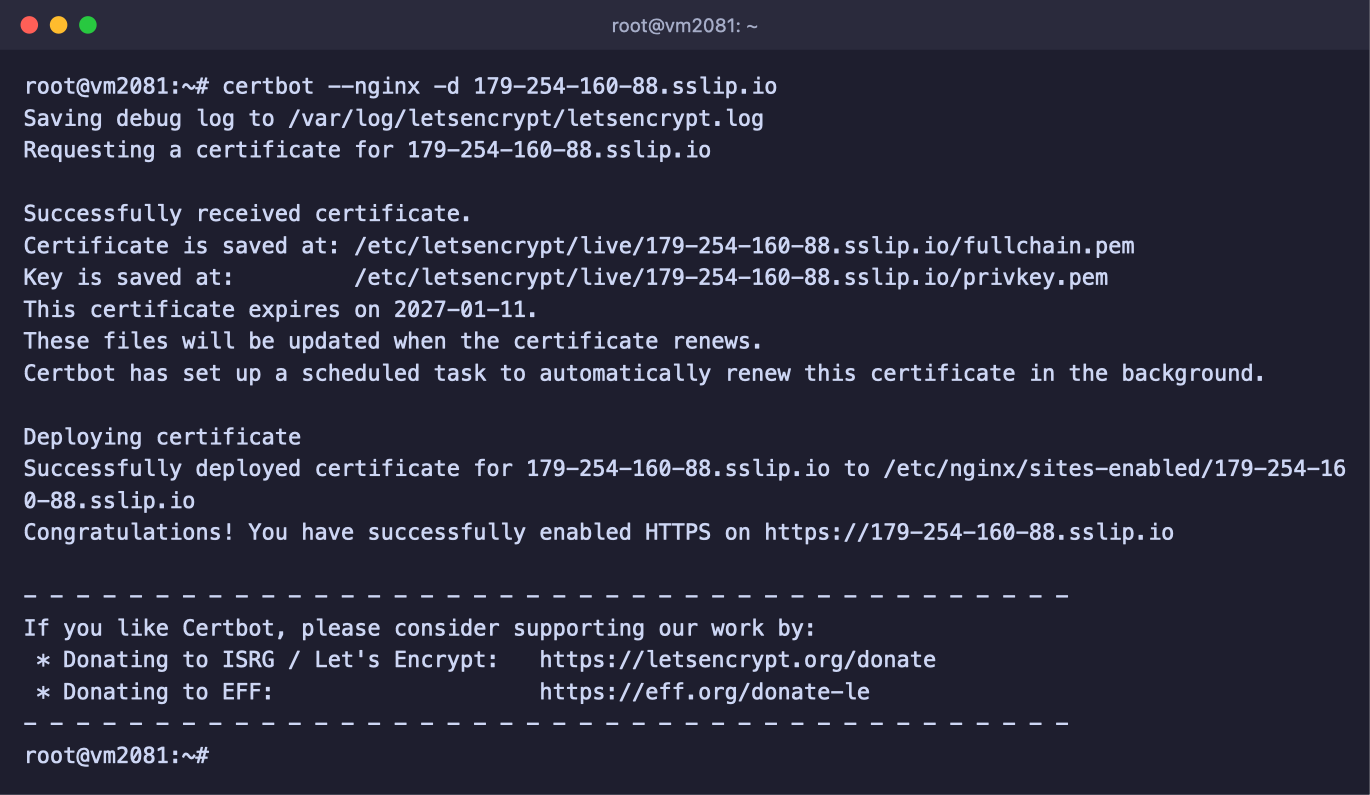
One command gets the certificate, connects it to the website and turns on the redirect from `http://` to `https://`. List all the website's addresses with `-d`, usually the domain with and without `www`.
#### Nginx
```bash
certbot --nginx -d example.com -d www.example.com
```
On the first run, Certbot will ask a few questions:
1. **Email** – important account notifications are sent to it.
2. **Let's Encrypt terms** – type `Y` to accept them.
3. **EFF mailing list** – this one is optional, you can answer `N`.
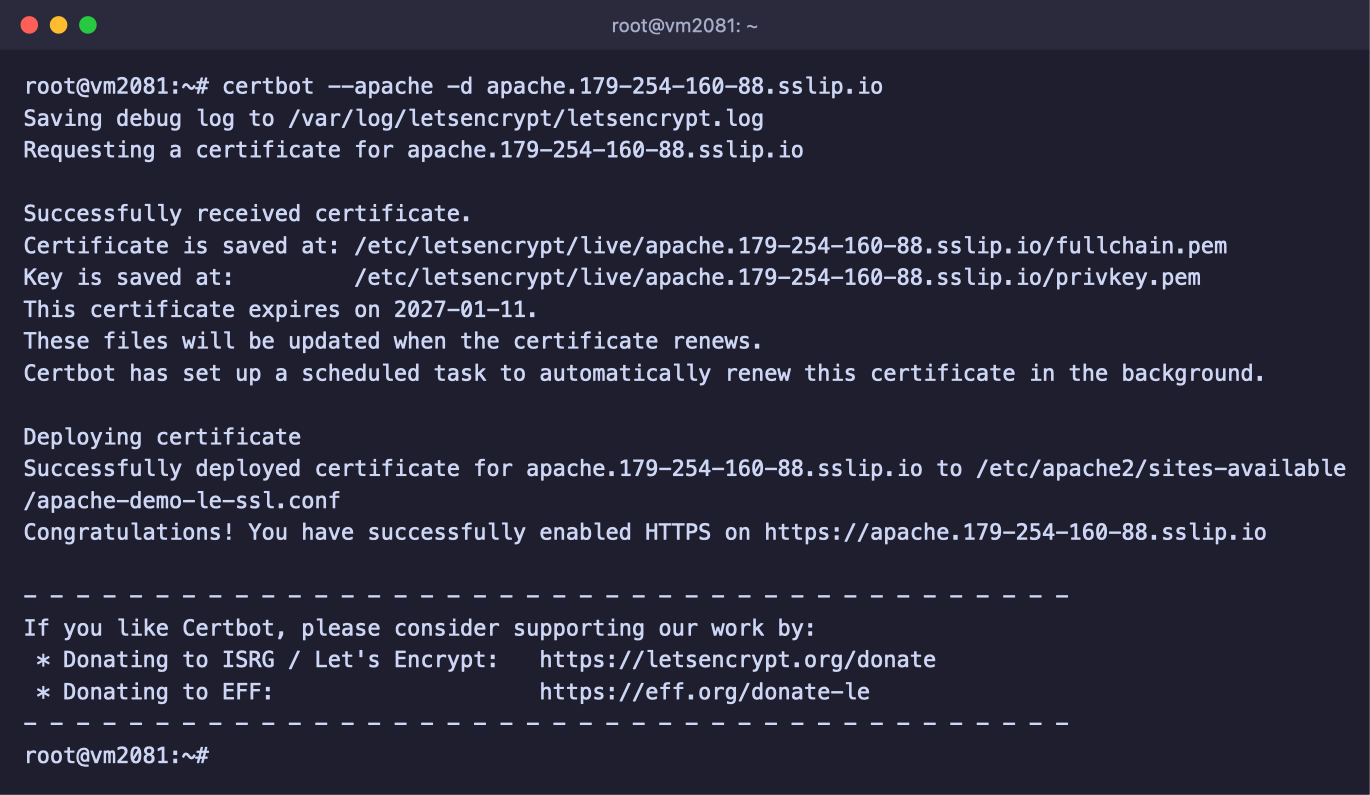
If you see `Congratulations! You have successfully enabled HTTPS` at the end, everything is ready. Open the website at `https://your-domain`, and a padlock will appear next to the address.
Certbot has added the required lines to the website settings by itself, and they are marked with the comment `# managed by Certbot`. In Nginx, this is the website file in `/etc/nginx/sites-available`.\
In Apache, a new file ending in `-le-ssl.conf` appears next to yours.
***
## 3. Check the certificate
```bash
# Show all certificates on the server
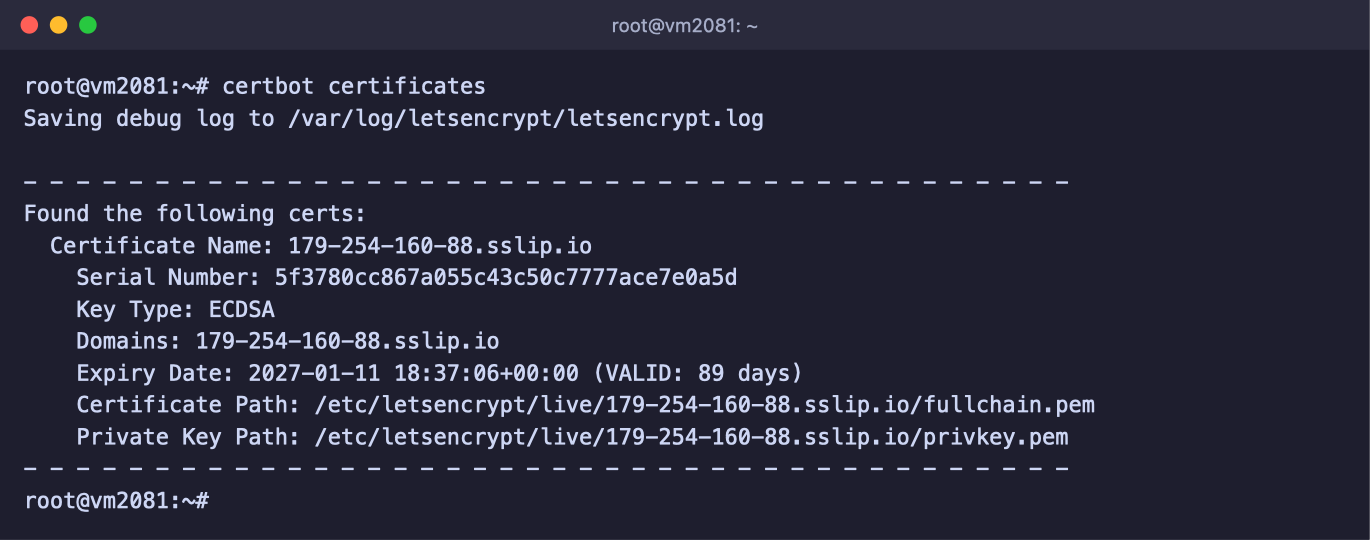
certbot certificates
```
The certificate is valid for another 89 days
The **Expiry Date** line shows when the certificate expires.\
`VALID` in brackets shows how many more days the certificate will be valid.
Below that are the paths to the certificate and key files, in case other programs need them.
***
## 4. Make sure renewal works
Let's Encrypt certificates are issued for a short period. Right now it is 90 days, and by 2028 Let's Encrypt will gradually shorten it to 45 days. You don't need to renew anything manually. Certbot checks the certificates twice a day and renews the ones that are close to expiring by itself.
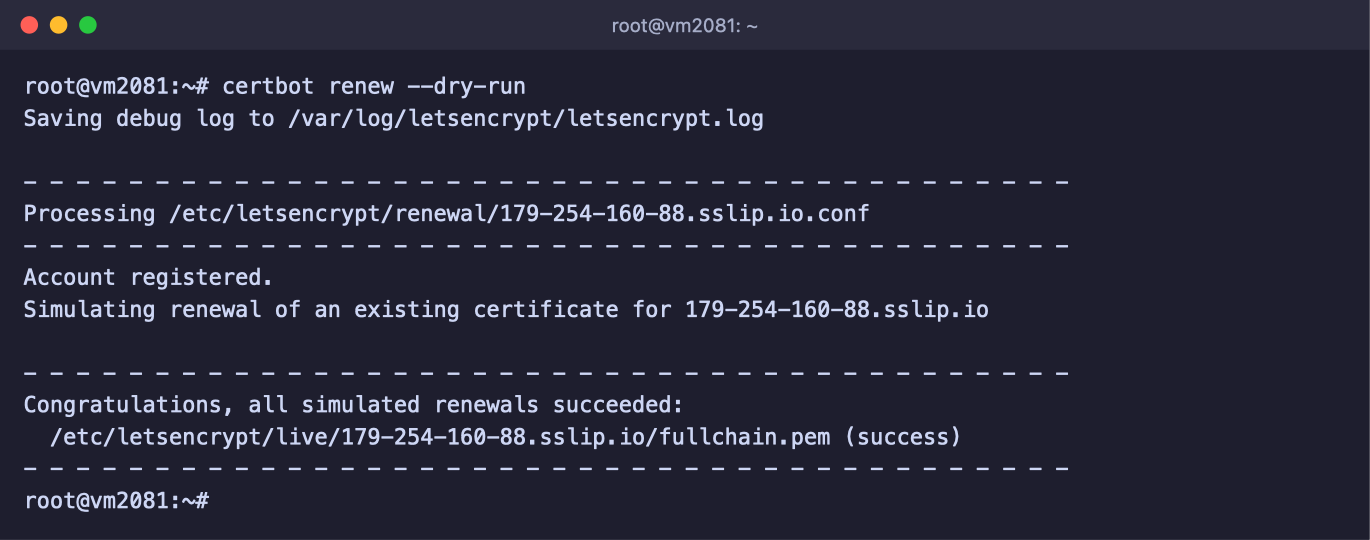
Check that renewal will work with a test run. It doesn't change anything on the server.
```bash
# Test renewal of all certificates
certbot renew --dry-run
```
The test renewal succeeded
If you see `Congratulations, all simulated renewals succeeded` at the end, the certificate will renew on its own.
***
## Several domains on one server
Run Certbot separately for each website, listing its domains. To add a new address to a certificate you already have, list all the old addresses plus the new one and add the `--expand` flag.
```bash
# Add the shop subdomain to the example.com certificate
certbot --nginx --expand -d example.com -d www.example.com -d shop.example.com
```
> **Let's Encrypt limits.**
>
> Let's Encrypt issues a certificate for the same set of domains no more than 5 times in 7 days.\
> No more than 5 failed checks per hour are allowed for one domain.
>
> So if something doesn't work, first find the cause in the section below and only then run Certbot again.
***
## Get a certificate without configuring the server
If you want to connect the certificate manually or another program needs it, use `certonly`. Certbot will only get the certificate and won't change anything in the settings.
#### Through Nginx or Apache
```bash
# Certbot passes the check through the running web server.
# For Apache, replace --nginx with --apache
certbot certonly --nginx -d example.com
```
#### Through the website folder
```bash
# Works with any web server. In -w, specify the folder
# the website serves its files from
certbot certonly --webroot -w /var/www/example.com -d example.com
```
#### Without a web server
```bash
# Certbot briefly takes over port 80 by itself. If a web server
# is running on it, stop the web server first
certbot certonly --standalone -d example.com
```
The ready files are in the `/etc/letsencrypt/live/example.com/` folder. The `fullchain.pem` file is the certificate.\
The `privkey.pem` file is the private key, and you must never share it with anyone.
***
## Common errors
Timeout during connect (likely firewall problem)
Let's Encrypt couldn't connect to the server on port 80. Most often the firewall is blocking it. Open ports 80 and 443 and run Certbot again. You can check that the web server is listening on port 80 at all with `ss -tlnp | grep ':80 '`.
DNS problem: NXDOMAIN looking up A
The domain has no A record. Add one at your domain registrar with the server's IP address. A new record doesn't start working straight away, so sometimes you need to wait a little. Check the result with `getent hosts example.com` and only then run Certbot.
unauthorized: Invalid response … 404
Let's Encrypt opened the domain but didn't find the check file. Usually the domain points to another server, for example the A record was left over from old hosting, or the AAAA record points to the wrong place. Compare the IP in DNS with your server's IP. If you use `--webroot`, check that `-w` points to the folder the website serves its files from.
Could not automatically find a matching server block
The certificate was obtained, but Certbot didn't find a website with this domain in the Nginx settings. Add the domain to the `server_name` directive in the website settings, check them with `nginx -t`, reload Nginx and connect the certificate you already have with `certbot install --cert-name example.com`.
too many certificates or too many failed authorizations
The Let's Encrypt limits have kicked in, and you need to wait until they reset.\
The limit on failed checks lasts an hour.\
The limit on reissuing lasts a week.
To debug your settings calmly, run Certbot with the `--dry-run` flag, because test runs don't count towards the real limits.
The certificate expired and did not renew itself
Renew it manually with `certbot renew` and see whether any errors appear. Most often it is one of the problems above, for example a closed port 80. You can check that the renewal timer is enabled with `systemctl list-timers | grep certbot`.\
Details of the latest runs are written to `/var/log/letsencrypt/letsencrypt.log`.
Can I get a certificate for all subdomains at once?
Yes, this is a wildcard certificate like `*.example.com`. But for it Let's Encrypt checks the domain through a DNS record rather than through the website, so the methods in this article won't work. Usually it is easier to issue a certificate for the subdomains you need with several `-d` flags.
***
## Our resources
**Telegram channel:** [https://t.me/f3cloud_news](https://t.me/f3cloud_news)\
**F3 Cloud:** [https://f3cloud.com](https://f3cloud.com/en)