> The full list of articles is in [llms.txt](https://docs.f3cloud.com/llms.txt). Every page has a Markdown version: add .md to its address. This page as Markdown: [https://docs.f3cloud.com/en/vpn-guide/outline-vpn.md](https://docs.f3cloud.com/en/vpn-guide/outline-vpn.md).
# Installing Outline VPN on your own server – Outline Manager and access keys
How to install Outline VPN on your own server. The official installation script, connecting to Outline Manager, access keys and data limits, the Outline Client apps, managing keys through the API without the Manager. Tested on Debian 12.
**Outline** is a free VPN from Jigsaw, a division of Google. It consists of a server, the **Outline Manager** program for managing it and the **Outline Client** app for connecting. Its main strength is simplicity. The server is installed with one command, and an access key is a single line that you just send to a relative or a colleague, and everything will work for them. In this article we will install Outline on a VPS, connect it to Outline Manager and hand out keys. We tested all commands on a test server with Debian 12, and the Outline server version at the time of testing was **1.12.3**.
***
## How Outline works and where its limits are
Outline is built on the Shadowsocks protocol. It works differently from familiar VPNs such as OpenVPN or WireGuard. Shadowsocks has no recognisable handshake, the whole connection is encrypted from the very first byte and looks like a stream of random data to an outside observer. Judging only by the contents of the packets, the provider sees neither the sites you open nor the very fact that you use a particular program. That is exactly why Shadowsocks was long considered one of the most resilient ways to get around blocking.
However, the absence of a recognisable pattern has itself become a giveaway. Ordinary internet traffic almost always starts with a clear header, for example a TLS handshake, and filtering systems have learned to flag a connection with no structure at all in its first bytes as suspicious. Shadowsocks is on the list of protocols that Roskomnadzor planned to restrict, and users in different regions of Russia report from time to time that it is blocked, more often on mobile networks. So Outline is a good choice where simplicity matters, for example for a family or a small team, and if blocking on your network is strict, protocols disguised as an ordinary website are more reliable, such as VLESS Reality from the articles about [3X-UI](https://docs.f3cloud.com/en/vpn-guide/3x-ui-panel-guide.md) and [Marzban](https://docs.f3cloud.com/en/vpn-guide/marzban-installation.md).
The Outline server is managed through an API. During installation the server creates a secret management address and a self-signed certificate, and Outline Manager connects to this address and checks the certificate fingerprint. That is why the line the installer prints serves as both the address of the server and its password, and you must not show it to anyone.
***
## What you need
* **A server** with Debian 12 or Ubuntu 24.04. Outline puts almost no load on the server, and on our test server it used about **80 MB** of memory, so the **DE-Promo** plan is enough. If you do not have a server yet, order one using the [guide](https://docs.f3cloud.com/en/client-area/order-vps.md).
* **An SSH connection**, for example via [Termius](https://docs.f3cloud.com/en/vps/termius-connection.md). Commands are run as `root`.
* **Outline Manager** on your computer. Download it for [Windows](https://s3.amazonaws.com/outline-releases/manager/windows/stable/Outline-Manager.exe), [macOS](https://s3.amazonaws.com/outline-releases/manager/macos/stable/Outline-Manager.dmg) or [Linux](https://s3.amazonaws.com/outline-releases/manager/linux/stable/Outline-Manager.AppImage).
***
## Step 1. Install Docker
The Outline server runs in Docker containers. Install Docker with the official script.
```bash
# Install Docker with the official script
curl -fsSL https://get.docker.com | sh
```
***
## Step 2. Run the Outline installation
Run the official installation command. We run it as `root` without `sudo`, because a clean Debian 12 may not have the `sudo` program, and the command from Outline Manager then fails with the error **sudo: command not found**.
```bash
# Official Outline server installation script
bash -c "$(wget -qO- https://raw.githubusercontent.com/Jigsaw-Code/outline-apps/master/server_manager/install_scripts/install_server.sh)"
```
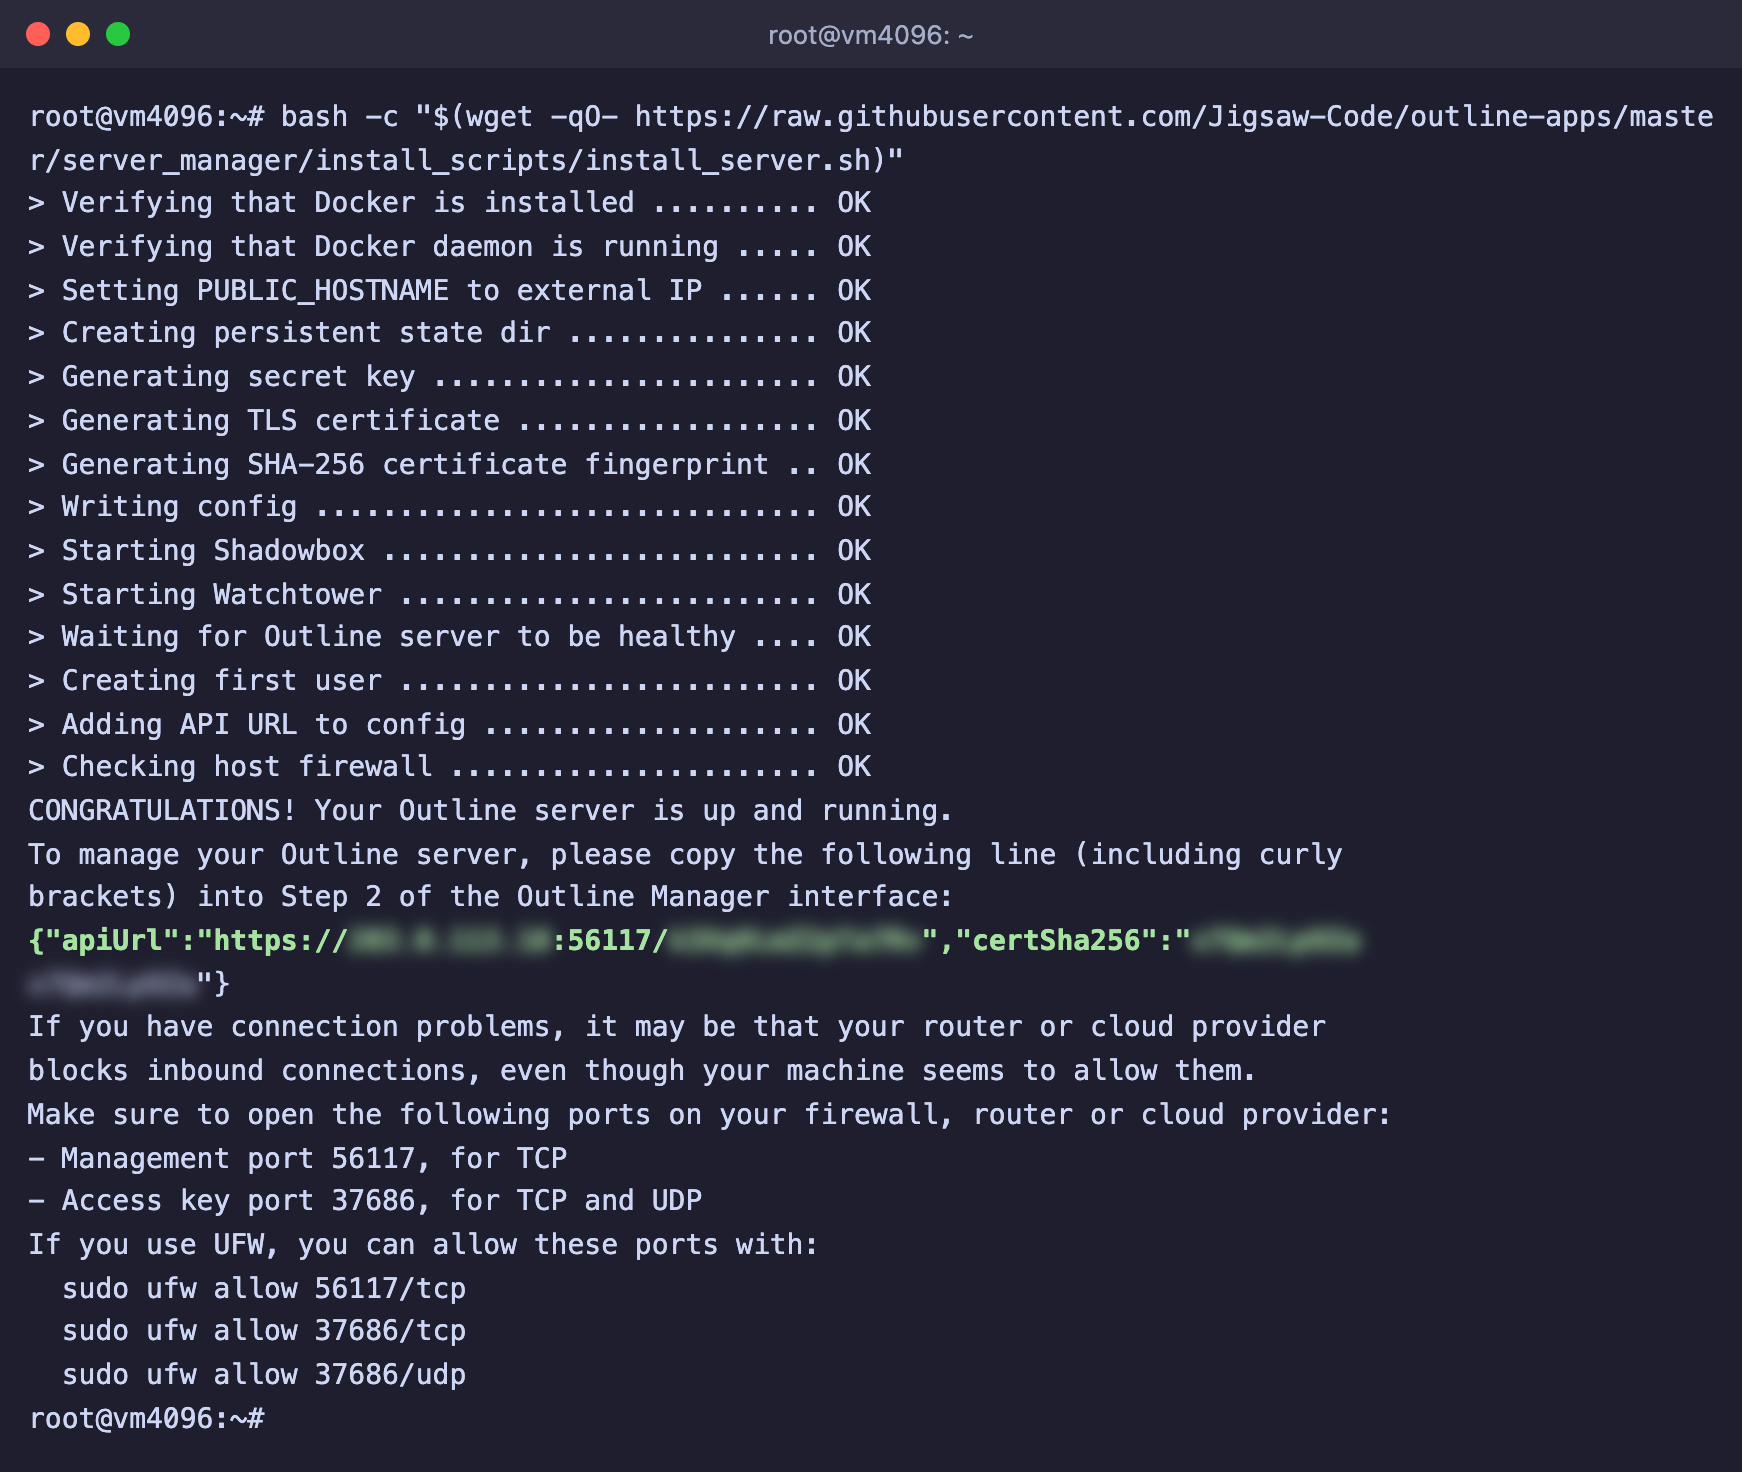
After a minute the script will print **CONGRATULATIONS! Your Outline server is up and running** and show a green line in curly braces. It starts with `{"apiUrl":` and ends with `"}`.
The Outline server is installed, the secret line is hidden in the screenshot
Below it the script lists two ports that it chose at random.
* **Management port** – the management port that Outline Manager connects to.
* **Access key port** – the port that devices with keys connect to. It is needed over both TCP and UDP.
> **The apiUrl line gives full access to the server.**
>
> Whoever gets hold of it can create and delete keys. Copy it into Outline Manager and do not publish it anywhere. If the line gets lost, it is stored on the server in the file `/opt/outline/access.txt`.
***
## Step 3. Connect the server to Outline Manager
1. Open Outline Manager on your computer.
2. In the server selection section, click **Set up Outline anywhere**.
3. The program will show the installation command, which you already ran in step 2. Skip this item.
4. Copy the whole green line from the server, including the curly braces, and paste it into the **Paste your installation output here** field.
5. Click Done.
The server will appear in the list, and its page will show the access keys and traffic counters.
***
## Step 4. Create access keys
It is better to give each person a separate key. Then you can limit or disable it without affecting the others.
1. On the server page, click **Add new key**.
2. Choose **Rename** for the key and enter a clear name, for example the person's name.
3. Open the **Share access** window for the key and click **Copy access key**.
A key is a line that starts with `ss://`. Send it to the person over a secure channel. If you need to limit the amount of traffic, choose **Set a custom data limit** for the key.
***
## Step 5. Connect a device
The **Outline Client** app is available for phones and computers, and links to it are collected on the [official website](https://getoutline.org/get-started/).
1. Install the app and open it.
2. Tap **Add server**.
3. Paste the key into the **Paste access key here** field and confirm.
4. Tap Connect.
If the key is already in the clipboard, the app may offer to add it by itself with the message **Access key detected**.
To check that your traffic goes through the server, open [api.ipify.org](https://api.ipify.org) in your browser. It should show your server's IP address. We tested a key issued this way on a test server, and requests through it really did go out from the server's address.
***
## Managing keys without Outline Manager
If the program is not at hand, you can manage keys right from the server through the same API. We tested all the commands below on a test server.
```bash
# API address from the Outline settings file
API=$(grep apiUrl /opt/outline/access.txt | cut -d: -f2-)
# Create a key. The response will contain the accessUrl field, which is the ss:// key
curl -sk -X POST "$API/access-keys"
# Give key number 1 the name phone
curl -sk -X PUT "$API/access-keys/1/name" -d name=phone
# Limit key number 1 to 50 GB
curl -sk -X PUT -H "Content-Type: application/json" "$API/access-keys/1/data-limit" -d '{"limit":{"bytes":50000000000}}'
# Show all keys
curl -sk "$API/access-keys"
# Delete key number 2
curl -sk -X DELETE "$API/access-keys/2"
```
The `-k` option is needed because the API certificate is self-signed.
***
## Firewall and updates
If UFW is enabled on the server, open both ports from the installer output in it. Your port numbers will be different.
```bash
# Management port, TCP only
ufw allow 56117/tcp
# Key port, TCP and UDP
ufw allow 37686/tcp
ufw allow 37686/udp
```
You do not need to update Outline manually. Together with the server, the installer starts the **Watchtower** container, which checks for new versions once an hour and updates the server by itself.
***
## Frequently asked questions
Installation fails with the error sudo: command not found
The server does not have the `sudo` program. You are already working as `root`, so run the command without `sudo`, as in step 2.
Outline Manager cannot connect to the server
1. Check that you pasted the whole line, including the curly braces.
2. If a firewall is enabled, open the management port as described above.
3. Check that the containers are running with the `docker ps` command. The list should include **shadowbox** and **watchtower**.
The app connects, but sites do not open
1. Check that the key port is open over both TCP and UDP.
2. Try another network, for example switch from mobile internet to Wi-Fi. If it works on one network but not on another, your provider is most likely restricting Shadowsocks. In this case VLESS Reality will help, for example via [3X-UI](https://docs.f3cloud.com/en/vpn-guide/3x-ui-panel-guide.md).
3. If that does not help, go through the steps of the article [“VPN on your own server does not connect”](https://docs.f3cloud.com/en/vpn-guide/vpn-not-connecting.md).
How to remove Outline from the server completely
Stop and remove both containers and the settings folder.
```bash
docker rm -f shadowbox watchtower
rm -rf /opt/outline
```
After that, all keys will stop working.
***
## Our resources
**Telegram channel:** [https://t.me/f3cloud_news](https://t.me/f3cloud_news)\
**F3 Cloud:** [https://f3cloud.com](https://f3cloud.com/en)