> The full list of articles is in [llms.txt](https://docs.f3cloud.com/llms.txt). Every page has a Markdown version: add .md to its address. This page as Markdown: [https://docs.f3cloud.com/en/vpn-guide/3x-ui-panel-guide.md](https://docs.f3cloud.com/en/vpn-guide/3x-ui-panel-guide.md).

# Installing 3X-UI on a VPS and setting up VLESS Reality

How to install the 3X-UI 3.10 panel on a VPS with one command and set up VLESS Reality with XTLS Vision. A certificate for the IP address, choosing a camouflage site, clients and subscription, limits, two-factor protection and backup. Tested on Debian 12.

**3X-UI** is a free web panel for managing the **Xray** core. In your browser you create connections, add users, set traffic limits and get links and QR codes for apps. In this article we will install the panel, set up the most block-resistant option, **VLESS Reality** with the **XTLS Vision** flow, and connect the first device. We repeated every step on a test server with Debian 12, and the 3X-UI version at the time of testing was **3.10.2**.

> **If you do not need a panel.**
>
> If you just want a VPN “for yourself” without any setup, it is easier to install [Marzban with our script](https://docs.f3cloud.com/en/vpn-guide/marzban-installation.md). It picks a camouflage site by itself and sets everything up with one command.

***

## How a VLESS Reality connection works

When the app on your phone connects to the server, the provider sees the start of an ordinary secure TLS connection, the same as when any site is opened over HTTPS. In the very first message the client openly names the site it is contacting, and this field is called SNI. It is by the SNI, the server address and the nature of the traffic that filtering systems decide whether to let the connection through. The idea of Reality is that this message carries the name of a real third-party site, and everything else looks like an ordinary visit to that site.

For this disguise to stand up to a check, the server must be able to respond just like the real site. That is why Xray on the server works as a fork in the road. An app that has the server's public key and one of the short identifiers (Short ID) marks its greeting in a special way, and Xray recognises its own client. Everyone else, whether it is the provider's inspection system or a random scanner, is transparently forwarded to the real site, which is called the target, and sees its genuine certificate. From the outside the server cannot be told apart from an intermediary through which someone else's site opens, and an attempt to “drop in and take a look” gives nothing away.

Inside the established connection, the VLESS protocol is at work. It does not encrypt the data a second time, because the outer TLS layer already does that job. The XTLS Vision flow adds one more layer of protection. When ordinary HTTPS runs inside the tunnel, and that is how almost all of the modern internet works, you get “TLS inside TLS”, and the sizes of the first packets of such a connection form a recognisable pattern. Vision evens out these packets, and after the handshake it stops encrypting already encrypted data a second time, which also reduces the load on the server.

The last element of the disguise is the TLS fingerprint. Every browser starts a connection in its own way, with a characteristic set of parameters, and the VPN app has to pretend to be one of them. This fingerprint is chosen in the **uTLS** field, and for servers in Russia we recommend `firefox`. Why not `chrome` is explained in detail in the [article about Marzban](https://docs.f3cloud.com/en/vpn-guide/marzban-installation.md#tls-fingerprint).

***

## What you need

* **A server** with Debian 12 or Ubuntu 24.04. The panel is undemanding, and on our test server with 1 GB of memory about **450 MB** was in use after installation, so the **DE-Promo** plan is enough. If you do not have a server yet, order one using the [guide](https://docs.f3cloud.com/en/client-area/order-vps.md).
* **An SSH connection**, for example via [Termius](https://docs.f3cloud.com/en/vps/termius-connection.md). Commands are run as `root`.
* **Free ports 443 and 80**. The VPN will run on port 443, and Let's Encrypt checks the server through port 80 when it issues and renews the certificate for the panel.

***

## Step 1. Install the panel

Connect to the server and run the installation command from the project's official page.

```bash
# Download and run the official 3X-UI installer
bash <(curl -Ls https://raw.githubusercontent.com/mhsanaei/3x-ui/master/install.sh)
```

The installer will download the panel and ask a few questions. Answer them like this.

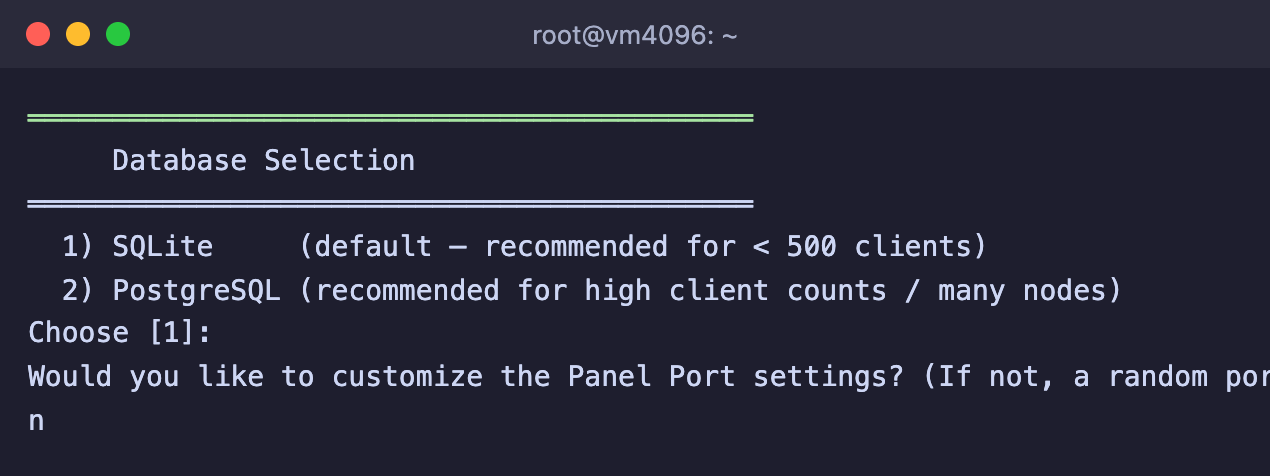
1. **Database Selection** – press <kbd>Enter</kbd> to choose SQLite. A separate PostgreSQL database is only needed with hundreds of users.

<figure><img src="https://docs.f3cloud.com/img/3xui-install-db.png" alt="3X-UI installer question about choosing an SQLite or PostgreSQL database" width="560"><figcaption><p>Choosing the database</p></figcaption></figure>

2. **Would you like to customize the Panel Port settings?** – type `n` and press <kbd>Enter</kbd>. The panel will get a random port, which makes it harder for scanners to find.
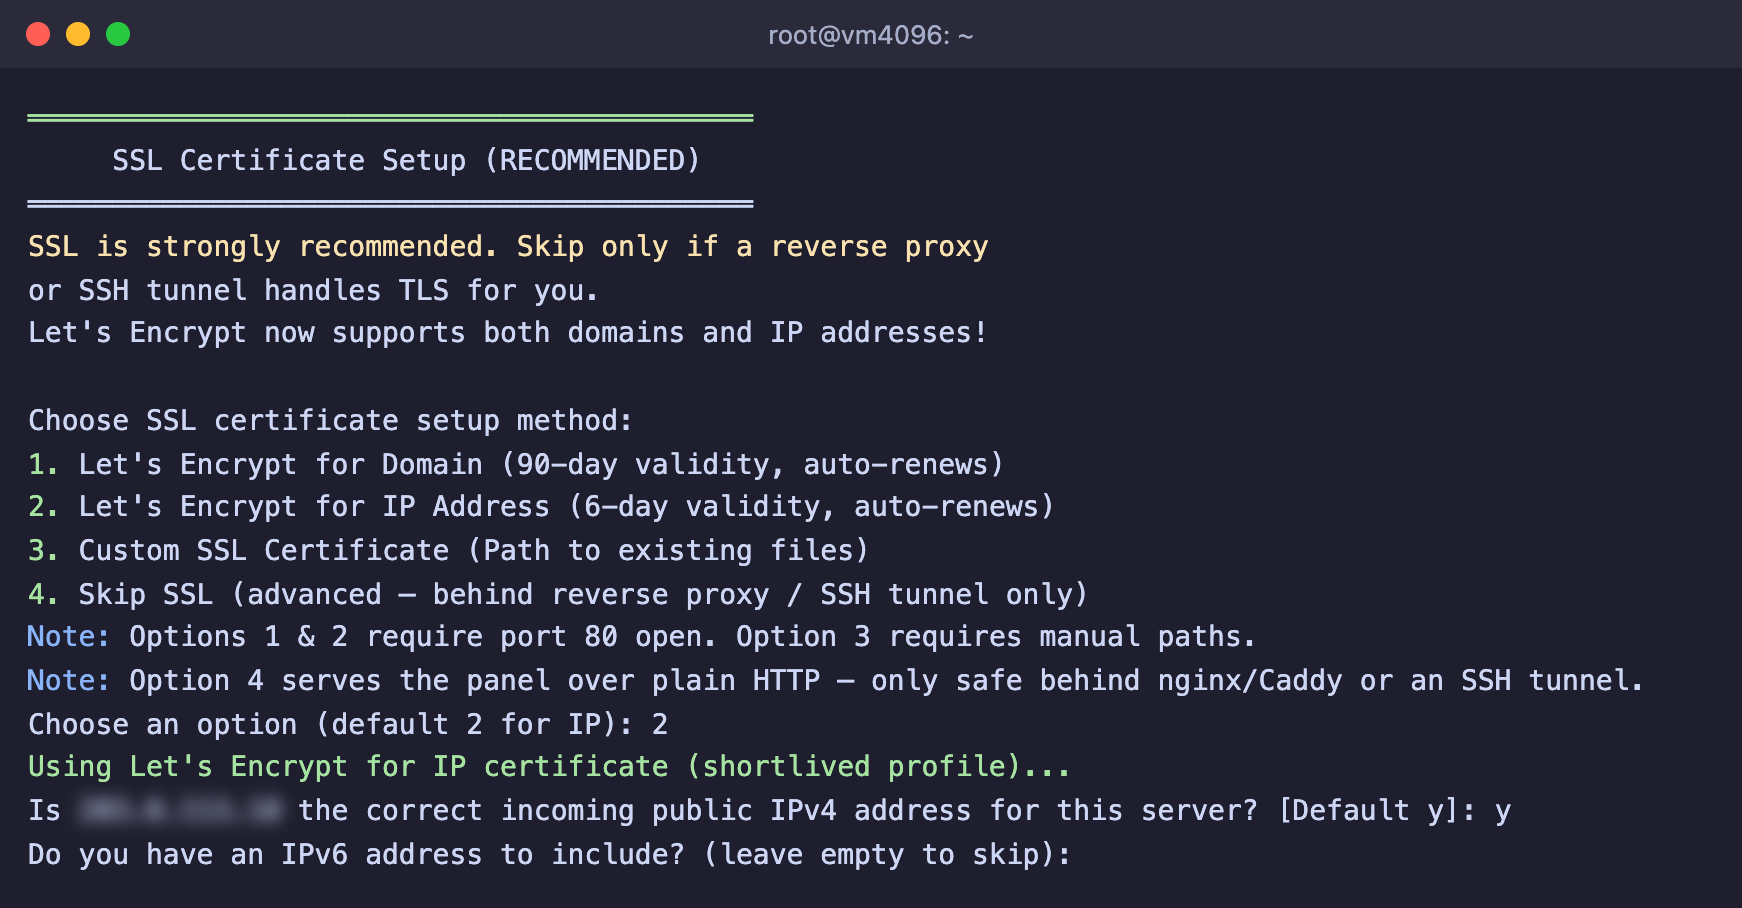
3. **Choose SSL certificate setup method** – type `2` and press <kbd>Enter</kbd>. The panel will get a free Let's Encrypt certificate issued directly for the server's IP address, and no domain is needed for this.
4. **Is ... the correct incoming public IPv4 address** – check that your server's IP address is shown and press <kbd>Enter</kbd>.
5. **Do you have an IPv6 address to include?** and **Port to use for ACME HTTP-01 listener** – just press <kbd>Enter</kbd> both times.

<figure><img src="https://docs.f3cloud.com/img/3xui-install-ssl.png" alt="Choosing how to get the SSL certificate in the 3X-UI installer, option 2 for the IP address is selected"><figcaption><p>Certificate for the server's IP address</p></figcaption></figure>

A few minutes later the installer will issue the certificate, start the panel and show the `x-ui` command menu.

***

## Step 2. Save your login details

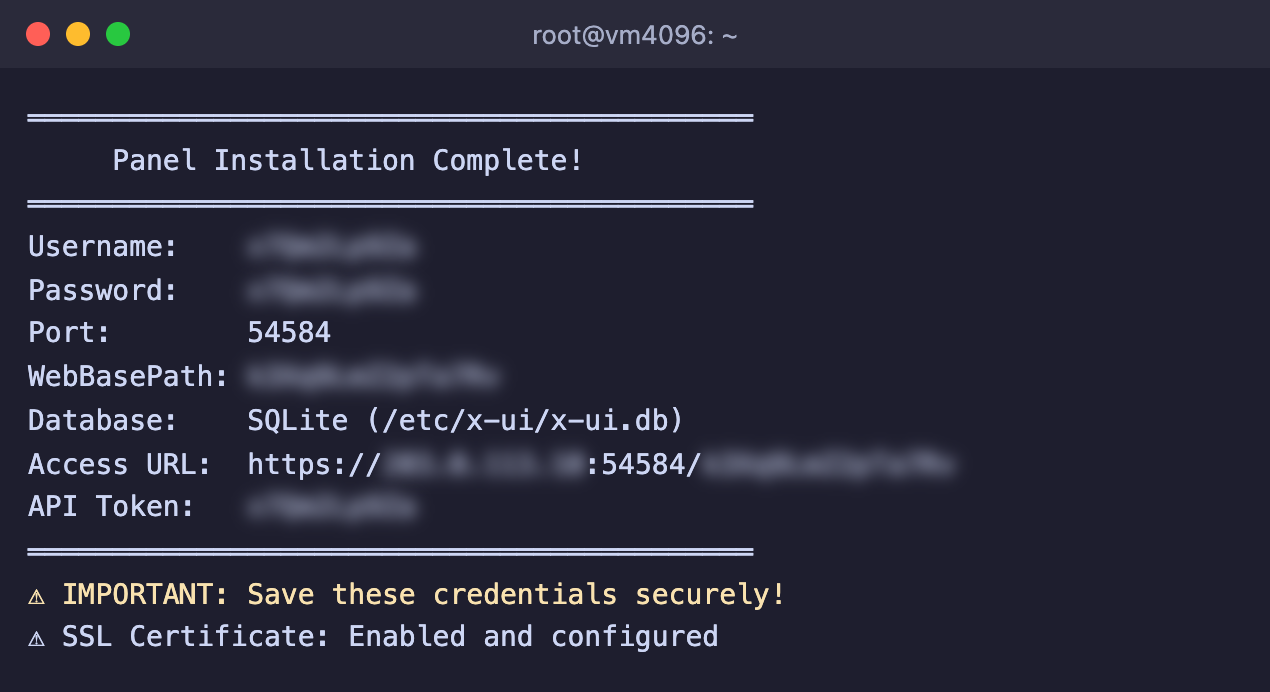
Before the menu, the installer prints the **Panel Installation Complete!** block. It contains everything you need to log in.

* **Username** and **Password** – the login and password, which are generated randomly.
* **Port** and **WebBasePath** – the panel's port and secret path.
* **Access URL** – the ready-made panel address, which you open in the browser.

<figure><img src="https://docs.f3cloud.com/img/3xui-install-done.png" alt="3X-UI installation summary with the login, password, port and panel address, the data is hidden" width="600"><figcaption><p>Login details, hidden in the screenshot</p></figcaption></figure>

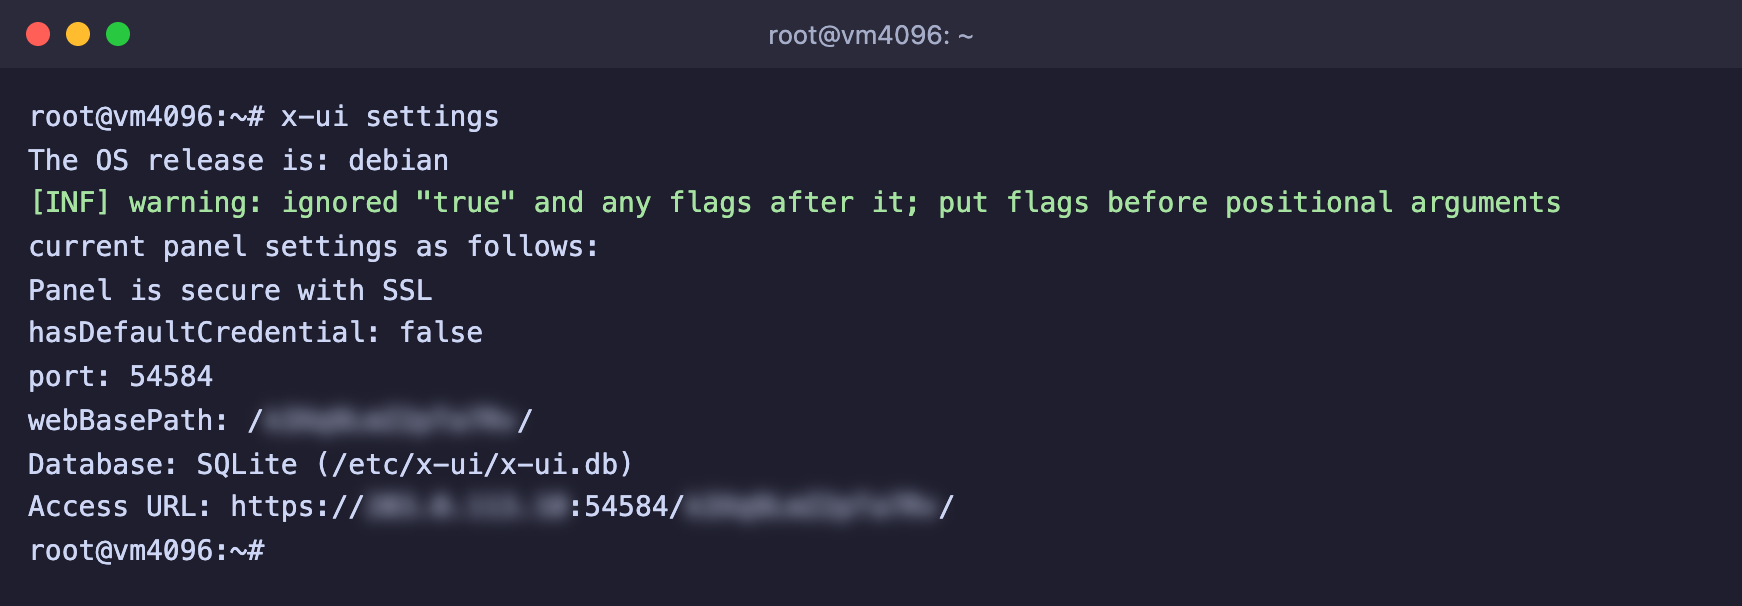
Save these details in a password manager. If the terminal window is already closed, the installer has also written them to a file, and the `x-ui settings` command shows the panel address at any time.

```bash
# Login, password and panel address saved during installation
cat /etc/x-ui/install-result.env

# Current port, path and panel address
x-ui settings
```

<figure><img src="https://docs.f3cloud.com/img/3xui-settings.png" alt="Output of the x-ui settings command with the port, path and panel address"><figcaption><p>The x-ui settings command</p></figcaption></figure>

> **The panel address is a password too.**
>
> Without the secret path the panel will not open even for someone who knows the login and password, and it responds with a 404 error. Do not publish the full address and do not send it to public chats.

***

## Step 3. Log in to the panel

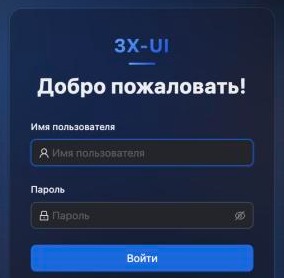
Open the address from the **Access URL** line in your browser. It starts with `https://`, and the certificate is a real one, so the browser will not complain about security. Enter the login and password and click <kbd>Log In</kbd> (Войти).

<figure><img src="https://docs.f3cloud.com/img/3xui-login.jpg" alt="3X-UI panel login page with username and password fields" width="284"><figcaption><p>Logging in to 3X-UI</p></figcaption></figure>

The panel menu is on the left. We will need three sections.

* **Inbounds** (Входящие) – this is where connections are created, that is, the ports and protocols on which the server accepts VPN connections.
* **Clients** (Клиенты) – users, each with their own key, limits and link.
* **Panel Settings** (Настройки панели) – the login, password, two-factor protection and other settings of the panel itself.

***

## Step 4. Create a VLESS Reality connection

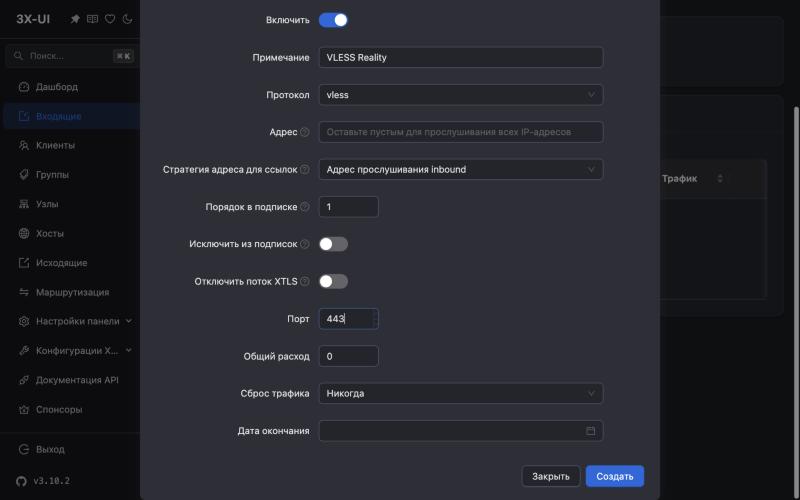
1. Open the **Inbounds** (Входящие) section and click <kbd>Add Inbound</kbd> (Создать подключение).
2. On the **Basics** (Основное) tab, fill in the fields.
   * **Remark** (Примечание) – any clear name, for example `VLESS Reality`.
   * **Protocol** (Протокол) – leave `vless`.
   * **Port** (Порт) – enter `443`. This is the port of ordinary websites, and a connection on it looks natural.

<figure><img src="https://docs.f3cloud.com/img/3xui-inbound-basic.jpg" alt="The Basics tab when creating a connection in 3X-UI, vless protocol and port 443"><figcaption><p>Basic connection settings</p></figcaption></figure>

3. Leave the **Protocol** (Протокол) and **Stream** (Поток) tabs alone. The **Transmission** (Транспорт) field is already set to `RAW`, which is what plain TCP is called in new versions.
4. Go to the **Security** (Безопасность) tab and click <kbd>Reality</kbd>.
5. In the **uTLS** field, choose `firefox`.
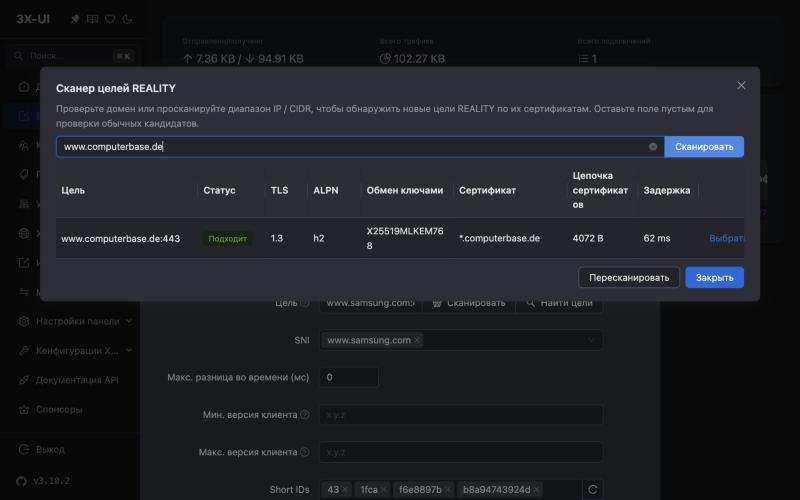
6. Click <kbd>Find Targets</kbd> (Найти цели). In the scanner that opens, enter a camouflage site, for example `www.computerbase.de`, and click <kbd>Scan</kbd> (Сканировать). How to choose your own site is explained [below](#how-to-choose-a-site-for-camouflage).

<figure><img src="https://docs.f3cloud.com/img/3xui-reality-check.jpg" alt="REALITY target scanner in 3X-UI, the site www.computerbase.de is feasible, TLS 1.3 and h2"><figcaption><p>Checking the camouflage site</p></figcaption></figure>

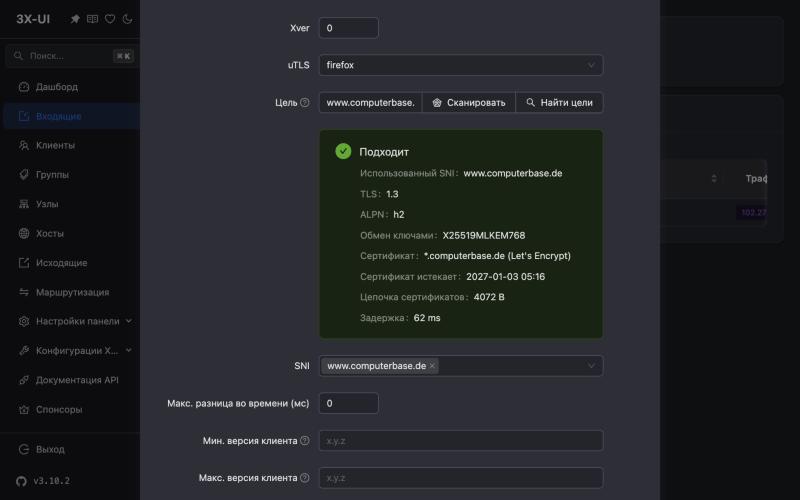
7. If the **Status** (Статус) column says **Feasible** (Подходит), click <kbd>Use</kbd> (Выбрать). The panel will fill in the **Target** (Цель) field and show a green block with the results of the check.
8. Look at the **SNI** field. It should contain **one name** matching the site, in our case `www.computerbase.de`. If the panel has put in a different name, remove it with the cross, type the right one and press <kbd>Enter</kbd>.

<figure><img src="https://docs.f3cloud.com/img/3xui-reality-target.jpg" alt="Reality settings in 3X-UI, firefox fingerprint, target www.computerbase.de and one name in the SNI field"><figcaption><p>Fingerprint, target and SNI</p></figcaption></figure>

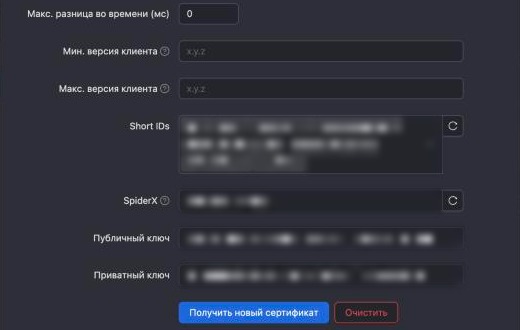
9. The panel has created the keys, **Short IDs** and **SpiderX** by itself, so leave them as they are.

<figure><img src="https://docs.f3cloud.com/img/3xui-reality-keys.jpg" alt="Generated Reality keys, Short IDs and SpiderX in 3X-UI, the values are hidden" width="520"><figcaption><p>The keys are created automatically, hidden in the screenshot</p></figcaption></figure>

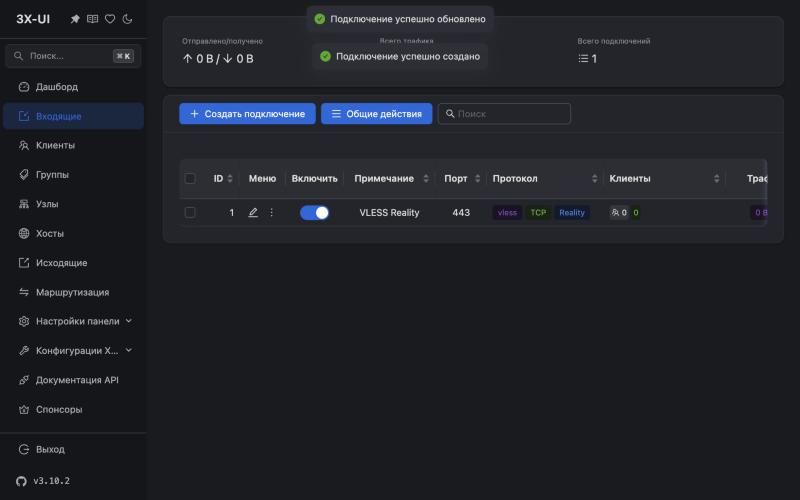
10. Click <kbd>Create</kbd> (Создать) at the bottom of the window. The connection will appear in the list with the **vless**, **TCP** and **Reality** tags.

<figure><img src="https://docs.f3cloud.com/img/3xui-inbound-created.jpg" alt="The created VLESS Reality connection on port 443 in the 3X-UI inbounds list"><figcaption><p>The connection has been created</p></figcaption></figure>

> **Why the SNI field should contain one name.**
>
> If you choose a large site in the scanner, the panel copies all the names from its certificate into the SNI field, sometimes several dozen of them. We checked that in this case every time the subscription is served it gets a random name from the list, for example `api-stg.semiconductor.samsung.cn` instead of `www.samsung.com`. Devices start contacting the same server under different names, and the disguise becomes less convincing.

***

## Step 5. Add a client

In version 3, users have been moved to a separate section, and one client can use several connections at once.

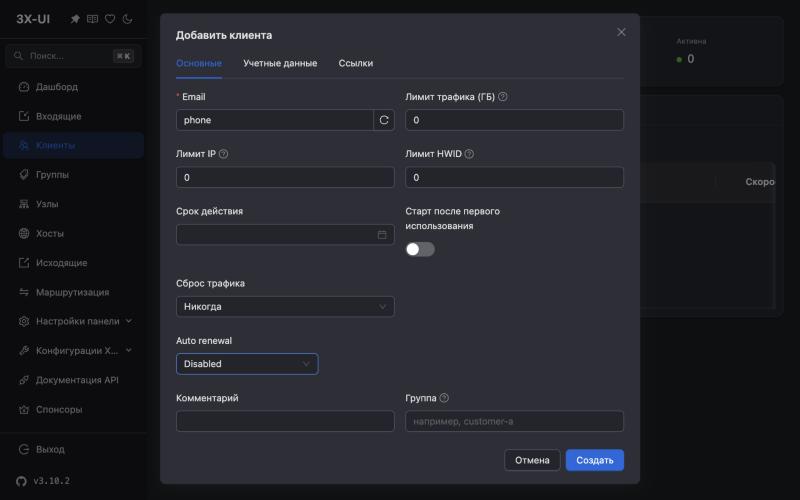
1. Open the **Clients** (Клиенты) section and click <kbd>Add Clients</kbd> (Добавить клиентов).
2. In the **Email** field, enter the client's name in Latin letters, for example `phone`. No email address is needed here, it is just a name.

<figure><img src="https://docs.f3cloud.com/img/3xui-client-add.jpg" alt="Client creation form in 3X-UI with the name phone and the limit fields"><figcaption><p>A new client</p></figcaption></figure>

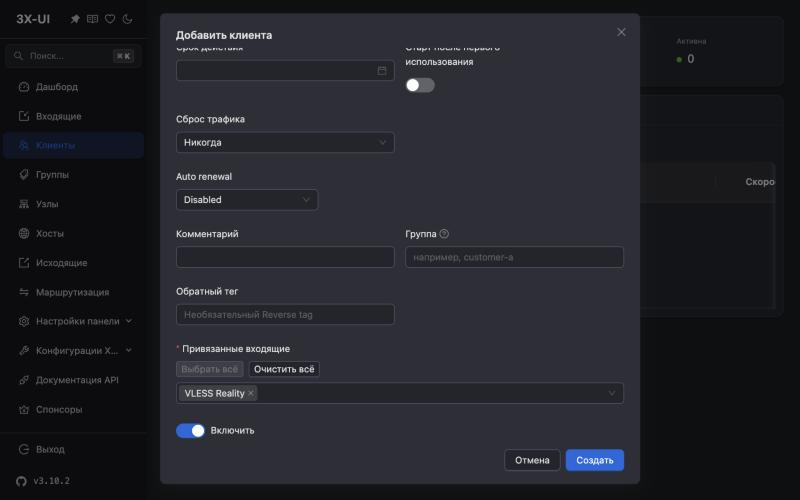
3. Scroll the form down to the **Attached inbounds** (Привязанные входящие) field, click <kbd>Select all</kbd> (Выбрать всё) and then <kbd>Create</kbd> (Создать).

<figure><img src="https://docs.f3cloud.com/img/3xui-client-bind.jpg" alt="The Attached inbounds field with the VLESS Reality connection selected"><figcaption><p>The client is attached to the connection</p></figcaption></figure>

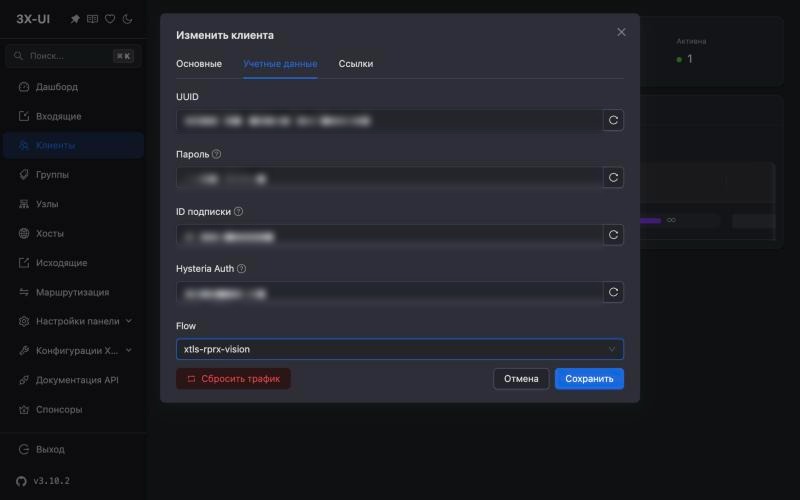
4. Now turn on the Vision flow. In the client's row, click the pencil icon, go to the **Credentials** (Учетные данные) tab, choose `xtls-rprx-vision` in the **Flow** field and click <kbd>Save</kbd> (Сохранить).

<figure><img src="https://docs.f3cloud.com/img/3xui-client-flow.jpg" alt="The Credentials tab of a 3X-UI client with Flow xtls-rprx-vision selected, the keys are hidden"><figcaption><p>XTLS Vision flow for the client</p></figcaption></figure>

> **The Flow field only appears when you edit a client.**
>
> It is not in the add form, because the flow depends on the connection the client is attached to. So create the client first, and then open it for editing.

***

## Step 6. Connect a device

1. In the client's row, click the first icon, the one with a QR code.
2. The top block, **Subscription info** (Информация о подписке), holds the QR code of the subscription link. It is handy to scan with a phone, and the button with two sheets next to the title copies the link itself.

<figure><img src="https://docs.f3cloud.com/img/3xui-client-qr.jpg" alt="Window with the client's subscription QR code in 3X-UI, the code is hidden"><figcaption><p>Subscription QR code, hidden in the screenshot</p></figcaption></figure>

3. Install an app built on the Xray core on your device. We recommend **Incy** or **Happ**, and links to them and to other apps are collected in the [article about Marzban](https://docs.f3cloud.com/en/vpn-guide/marzban-installation.md#client-apps).
4. In the app, add the subscription from the clipboard or scan the QR code, and turn on the connection.

A subscription is better than a single link, because the app fetches the current settings from the server by itself. If you change the camouflage site or the keys, it is enough to refresh the subscription in the app.

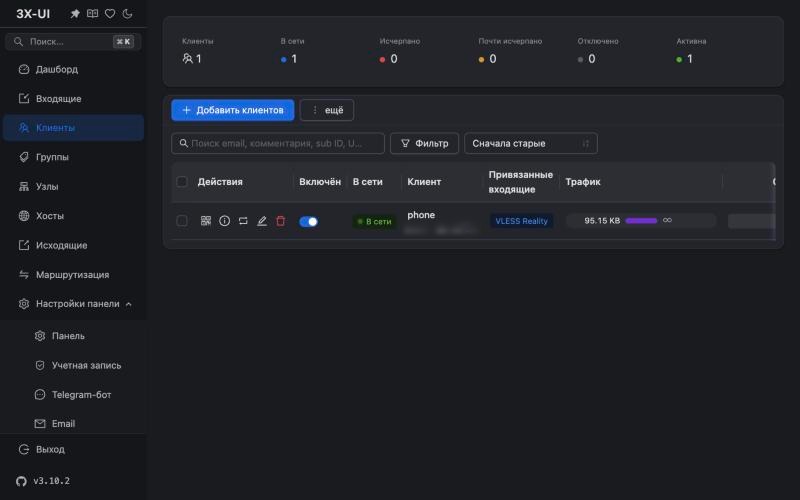
To check that your traffic goes through the VPN, open [api.ipify.org](https://api.ipify.org) in your browser. It should show your server's IP address. In the panel, the client will get a green **Online** (В сети) tag and its traffic counter will start to grow.

<figure><img src="https://docs.f3cloud.com/img/3xui-client-online.jpg" alt="The client phone in 3X-UI with the Online status and a traffic counter"><figcaption><p>The device has connected</p></figcaption></figure>

> **The subscription link and QR code are the key to your VPN.**
>
> Anyone who gets hold of them can connect. Create a separate client for each person, and then if something leaks you only need to delete one.

***

## How to choose a site for camouflage

The choice of target largely determines how long the connection will last without being blocked, so this step is worth taking thoughtfully. The first requirement is technical. The site must work over TLS 1.3 and HTTP/2 and support the modern X25519MLKEM768 key exchange, otherwise the Reality handshake cannot convincingly reproduce its behaviour. These are exactly the properties the scanner in the panel checks, and the **Feasible** (Подходит) status means that they are all in place.

The second requirement is about plausibility. The filtering system sees both the site name and the IP address the connection goes to. The addresses of big companies such as Samsung, Microsoft or Amazon are well known and belong to their own networks or to CDN networks, and a request to such a name that goes to the address of an ordinary hosting provider in Germany looks unnatural. A small European site that is itself hosted with a hosting provider looks far more natural. For the same reason, sites behind Cloudflare and other CDNs are unsuitable, since their real addresses are well known too. Our [script for Marzban](https://docs.f3cloud.com/en/vpn-guide/marzban-installation.md) chooses sites exactly this way, and you can use its list here as well, for example `www.computerbase.de`, `www.reichelt.de`, `wiki.ubuntuusers.de` or `mailbox.org`.

If you want to pick your own option, enter its domain in the scanner and click <kbd>Scan</kbd> (Сканировать). You can check from the server with one command whether the site sits behind a CDN.

```bash
# See which server answers for the site. Cloudflare, Akamai or Fastly are not suitable
curl -sI https://www.computerbase.de | grep -i '^server'
```

For `www.computerbase.de` the command returned `server: nginx`, which means the site runs on its own server. Even more reliable is camouflage as your own domain using the self-steal scheme, which is described in a [separate article](https://docs.f3cloud.com/en/vpn-guide/reality-self-steal.md).

***

## Client limits

All limits are set in the client form on the **Basics** (Основные) tab. Zero in any field means “no limit”.

* **Traffic Limit (GB)** (Лимит трафика (ГБ)) – how many gigabytes the client can use. After that, the connection is switched off for them.
* **IP Limit** (Лимит IP) – how many IP addresses can use the key at the same time. The limit works through Fail2ban, which the installer has set up by itself.
* **HWID Limit** (Лимит HWID) – how many devices can receive the subscription.
* **Expiry** (Срок действия) – the date after which the client stops working. If you turn on **Start After First Use** (Старт после первого использования), the countdown starts from the first connection, which is handy for gift keys.
* **Traffic Reset** (Сброс трафика) – how often the client's traffic counter is reset.

***

## Protect the panel

The panel controls all the keys, so it is worth protecting it straight after setup.

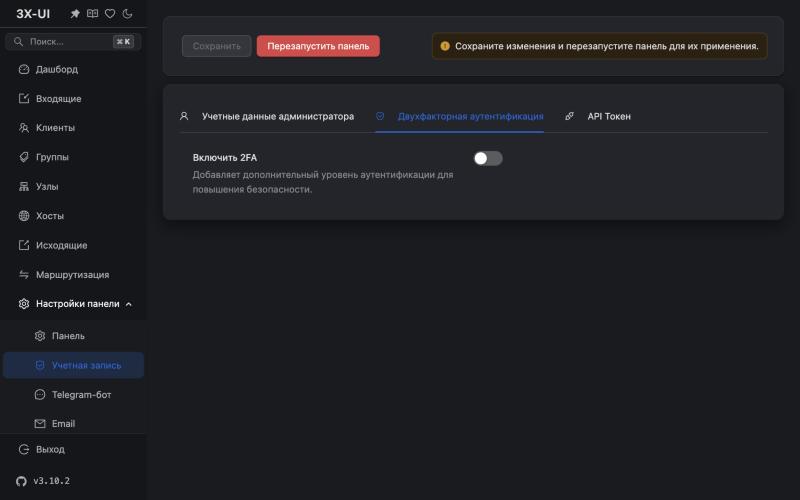
1. Open **Panel Settings** (Настройки панели) → **Authentication** (Учетная запись) → **Two-factor authentication** (Двухфакторная аутентификация), turn on the **Enable 2FA** (Включить 2FA) switch and follow the panel's prompts. After that, logging in will require a code from an authenticator app.

<figure><img src="https://docs.f3cloud.com/img/3xui-settings-2fa.jpg" alt="Two-factor authentication tab in the 3X-UI account settings"><figcaption><p>Two-factor authentication</p></figcaption></figure>

2. Do not change the random port and secret path to simple ones such as `2053` or `/panel`. These are exactly what scanners try first.
3. If the UFW firewall is enabled on the server, open the required ports in it, otherwise the panel and the VPN will become unreachable.

```bash
# VPN port and port 80 for certificate renewal
ufw allow 443/tcp
ufw allow 80/tcp

# Panel port from the Port line and the subscription port
ufw allow 54584/tcp
ufw allow 2096/tcp
```

Instead of `54584`, enter your panel's port. The panel uses port `2096` for subscription links.

***

## Updates and backup

You can update the panel with one command. Before updating, make a backup as described below.

```bash
x-ui update
```

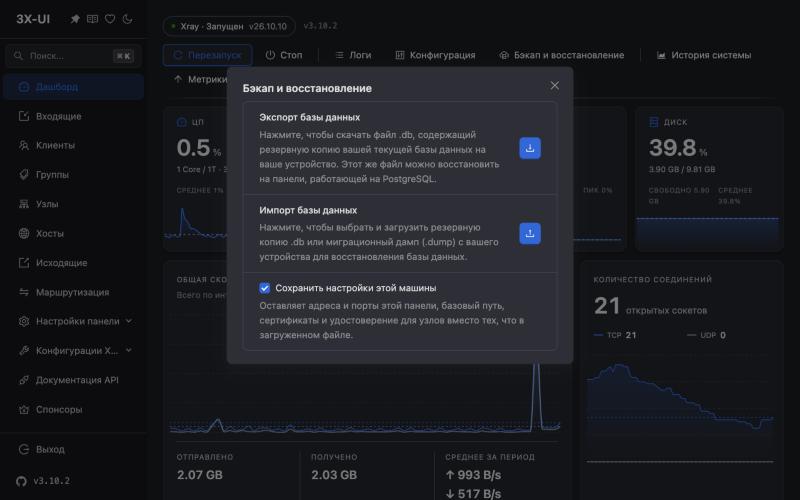
The easiest way to make a backup is in the panel itself. Open **Overview** (Дашборд), click <kbd>Backup & Restore</kbd> (Бэкап и восстановление) and then the download button next to **Back Up** (Экспорт базы данных). The `.db` file contains all clients and all connections, and you can upload it back through **Restore** (Импорт базы данных), for example when moving to a new server.

<figure><img src="https://docs.f3cloud.com/img/3xui-backup.jpg" alt="The Backup & Restore window in 3X-UI with database export and import"><figcaption><p>Database backup</p></figcaption></figure>

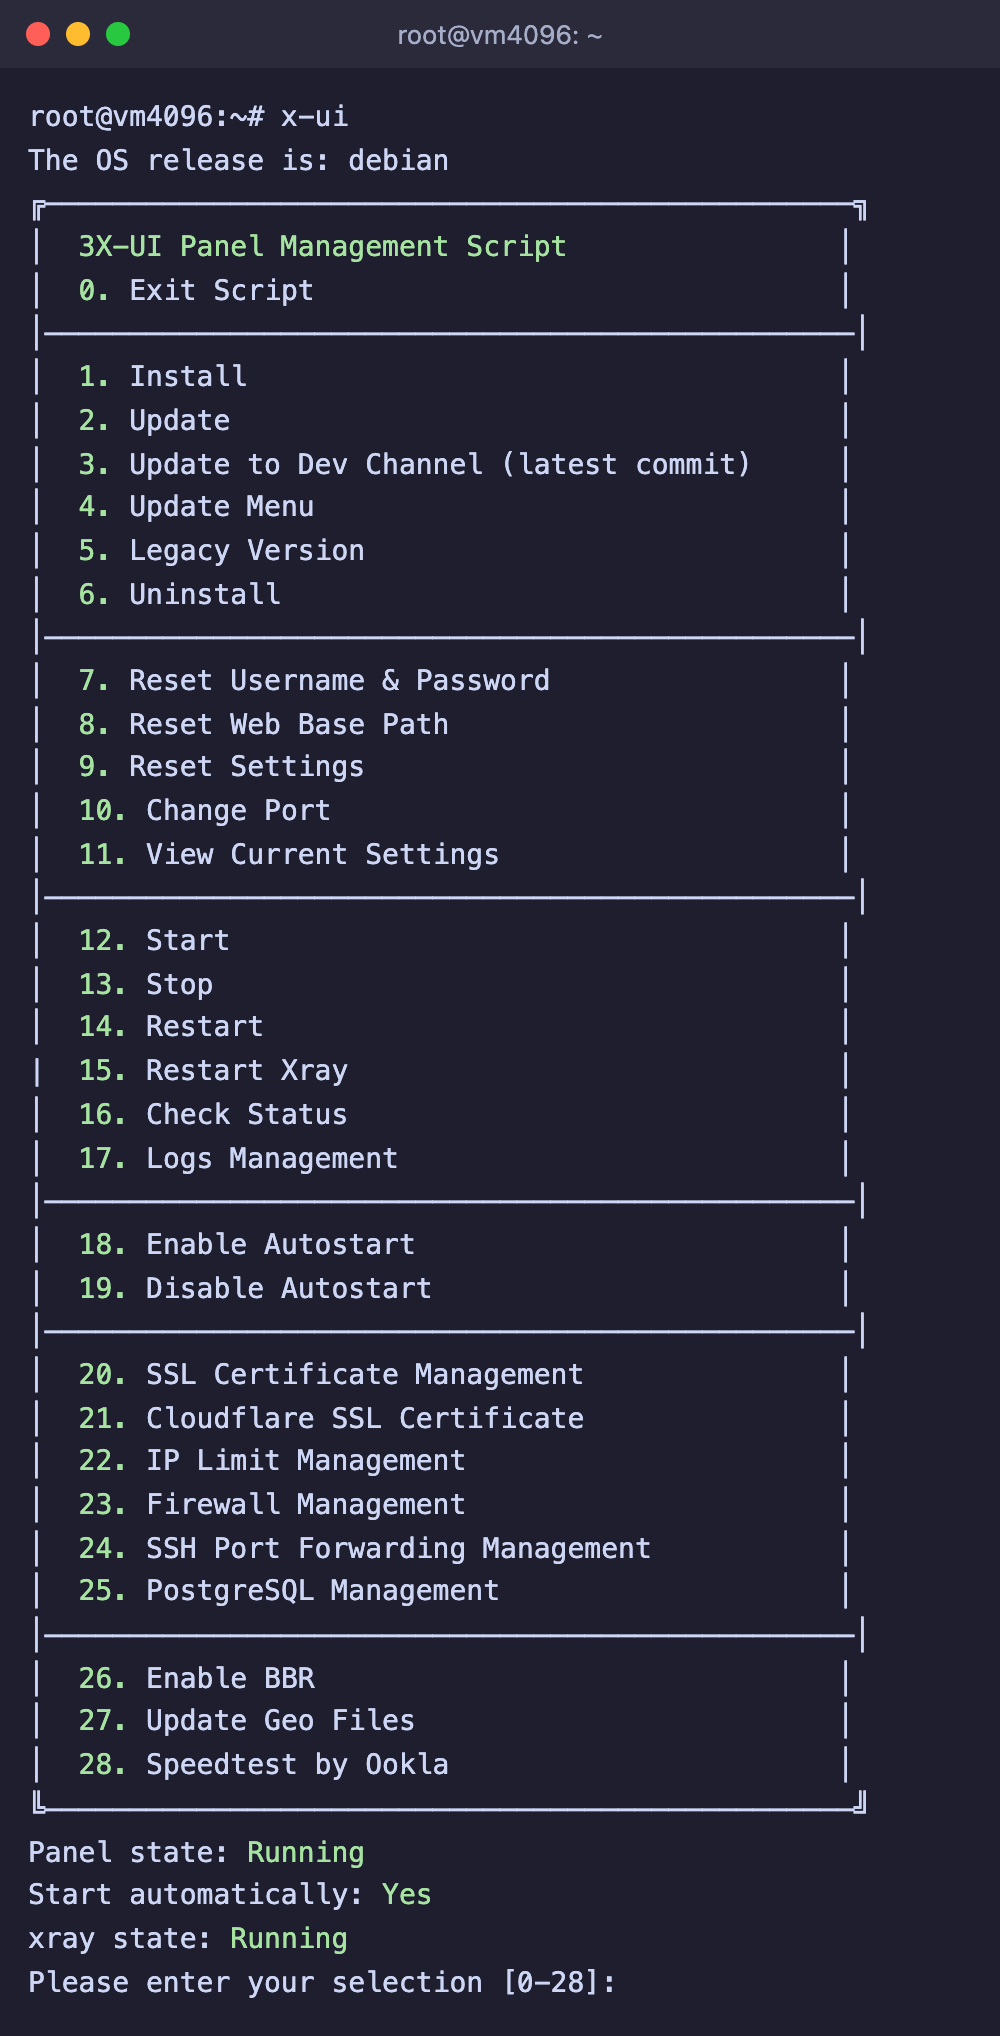
The other actions are collected in the menu that opens with the `x-ui` command without parameters. In it you can reset the login and password, change the port, manage the certificate and view the logs.

<figure><img src="https://docs.f3cloud.com/img/3xui-menu.png" alt="3X-UI management menu in the terminal with items from 0 to 28" width="480"><figcaption><p>The x-ui menu</p></figcaption></figure>

***

## Frequently asked questions

<details>

<summary>Forgot the panel login or password</summary>

If you have not changed them, they are saved in the `/etc/x-ui/install-result.env` file, and you can view them with `cat /etc/x-ui/install-result.env`. If you have changed them, run `x-ui`, choose item **7. Reset Username & Password** and set new ones.

</details>

<details>

<summary>The panel does not open</summary>

Check three things.

1. The address must be complete, with the port and the secret path. Without the path the panel responds with a 404 error.
2. The address starts with `https://`. The panel does not accept connections over `http://`.
3. The panel port is open in the firewall, and the panel itself is running. The `x-ui status` command shows its state.

</details>

<details>

<summary>The browser says the certificate is invalid</summary>

A certificate for an IP address is issued for only 6 days, and acme.sh checks whether it needs renewing four times a day. To renew it, Let's Encrypt contacts the server on port 80. If this port is closed by a firewall or taken by another program, such as a web server, the certificate will expire. Free up port 80 and issue the certificate again via `x-ui` → **20. SSL Certificate Management**.

</details>

<details>

<summary>The app connects, but sites do not open</summary>

1. Refresh the subscription in the app. After the keys, the site or the flow have changed, the old settings no longer fit.
2. Update the app itself. New Xray versions require clients to support post-quantum key exchange, and old apps do not work with them.
3. Check that the client has **Flow** set to `xtls-rprx-vision` and the connection has the **uTLS** fingerprint `firefox`.
4. If that does not help, go through the steps of the article [“VPN on your own server does not connect”](https://docs.f3cloud.com/en/vpn-guide/vpn-not-connecting.md).

</details>

<details>

<summary>The installer says port 443 is taken</summary>

Find out which program has taken it with `ss -lntp | grep ':443 '`. Most often it is the Nginx web server or another VPN. Stop it or choose a different port for the connection.

</details>

***

## Our resources

**Telegram channel:** [https://t.me/f3cloud_news](https://t.me/f3cloud_news)\
**F3 Cloud:** [https://f3cloud.com](https://f3cloud.com/en)