> The full list of articles is in [llms.txt](https://docs.f3cloud.com/llms.txt). Every page has a Markdown version: add .md to its address. This page as Markdown: [https://docs.f3cloud.com/en/client-area/order-vps.md](https://docs.f3cloud.com/en/client-area/order-vps.md).

# Ordering a virtual server on F3 Cloud

A step-by-step guide to ordering a VPS in the F3 Cloud client area. Choosing a plan and operating system, payment, activation and connection details.

In this article, we will go all the way from logging in to the client area to a ready server. The order itself takes a few minutes, and after payment the server is usually activated in about **2 minutes**.

***

## 1. Log in to the client area

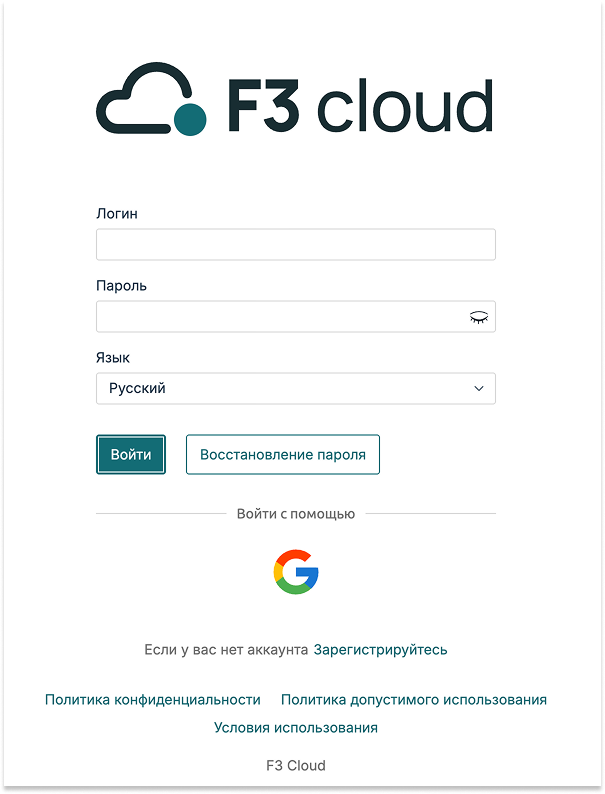
Open the [login page](https://my.f3cloud.com) and enter the email and password you used when signing up. If you signed up with Google, just click the **Google** icon below the form.

If you don't have an account yet, you can create one in a couple of minutes with our [registration guide](https://docs.f3cloud.com/en/client-area/registration.md).

<figure><img src="https://docs.f3cloud.com/img/order-login.png" alt="" width="400"><figcaption><p>The client area login page</p></figcaption></figure>

***

## 2. The client area home page

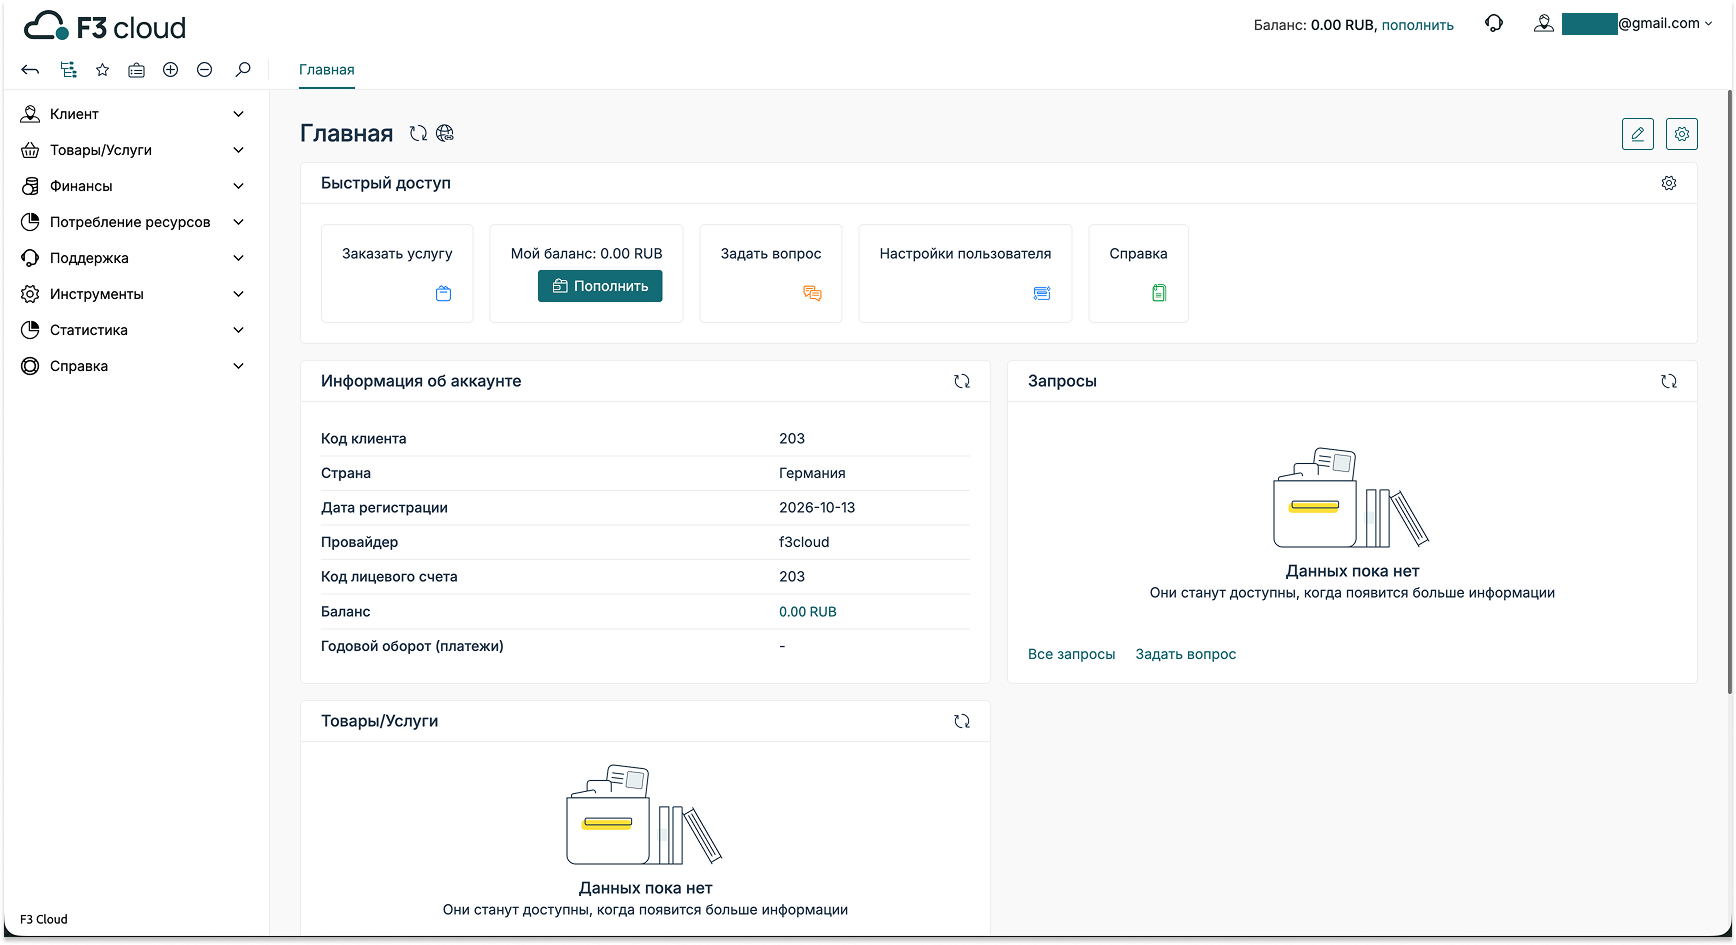
After you log in, the home page will open. On the left there is a menu where everything is arranged into sections:

* **Products/Services** – your servers and ordering new ones;
* **Finance** – topping up your balance and your spending history;
* **Support** – your requests to our support team;
* **Client** – your account details;
* **Statistics** – the history of logins to the client area.

To go on to choosing a server, click <kbd>Order a service</kbd> in the **Quick access** (Быстрый доступ) block.

<figure><img src="https://docs.f3cloud.com/img/order-dashboard.png" alt=""><figcaption><p>The client area home page</p></figcaption></figure>

***

## 3. Choose a plan

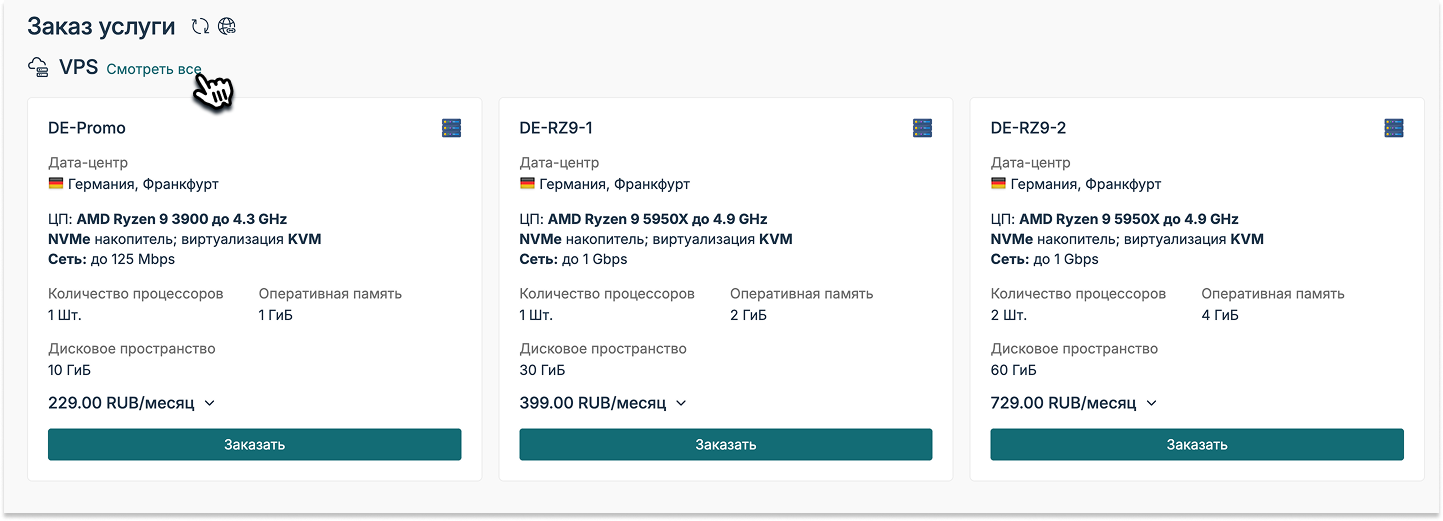
On the **Order service** (Заказ услуги) page, only three plans are shown at first. To see them all and compare them on one page, click **View all** (Смотреть все) next to the VPS heading.

<figure><img src="https://docs.f3cloud.com/img/order-tariffs.png" alt=""><figcaption><p>The Order service page</p></figcaption></figure>

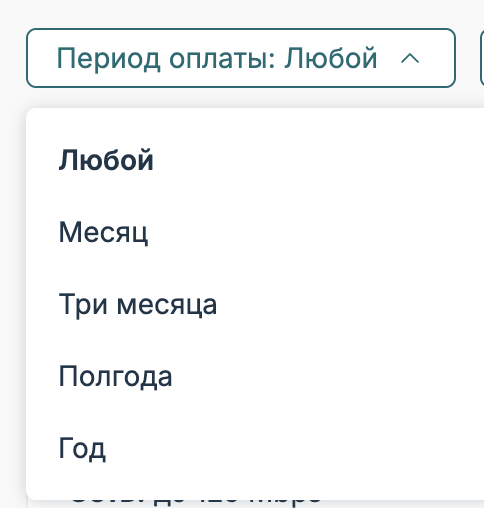
The data centre is shown on each plan's card, and there are filters above the list of plans. The first one sets the **payment period**. You can pay for a server for a month, three months, six months or a whole year at once.

<figure><img src="https://docs.f3cloud.com/img/order-period.png" alt="" width="242"><figcaption><p>Choosing the payment period</p></figcaption></figure>

> **A longer period saves money.**
>
> DE-RZ9 plans come with a discount for the period, which is **5%** when you pay for three months, **10%** for six months and **15%** for a year.

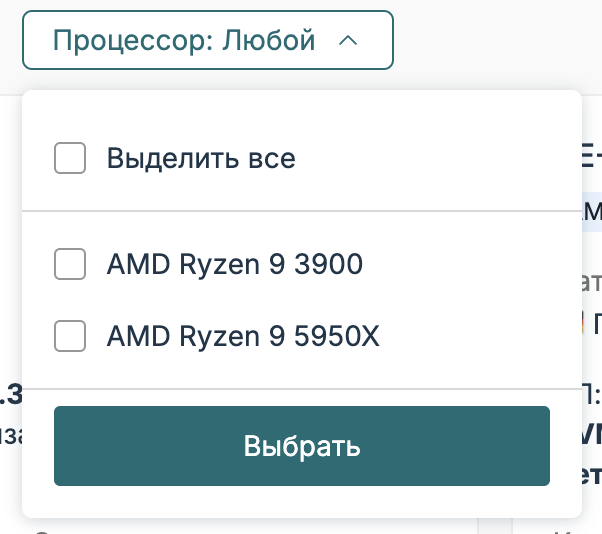
The **Processor** filter helps you narrow down plans by CPU model. DE-Promo runs on an AMD Ryzen 9 3900.\
All DE-RZ9 plans run on the more powerful AMD Ryzen 9 5950X.

<figure><img src="https://docs.f3cloud.com/img/order-cpu.png" alt="" width="301"><figcaption><p>Choosing a processor</p></figcaption></figure>

Once you have decided on a plan, click <kbd>Order</kbd> (Заказать) on its card.

***

## 4. Configure the server

Next, the configuration page will open. Here you choose what will be installed on the server and how many servers you need.

### Operating system

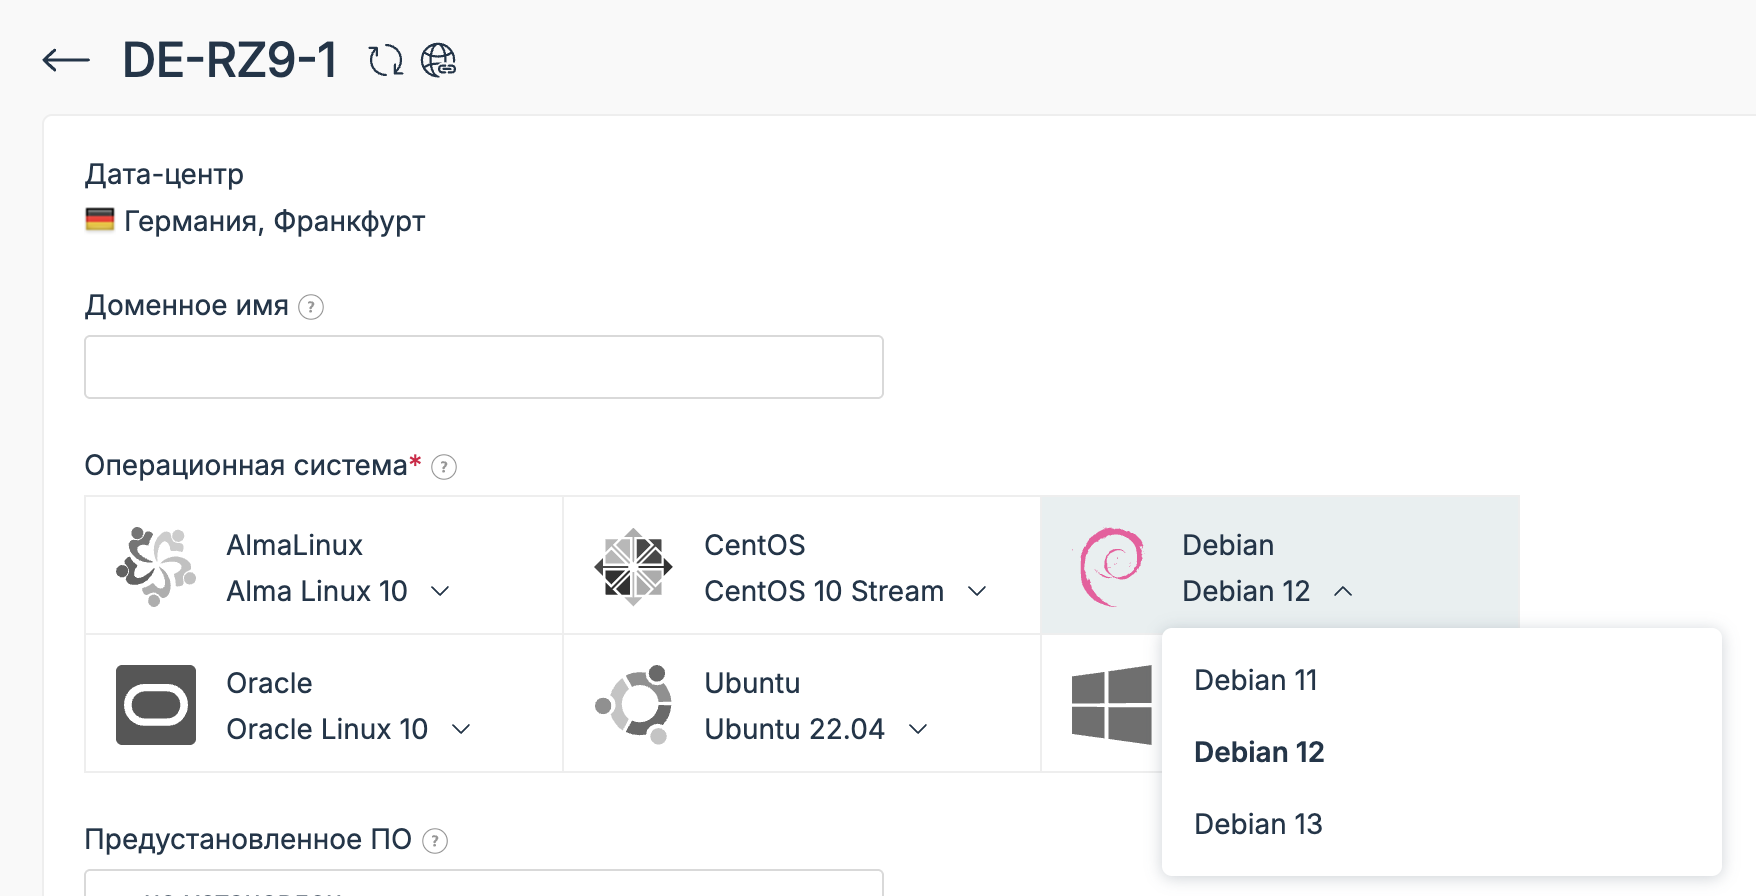
At the top of the page you can see the data centre and a **Domain name** (Доменное имя) field. You can leave it empty, and the server will then get a standard name like `vm2081.hosted-by.f3cloud.com`.

Below that, choose the operating system. You can pick **AlmaLinux, CentOS Stream, Debian, Oracle Linux, Ubuntu and Windows**. To choose a version, click the arrow next to the system name.

<figure><img src="https://docs.f3cloud.com/img/order-os.png" alt=""><figcaption><p>Choosing the operating system and its version</p></figcaption></figure>

> **Not sure what to choose?.**
>
> If you are not sure which system to choose, start with **Ubuntu**. It suits most tasks.

### Preinstalled software

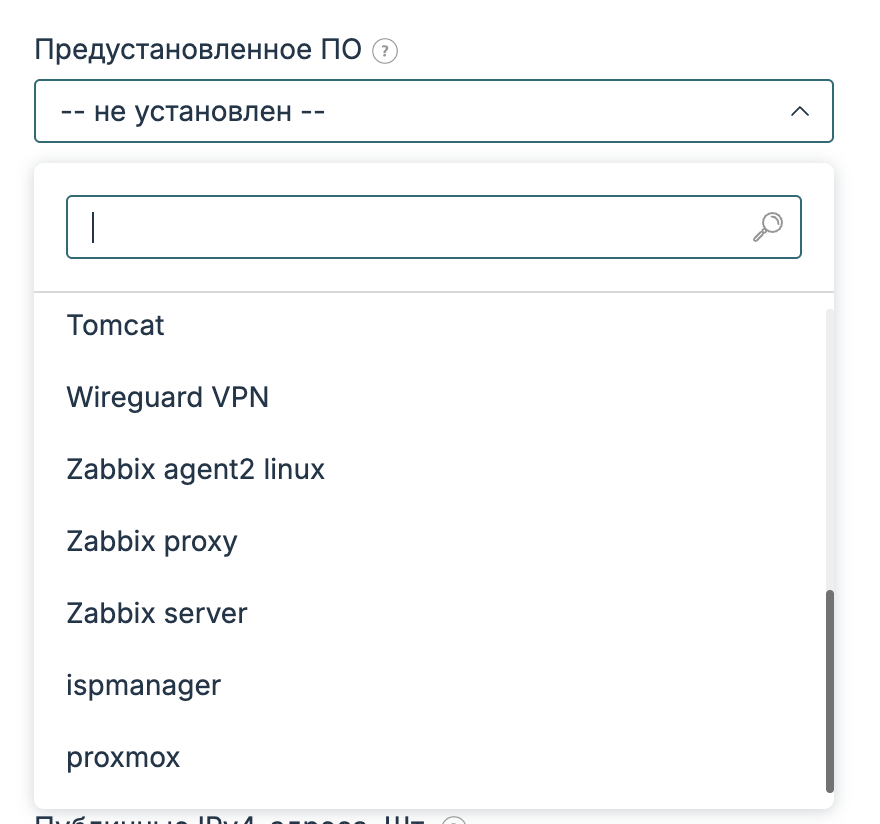
If you like, the server can come with ready-made programs straight away. The **Preinstalled software** list includes, for example, WireGuard VPN, the ISPmanager panel, Proxmox and Zabbix, and you can easily find the program you need with the search at the top of the list. The program is installed together with the system, so you won't have to set it up manually.

If you don't need anything like that, leave it set to **-- none --** (не установлен).

<figure><img src="https://docs.f3cloud.com/img/order-software.png" alt="" width="440"><figcaption><p>Choosing preinstalled software</p></figcaption></figure>

### Additional parameters

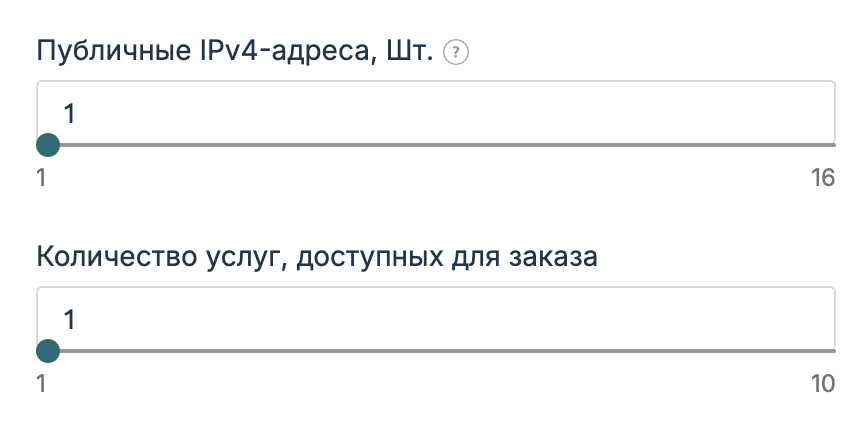
Below there are two more sliders:

* **Public IPv4-addresses** (Публичные IPv4-адреса) – how many addresses the server needs, up to 16;
* **Number of services available for order** (Количество услуг) – how many identical servers to order at once.

For one server with one address, leave both numbers as they are.

<figure><img src="https://docs.f3cloud.com/img/order-extra.png" alt="" width="433"><figcaption><p>Number of IPv4 addresses and servers</p></figcaption></figure>

> **Note.**
>
> Each additional IPv4 address costs **150 ₽ a month** on top of the plan price.

### Completing the order

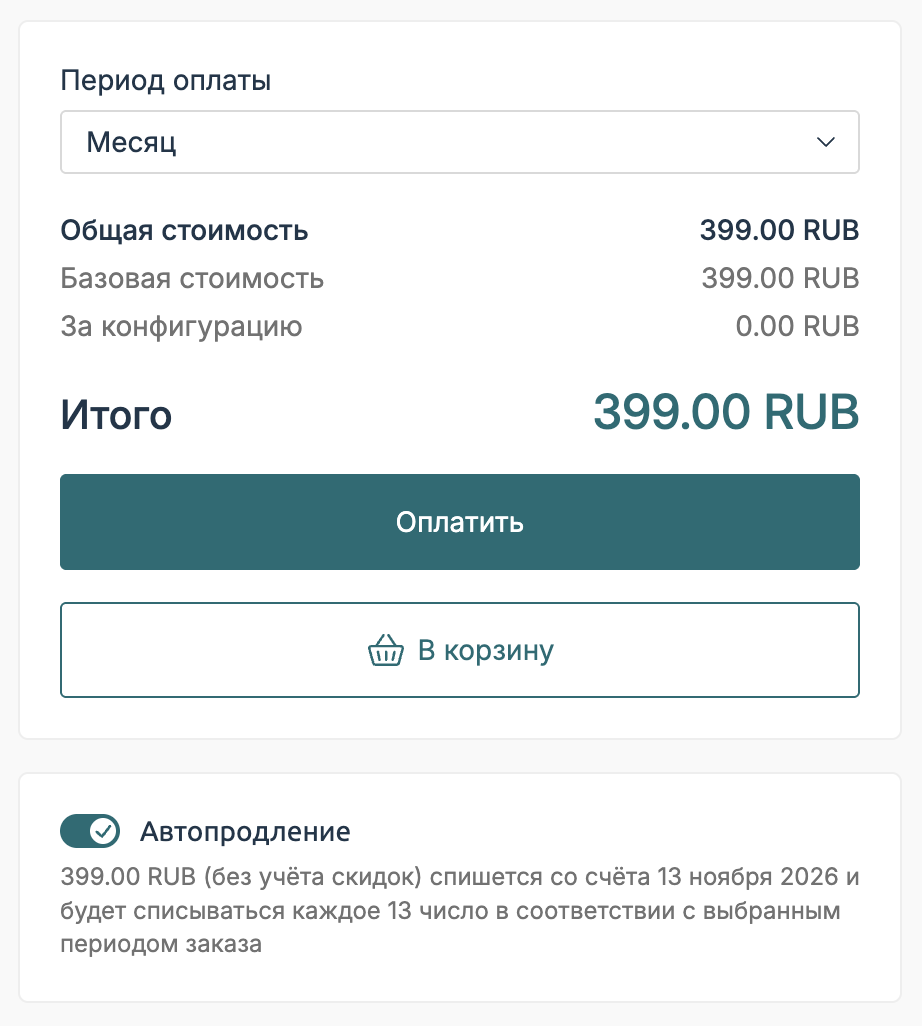
The total cost is shown on the same page. Here you can change the payment period once more and turn on **auto-renewal**. With it, the server renews itself as long as there is enough money on your client area balance, so you won't miss a payment date.

When everything is ready, click <kbd>Pay</kbd> (Оплатить).

<figure><img src="https://docs.f3cloud.com/img/order-total.png" alt="" width="461"><figcaption><p>Total cost and auto-renewal</p></figcaption></figure>

> **Several servers in one payment.**
>
> The <kbd>To cart</kbd> (В корзину) button comes in handy if you want to put together several different servers and pay for them all at once.

***

## 5. Pay for your order

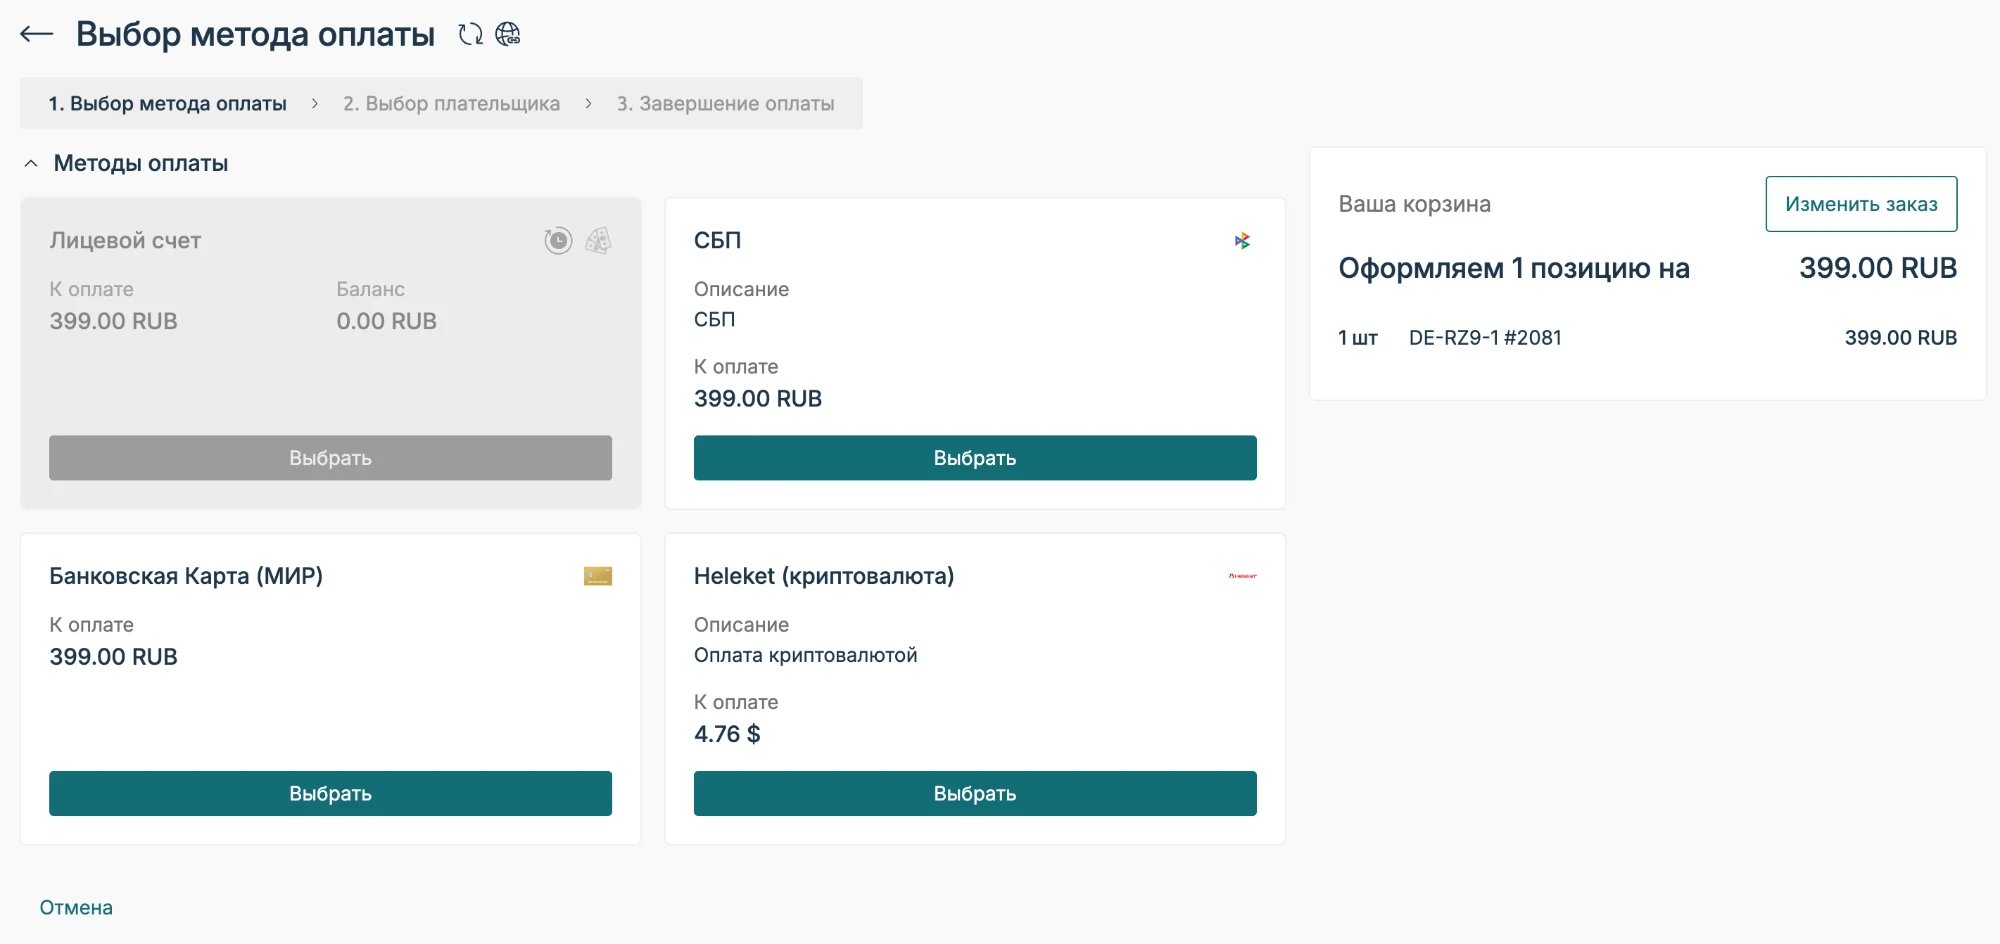
All that's left is to choose a convenient payment method:

* **SBP** (Faster Payments System);
* a **Mir bank card**;
* **cryptocurrency** via Heleket;
* your **personal account**, if there is enough money on your client area balance.

Your cart is shown on the right of the page. If you have forgotten something, you can change the order with the <kbd>Change order</kbd> (Изменить заказ) button.

<figure><img src="https://docs.f3cloud.com/img/order-payment.webp" alt=""><figcaption><p>Choosing a payment method</p></figcaption></figure>

***

## 6. Wait for activation

After payment, the server starts being created automatically, which usually takes no more than **2 minutes**. While it is being prepared, it has the **Processing (opening)** status in the server list.

<figure><img src="https://docs.f3cloud.com/img/order-status-processing.webp" alt=""><figcaption><p>The server is still being prepared</p></figcaption></figure>

As soon as the status changes to **Active**, you can use the server.

<figure><img src="https://docs.f3cloud.com/img/order-status-active-v2.png" alt=""><figcaption><p>The server is ready to use</p></figcaption></figure>

***

## 7. Where to find the connection details <a href="#access" id="access"></a>

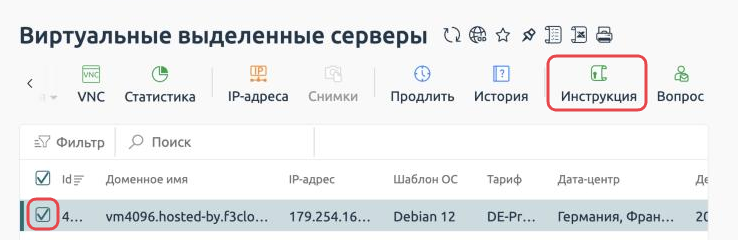
The server IP address, login and password will be sent to the email you gave when signing up. You can also always find them in the client area:

1. Open the server list in the **Products/Services** section.
2. Tick the server you need.
3. Click <kbd>Instructions</kbd> in the top menu.

<figure><img src="https://docs.f3cloud.com/img/billing-vds-instruction-button.png" alt=""><figcaption><p>The Instructions button with the server details</p></figcaption></figure>

***

## 8. Your server is ready

Congratulations, your server is up and running! Now you can connect to it:

* to a Linux server via [Termius](https://docs.f3cloud.com/en/vps/termius-connection.md);
* to a Windows server via [Remote Desktop](https://docs.f3cloud.com/en/vps/windows-rdp-access.md).

After that, all that's left is to install the programs you need and get on with your projects.

***

## Our resources

**Telegram channel:** [https://t.me/f3cloud_news](https://t.me/f3cloud_news)\
**F3 Cloud:** [https://f3cloud.com](https://f3cloud.com/en)