> The full list of articles is in [llms.txt](https://docs.f3cloud.com/llms.txt). Every page has a Markdown version: add .md to its address. This page as Markdown: [https://docs.f3cloud.com/en/ai/hermes-agent.md](https://docs.f3cloud.com/en/ai/hermes-agent.md).

# Hermes Agent on a VPS – installation, connecting a model and a Telegram bot

Installing Hermes Agent from Nous Research on a VPS. The setup wizard, connecting a model with a DeepSeek or OpenRouter API key, a Telegram bot via BotFather, the gateway service and why a local model on a server without a graphics card is not a good fit. Tested on Debian 12 with Hermes Agent v0.22.2.

**Hermes Agent** is an open-source AI agent from Nous Research. It lives on your server, runs commands in the terminal, works with files, searches the internet and can run tasks on a schedule. You can talk to it right in the terminal or through a Telegram bot. What sets Hermes apart is that it learns from its own work. After difficult tasks the agent writes down the approaches that worked as skills and uses them the next time. In this article we will install Hermes on a VPS and connect a model and Telegram to it. We repeated every step on a test server with Debian 12, and the Hermes version at the time of testing was **v0.22.2**.

***

## How Hermes Agent works

Hermes itself is not a neural network. It is a program that takes your task, sends it to a model along with a description of the available tools and carries out whatever the model decides to do. Say you ask how much disk space is left. The model replies that the `df -h` command needs to be run, Hermes runs it, passes the result back to the model, and only then do you get your answer. A single task can take dozens of such steps, so almost everything depends on the model. Both how smart the agent acts and how much its work costs.

The model is usually connected through an API. Hermes sends requests to a cloud service such as DeepSeek, OpenRouter, OpenAI or Anthropic, and you pay that service through your API key. In this case the server needs neither a graphics card nor a lot of memory. There is one hard requirement. The model must support a **context of at least 64,000 tokens**, otherwise Hermes will refuse to work with it. Every request from the agent contains a long instruction describing its tools and skills. On our server the very first request already took about 12,500 tokens, and the model needs room to spare to keep track of a multi-step task.

The second part is the **gateway**. It is a service that runs all the time and connects the agent to messengers. Through it you write to the bot in Telegram, and Hermes replies and sends you the results of scheduled tasks. The installer registers the gateway as a systemd service on its own, so it starts together with the server.

> **The agent runs real commands on the server.**
>
> Hermes works with the rights of the user it was installed under, and in our example that is `root`. Dangerous commands are checked separately by default, and the agent will not run risky ones without your consent, but you should not rely on that completely. Install Hermes on a separate server with no websites, databases or other people's data.

***

## What you need

* **A server** with Debian 12 or Ubuntu 24.04 and **at least 2 GB of memory**, for example the **DE-RZ9-1** plan. On our server the agent and the gateway together took up about 500 MB of memory, and Hermes itself with all its components took about 3.2 GB of disk space. If you do not have a server yet, order one using the [guide](https://docs.f3cloud.com/en/client-area/order-vps.md).
* **An SSH connection**, for example via [Termius](https://docs.f3cloud.com/en/vps/termius-connection.md). Commands are run as `root`.
* **An API key** from a model provider, for example **DeepSeek** or **OpenRouter**. You create the key in the provider's account, and that is also where you pay for requests to the model.
* **A Telegram account**, if you want to talk to the agent through a bot.

***

## Step 1. Install Hermes

Connect to the server and run the official installation command.

```bash
curl -fsSL https://hermes-agent.nousresearch.com/install.sh | bash
```

The installer will download Python, Node.js and everything else the agent needs into the `/root/.hermes` folder. As soon as the download finishes, the setup wizard opens.

***

## Step 2. Go through the setup wizard

The wizard is controlled from the keyboard. The <kbd>↑</kbd> and <kbd>↓</kbd> arrows pick an option, and <kbd>Enter</kbd> confirms your choice.

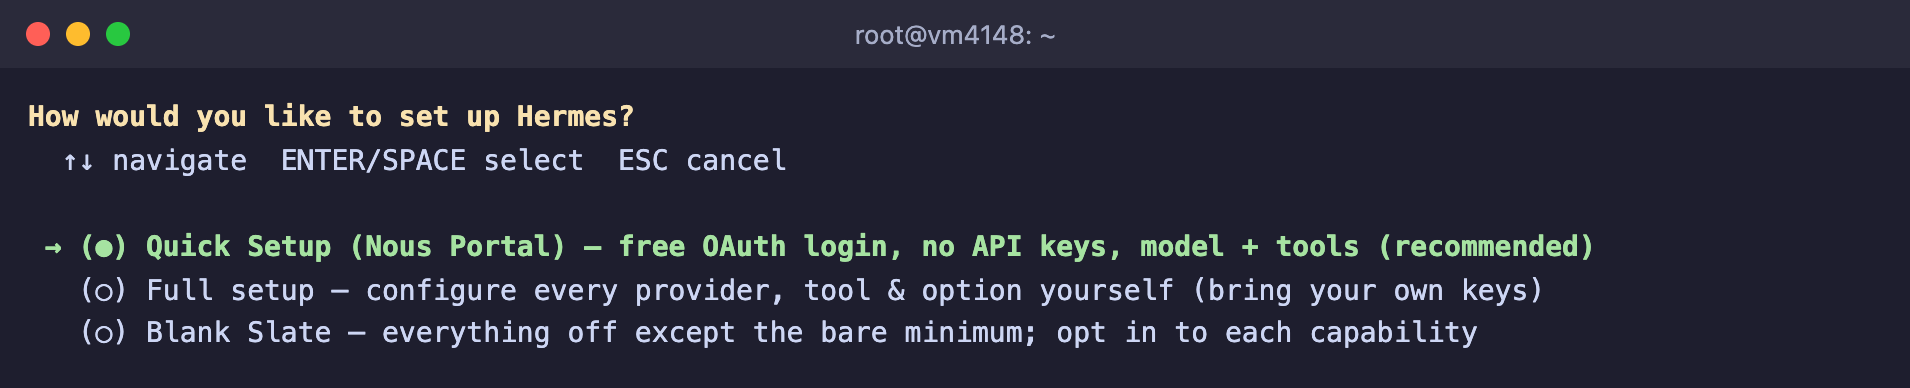
The first question, **How would you like to set up Hermes?**, offers three ways to set things up.

<figure><img src="https://docs.f3cloud.com/img/hermes-setup-choice.png" alt="Hermes Agent setup wizard offering Quick Setup, Full setup and Blank Slate"><figcaption><p>Three ways to set up Hermes</p></figcaption></figure>

* **Quick Setup (Nous Portal)** – sign in with a Nous Research account, no API keys needed. Signing in is free, but requests to the models are paid for with a Nous Portal subscription.
* **Full setup** – you pick the model provider yourself and enter your own key. This option suits you if you already have a key from DeepSeek, OpenRouter or another service.
* **Blank Slate** – a minimal agent with only the model, file handling and the terminal turned on. Everything else is connected by hand.

We will go through **Full setup** with your own key.

1. Select **Full setup**.
2. In the **Select provider** list, find your provider, for example **DeepSeek** or **OpenRouter**, and press <kbd>Enter</kbd>.
3. The wizard will ask for your key, for example with a **DEEPSEEK_API_KEY** line. Paste the key and press <kbd>Enter</kbd>.
4. Choose a model from the list the wizard shows you.
5. Next, the wizard will ask one by one about providers for extra tools, such as internet search. If you are not sure what to pick, choose **Skip — keep defaults**.
6. At the **Select platforms to configure** question, just press <kbd>Enter</kbd>. We will connect Telegram separately in step 4.

When the wizard is done, it will show you where the settings are kept. Regular parameters are stored in the `/root/.hermes/config.yaml` file, and keys and tokens in `/root/.hermes/.env`. To make the `hermes` command work in the current terminal window, run this command.

```bash
source ~/.bashrc
```

> **You can change the provider at any time.**
>
> The `hermes model` command opens the provider and model selection again. You do not need to reinstall the agent for that.

***

## Step 3. Talk to the agent in the terminal

Start Hermes.

```bash
hermes
```

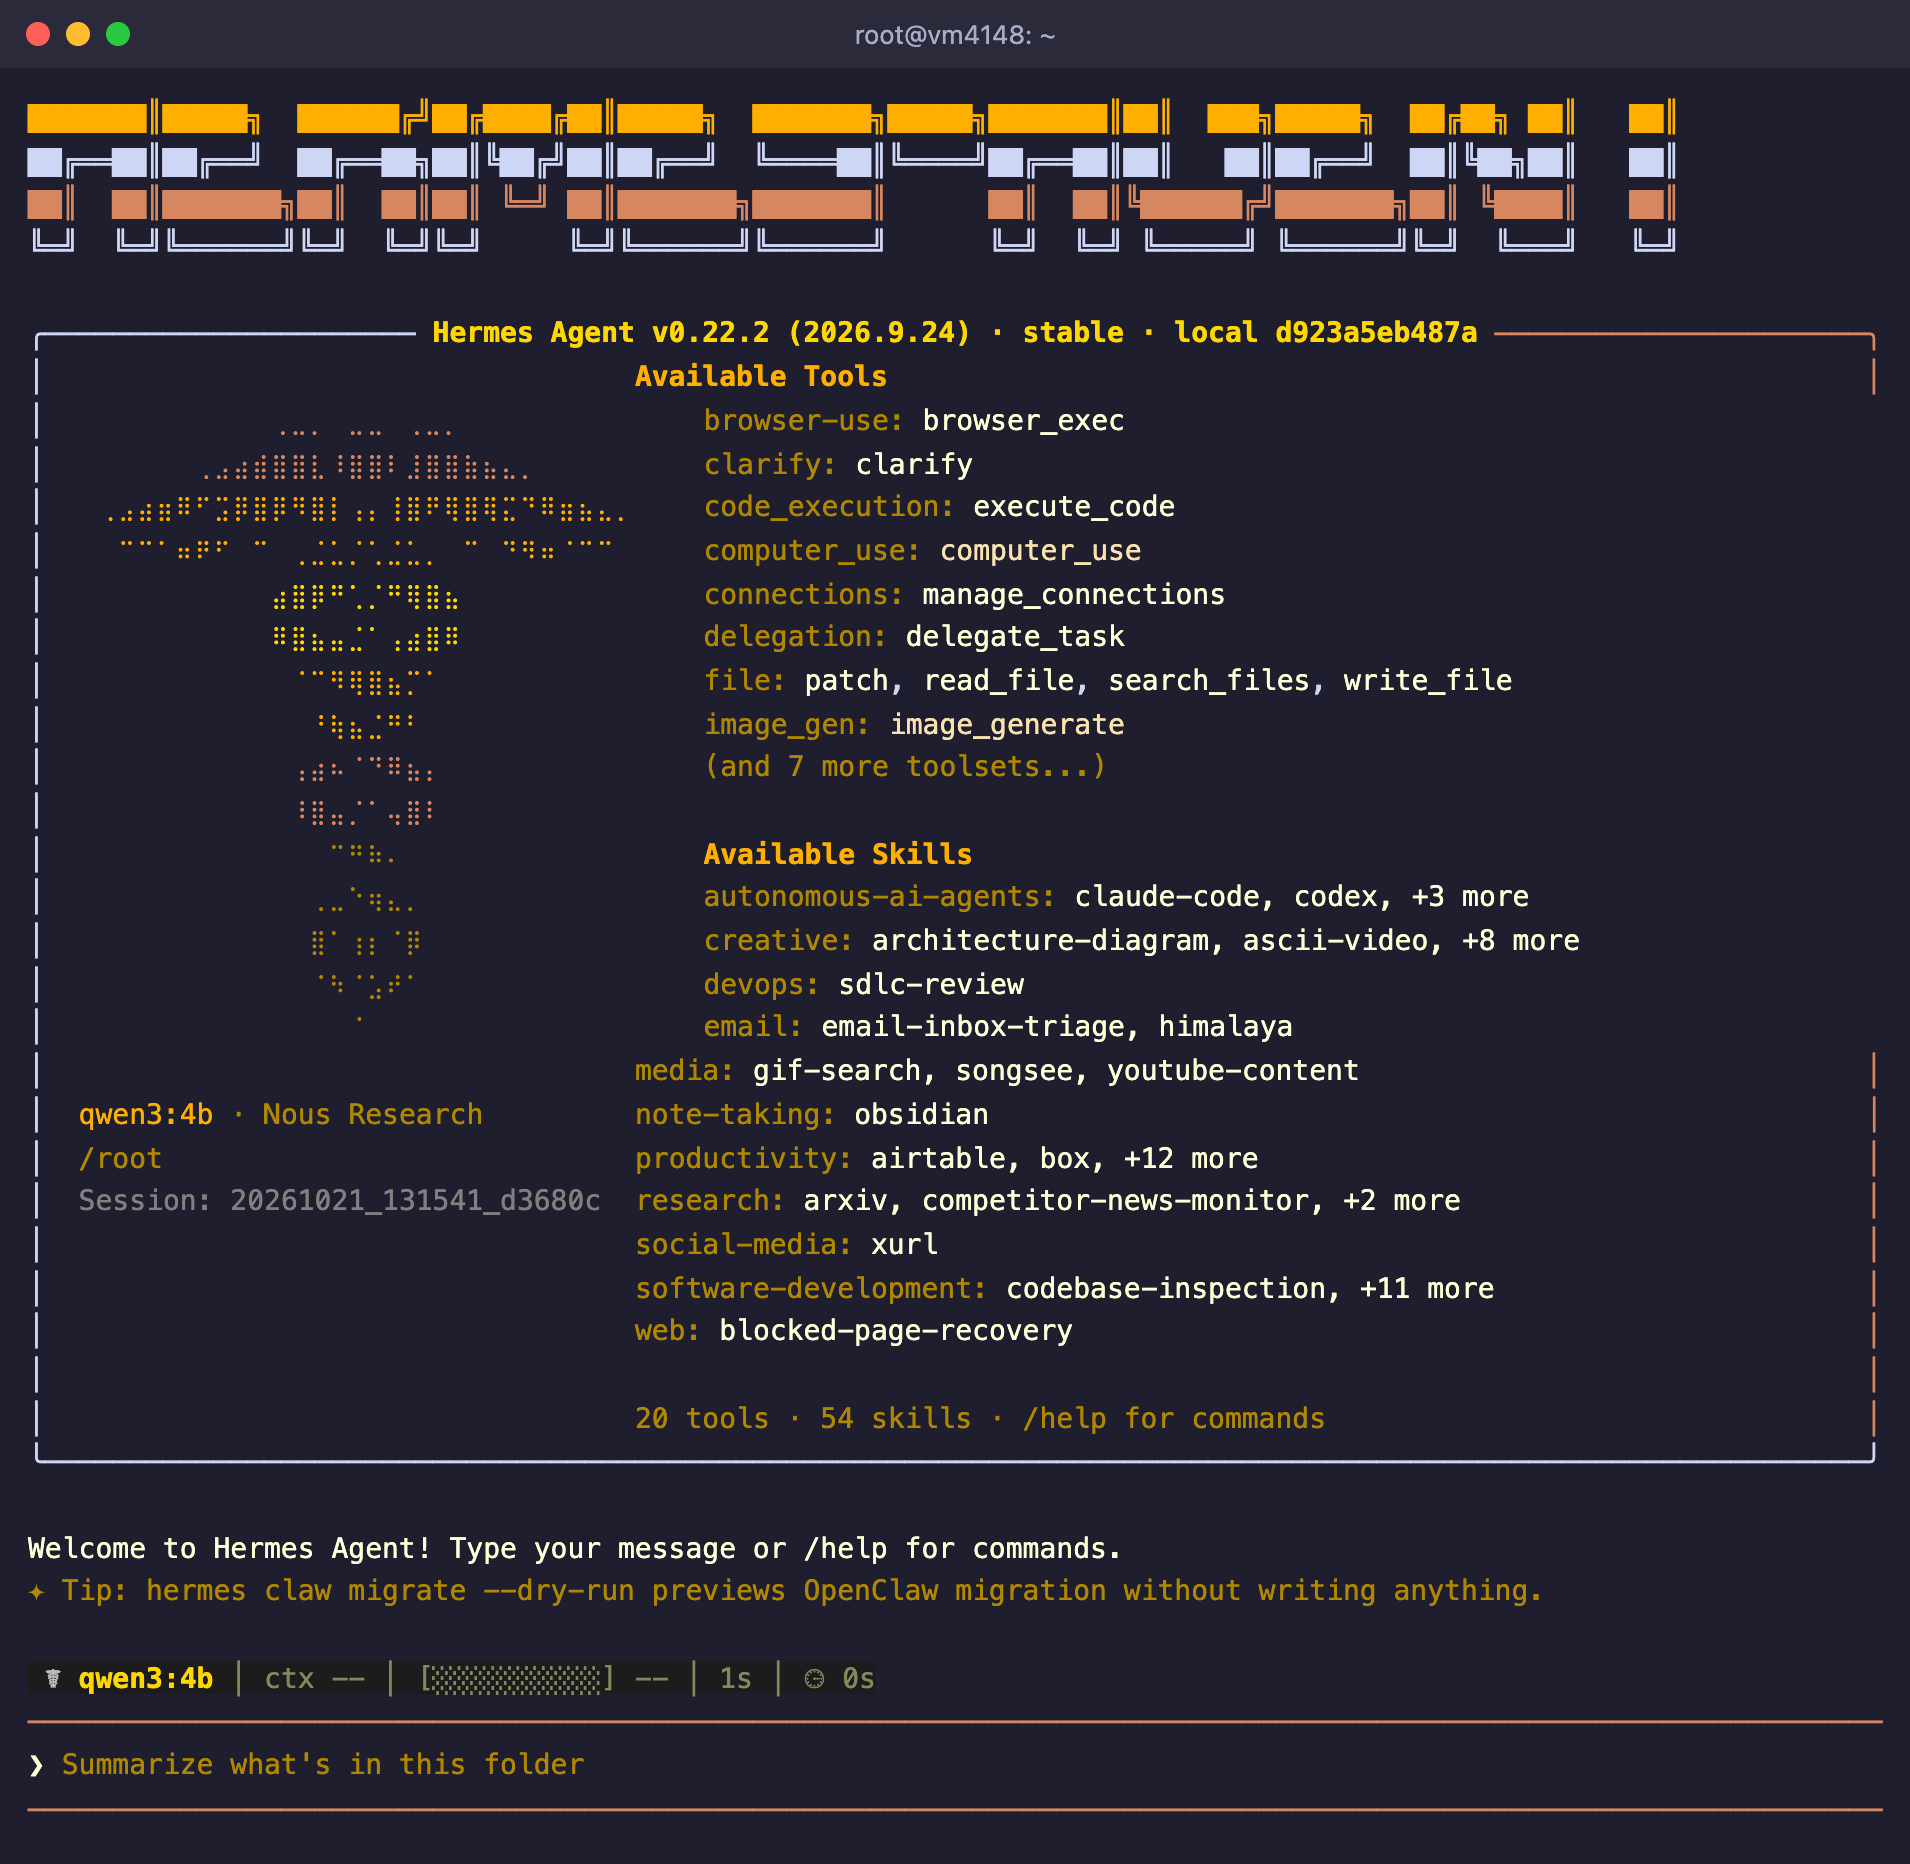
You will see a welcome screen with the selected model and a list of tools and skills. At the bottom there is an input line where you type your task.

<figure><img src="https://docs.f3cloud.com/img/hermes-tui.png" alt="Hermes Agent v0.22.2 window with the list of tools and skills and the input line"><figcaption><p>Hermes is ready to work, the task line is at the bottom</p></figcaption></figure>

For a first check, give it a simple task whose result is easy to verify, for example "How much free disk space is there? Check it with a command". The agent will run the command and answer. If a task drags on, write a new message and press <kbd>Enter</kbd>, and that will interrupt the current task. You can exit Hermes with <kbd>Ctrl</kbd> + <kbd>D</kbd> and get back to the last conversation with the `hermes -c` command.

***

## Step 4. Connect Telegram

First, create a bot and find out your Telegram ID.

1. Open the **@BotFather** bot in Telegram and send it the `/newbot` command.
2. Come up with a name for the bot, and then an address that ends in `bot`, for example `my_hermes_bot`.
3. BotFather will send you a **token**, a string like `123456789:ABCdef…`. Save it and do not show it to anyone.
4. Write to the **@userinfobot** bot. It will reply with your numeric **ID**.

Now start the gateway setup on the server.

```bash
hermes gateway setup
```

1. In the list of platforms, select **Telegram** and press <kbd>Enter</kbd>.
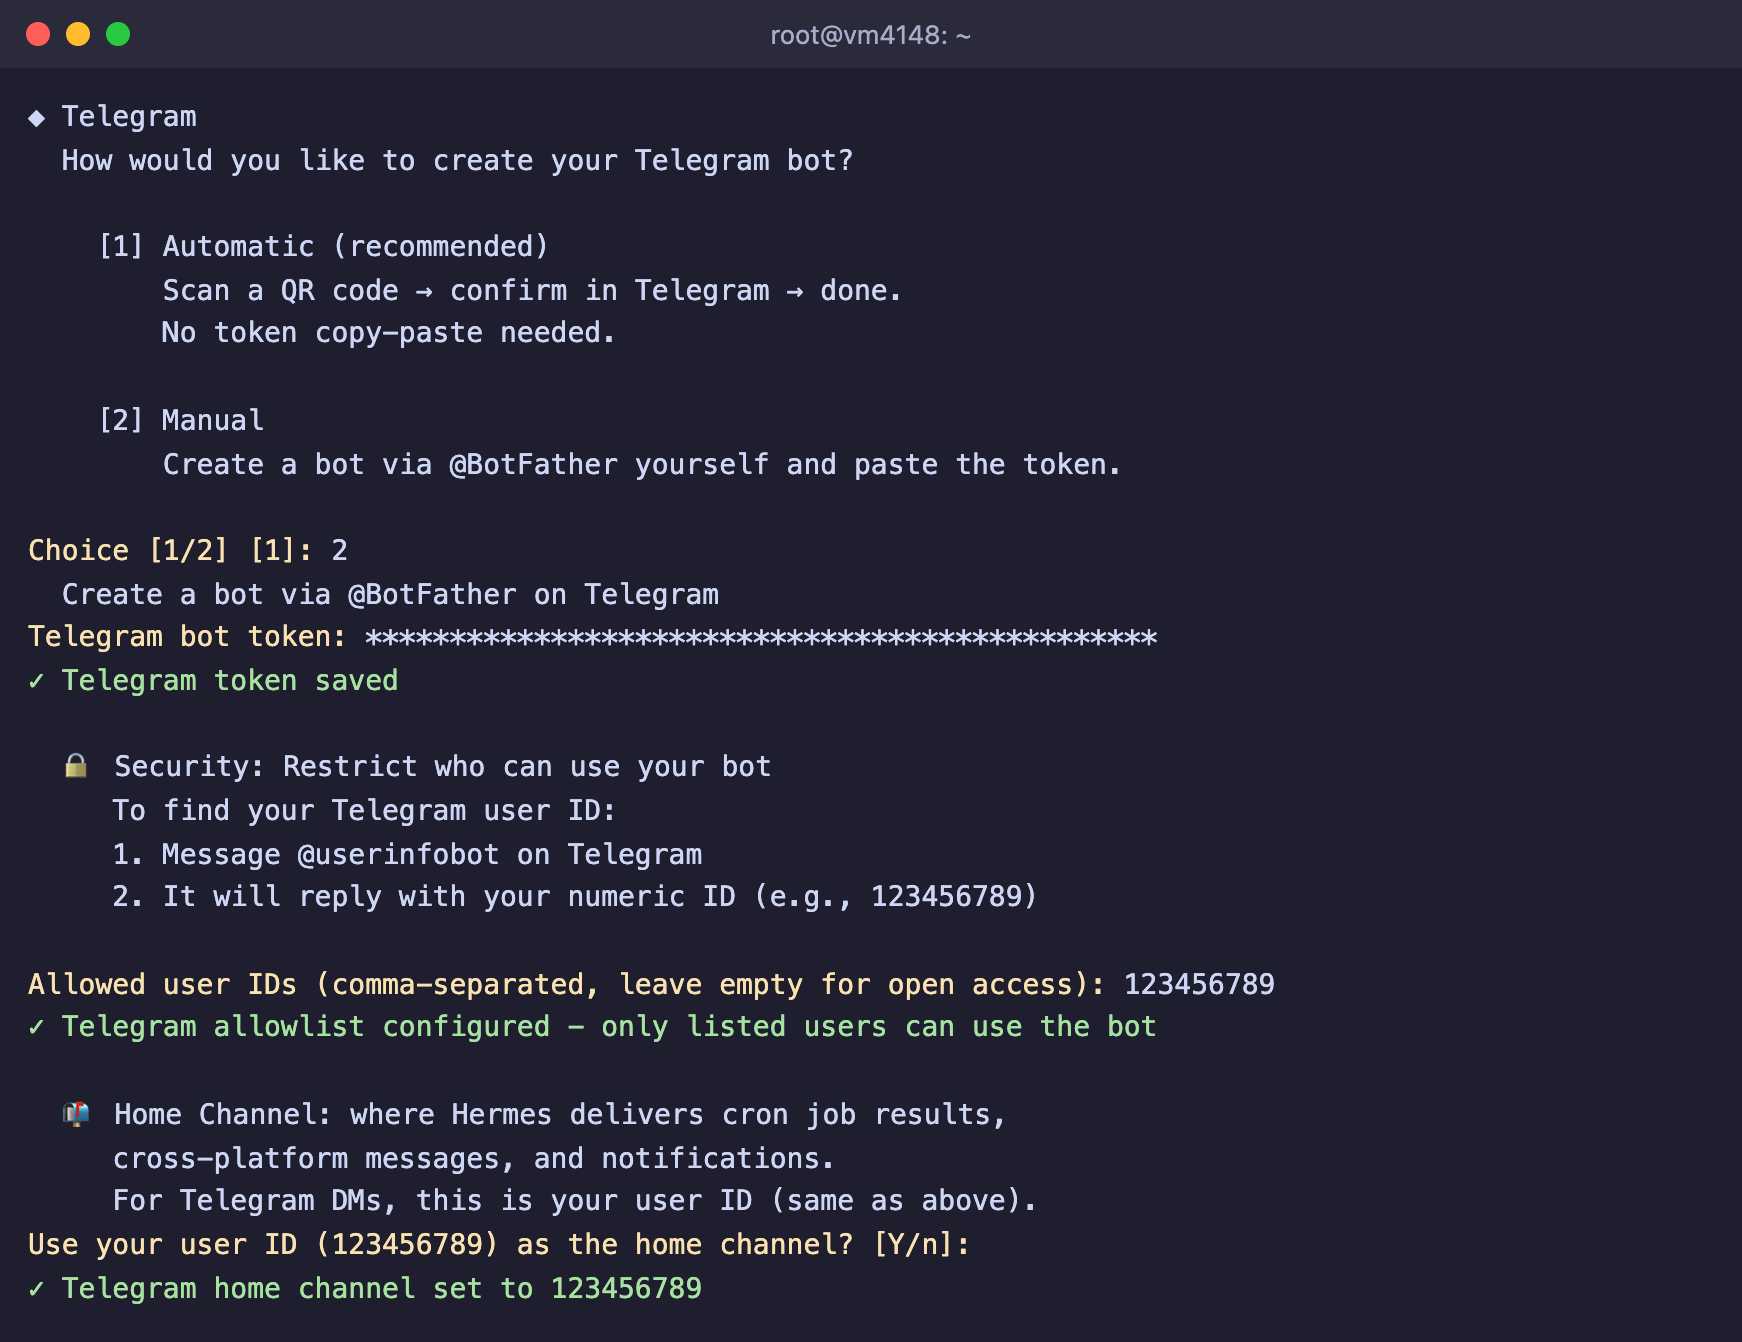
2. At the **How would you like to create your Telegram bot?** question, enter `2`, which is **Manual**.
3. In the **Telegram bot token** field, paste the token from BotFather.
4. In the **Allowed user IDs** field, enter your ID. If there are several users, list their IDs separated by commas.
5. At the **Home Channel** question, press <kbd>Enter</kbd>. That is where the agent will send the results of scheduled tasks.
6. In the list of platforms, select **Done**, and at the **Restart the gateway to pick up changes?** question, press <kbd>Enter</kbd>.

<figure><img src="https://docs.f3cloud.com/img/hermes-telegram-setup.png" alt="Telegram setup in hermes gateway setup, with the token hidden by asterisks, the user ID and Home Channel"><figcaption><p>The token is hidden by asterisks, and the bot answers only the specified ID</p></figcaption></figure>

> **Do not leave the user list empty.**
>
> If you leave the **Allowed user IDs** field empty, the wizard will turn on open access. Then anyone who finds your bot will be able to give the agent tasks and run commands on your server.

After the restart, find your bot in Telegram and write to it. If the bot stays silent, check the gateway status and its log.

```bash
hermes gateway status
journalctl --user-unit hermes-gateway -n 50
```

The first option in the wizard is **Automatic**. In this mode Hermes contacts a Nous Research service and gives you a link to their helper bot, which creates your bot without you having to copy the token. We showed the manual method because it does not depend on third-party services, and you get the token directly from Telegram.

***

## Can you do without a paid API

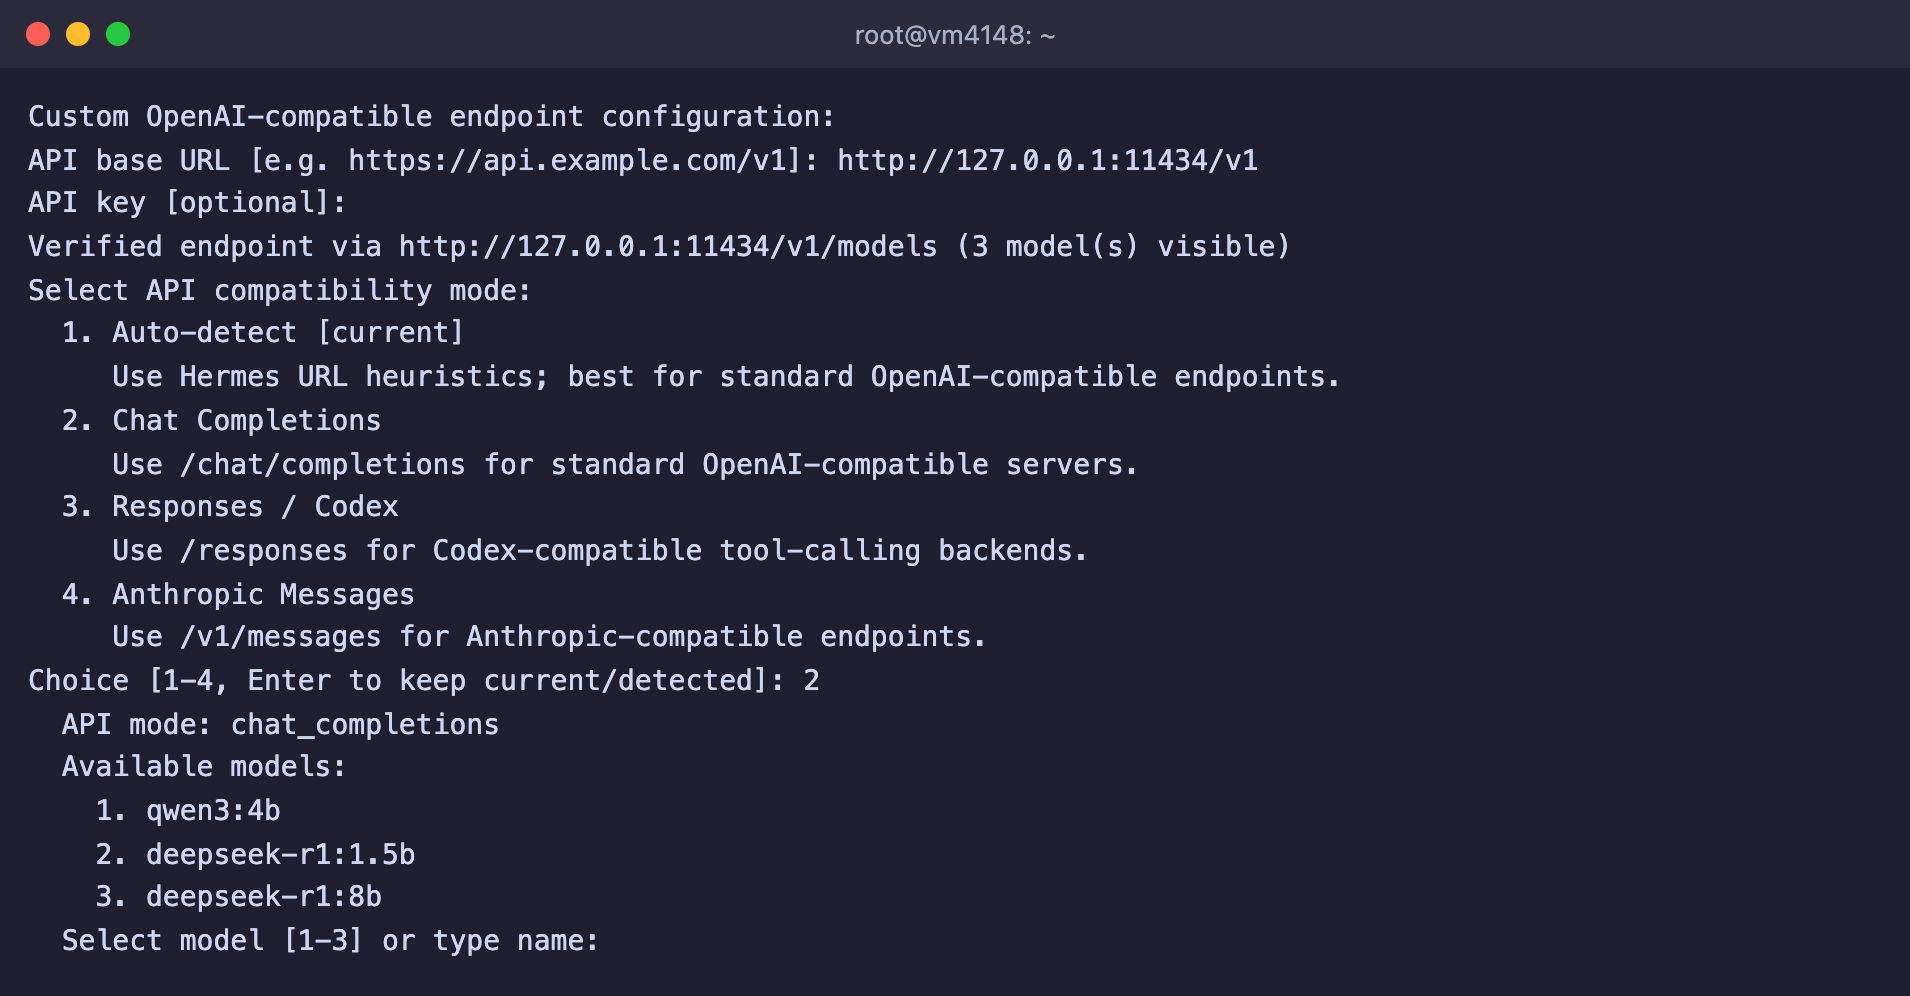
Hermes can also work with a model running on the server itself, for example through Ollama. To do that, choose the **custom (direct API)** provider in the wizard and enter the address `http://127.0.0.1:11434/v1`. We tested this option on a test server with 4 cores and 8 GB of memory, and here is what happened.

<figure><img src="https://docs.f3cloud.com/img/hermes-custom-endpoint.png" alt="Connecting Hermes to Ollama via a custom endpoint, choosing the Chat Completions mode and the model"><figcaption><p>Hermes sees the Ollama models on the server</p></figcaption></figure>

At first Hermes refused to work, because the model was connected with a context of 16,384 tokens.

<figure><img src="https://docs.f3cloud.com/img/hermes-context-error.png" alt="Hermes Agent error saying that the 16,384-token context of the qwen3:4b model is below the minimum of 64,000"><figcaption><p>Hermes requires a context of at least 64,000 tokens</p></figcaption></figure>

After we raised the context to 65,536 tokens, Hermes sent the first request to the qwen3:4b model. There was still no answer after 20 minutes. Before answering, the model has to read the whole request, and that is about 12,500 tokens. Without a graphics card it read it at 27 down to 10 tokens per second, and the more it had read, the slower it went. After 13 minutes the model had read only two thirds of the request. In practice, an agent like that is useless.

The conclusion is simple. For Hermes on a regular VPS, use a model through an API. If you really want your own model, you need a server with a graphics card. We covered how local models work and how much memory they need in the article about [DeepSeek R1 via Ollama](https://docs.f3cloud.com/en/ai/deepseek-installation.md).

***

## Useful commands

```bash
hermes                    # open the agent in the terminal
hermes -c                 # continue the last conversation
hermes model              # change the provider or model
hermes setup              # run the setup wizard again
hermes gateway setup      # connect messengers
hermes gateway status     # gateway status
hermes gateway restart    # restart the gateway
hermes doctor             # check the installation and settings
hermes update             # update Hermes
```

If you used [OpenClaw](https://docs.f3cloud.com/en/ai/openclaw-installation.md) before, Hermes can carry over its settings with the `hermes claw migrate` command. First it shows what will be moved and asks for confirmation, and with the `--dry-run` option it only shows the plan and changes nothing.

***

## Frequently asked questions

<details>

<summary>hermes: command not found</summary>

The current terminal window does not know about the new command yet. Run `source ~/.bashrc` or reconnect to the server over SSH.

</details>

<details>

<summary>Model has a context window of 16,384 tokens, which is below the minimum 64,000</summary>

The selected model has too small a context. Choose another model with the `hermes model` command. If the model is connected through **custom (direct API)**, for example from Ollama, open the `/root/.hermes/config.yaml` file, find your model in the `custom_providers` section and set `context_length: 65536` for it. Keep in mind the speed we described above.

</details>

<details>

<summary>Telegram bot token rejected: The token was rejected by the server</summary>

The token was entered with a mistake or was revoked in BotFather. We got this error when we entered a token that did not exist, and the gateway did not start after it. Get a new token from @BotFather and go through `hermes gateway setup` again.

</details>

<details>

<summary>The Telegram bot does not reply</summary>

1. Check that your ID is in the list of allowed users. It is stored in the `TELEGRAM_ALLOWED_USERS` line of the `/root/.hermes/.env` file.
2. Check the gateway with the `hermes gateway status` command. If it is stopped, start it with the `hermes gateway restart` command.
3. Run `hermes doctor`, and it will show any errors in the settings.

</details>

<details>

<summary>The agent shows waiting for the first stream chunk for a long time</summary>

Hermes is waiting for the model to start answering. With a cloud model this usually takes seconds. If you connected a model running on the server itself without a graphics card, the wait can stretch to tens of minutes. Switch to a model through an API with the `hermes model` command.

</details>

***

## Our resources

**Telegram channel:** [https://t.me/f3cloud_news](https://t.me/f3cloud_news)\
**F3 Cloud:** [https://f3cloud.com](https://f3cloud.com/en)